Tools
No tools specified.
-
-
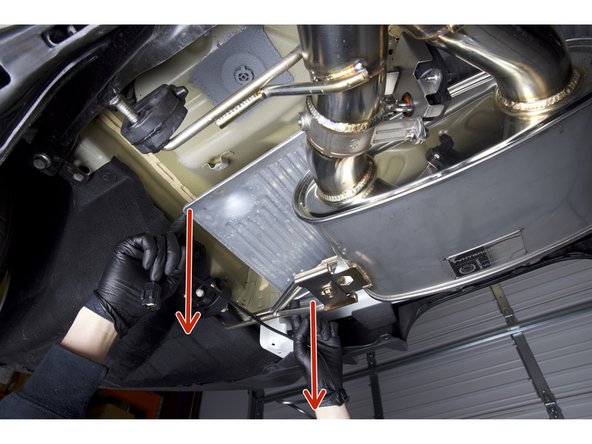
Begin your installation by unbolting the rear portion of the underbody tray. You do not need to remove the entire plastic tray, but you must remove enough bolts so the panel can be pulled out of the way.
-
Using a panel removal tool, remove the clips that hold the inner wheel well panel in place. There is one clip in each wheel well.
-
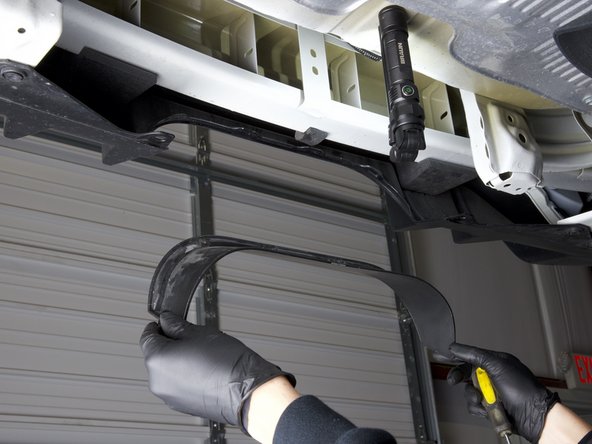
Once you have removed all the bolts and clips, you should be able to pull the undertray downward to gain access to the exhaust system front pipe.
-
-
-
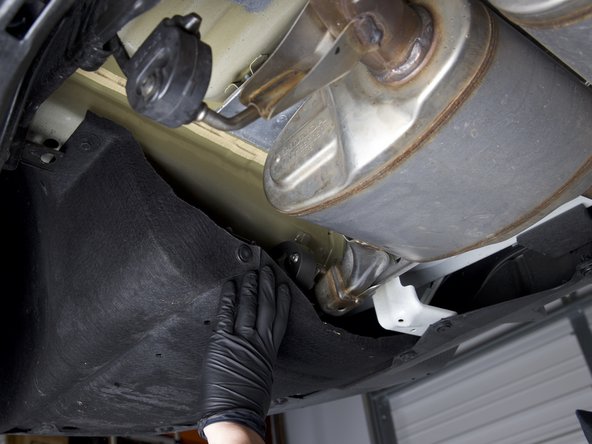
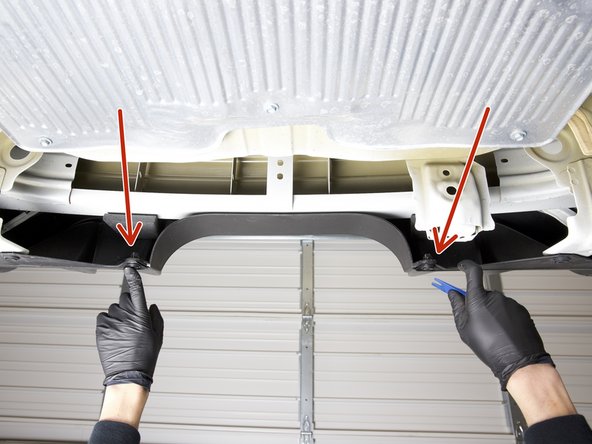
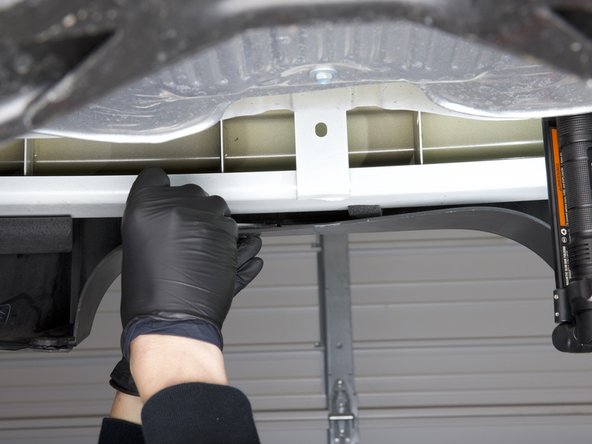
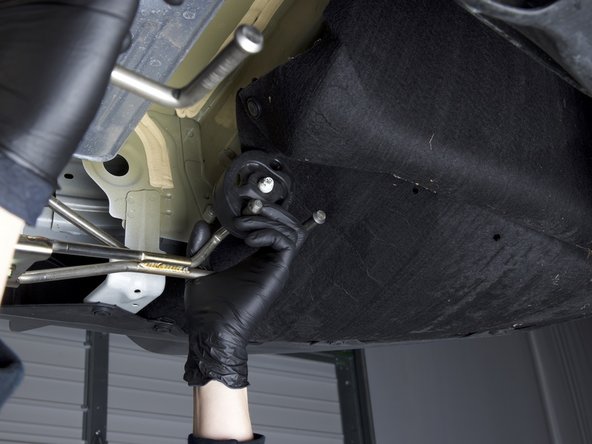
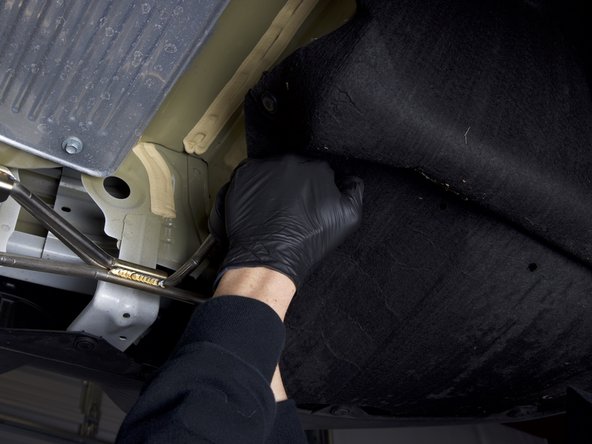
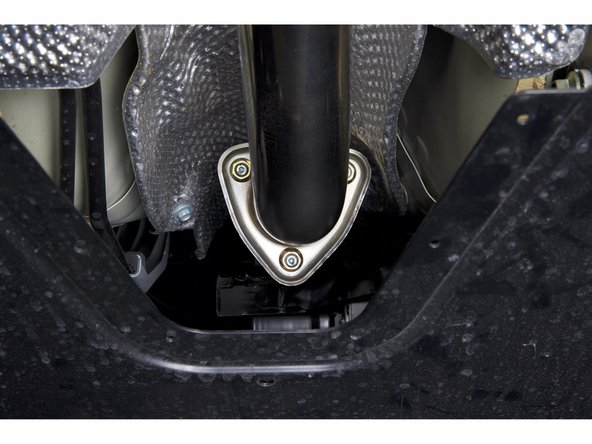
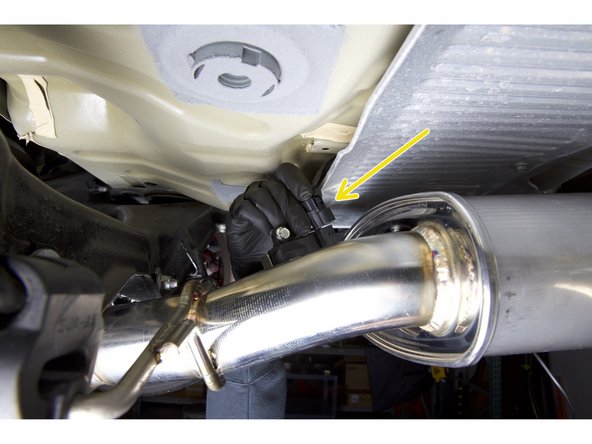
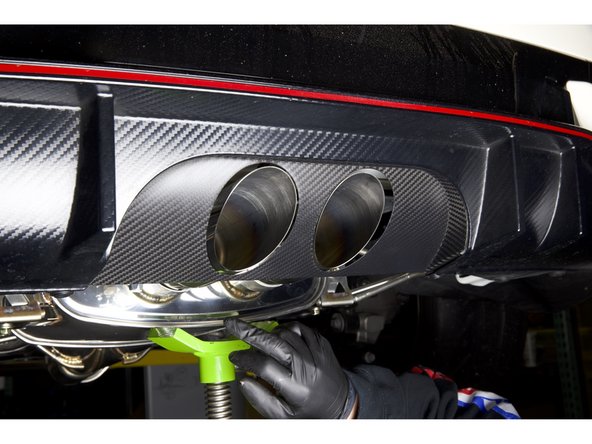
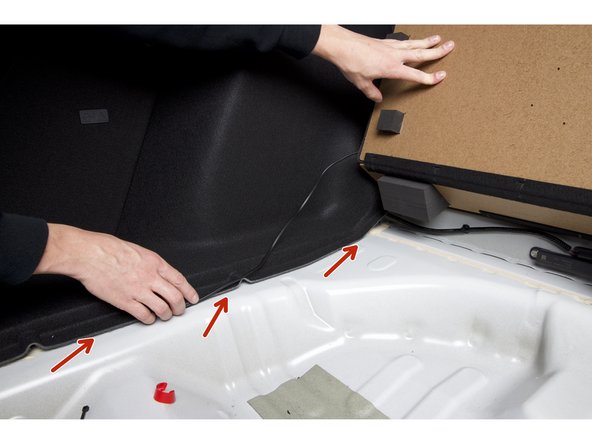
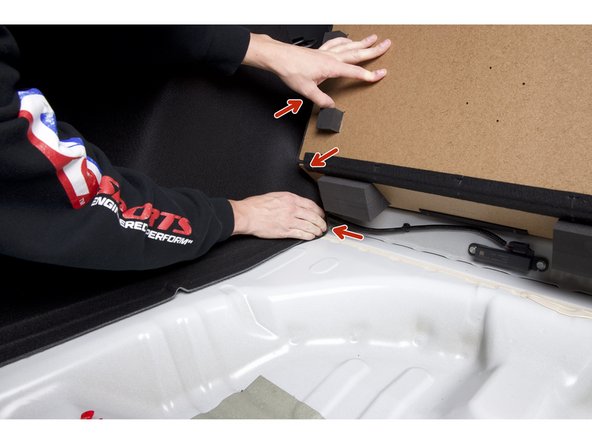
At the rear of the car, push the felt rear liners inward to expose the rear exhaust hangers.
-
No need to remove the clips totally, just push the liners inward. They will pop back in place after the HR exhaust is installed.
-
-
-
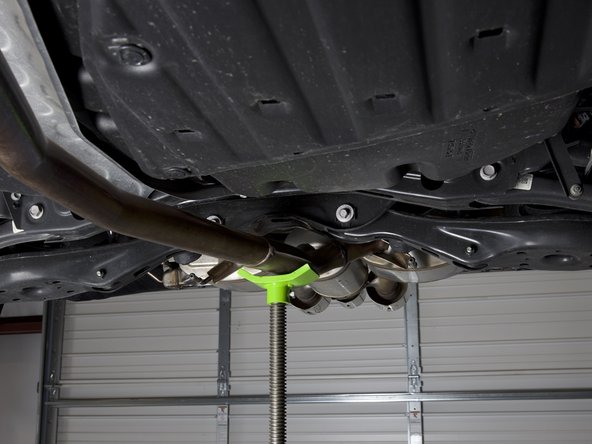
Use a jack, pole, wooden blocks, or a friend to support the exhaust system.
-
The next steps will require you to remove the exhaust hangers so be sure you are prepared to hold the system up once they are removed.
-
A second set of hands definitely helps.
-
-
-
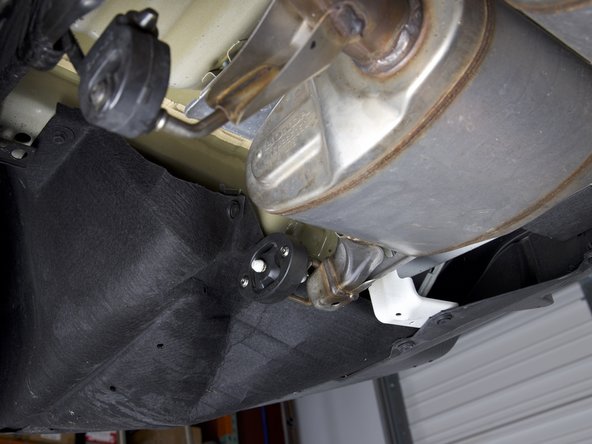
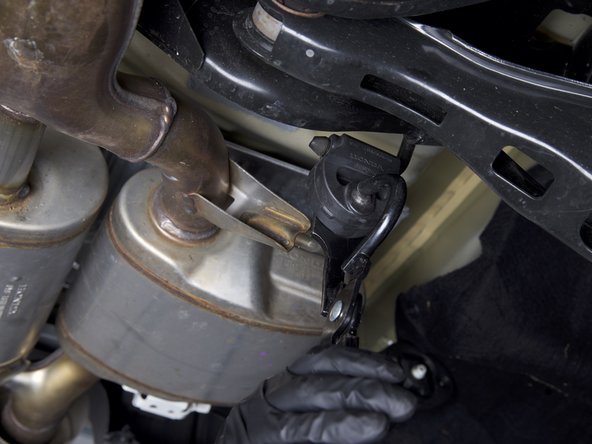
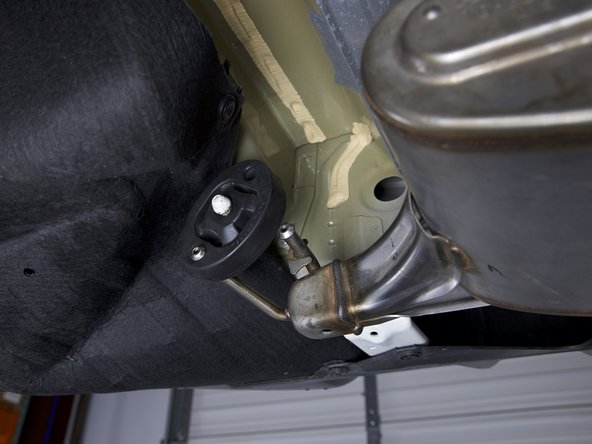
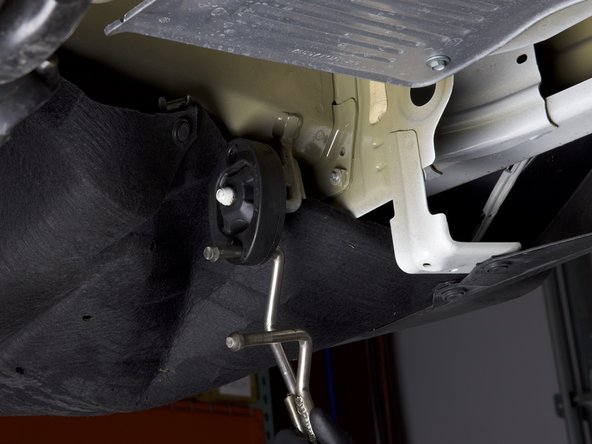
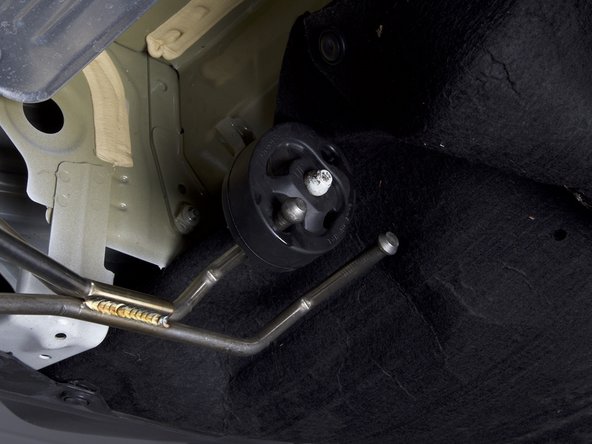
There are four exhaust hangers on the rear section.
-
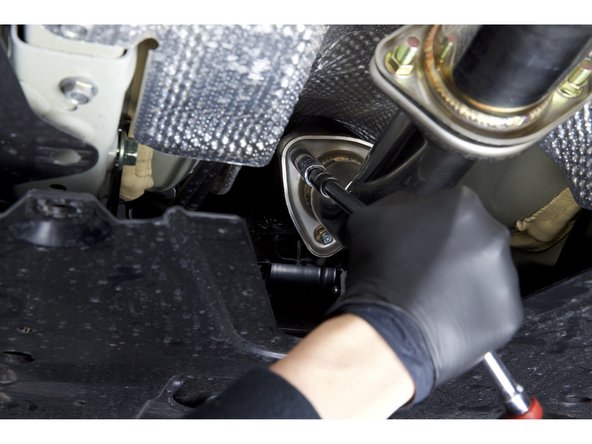
Remvove the exhaust from the rubber hangers. You can use a little spray lubricant and/or a removal tool to make the job easier.
-
Be sure the weight is supported correctly.
-
-
-
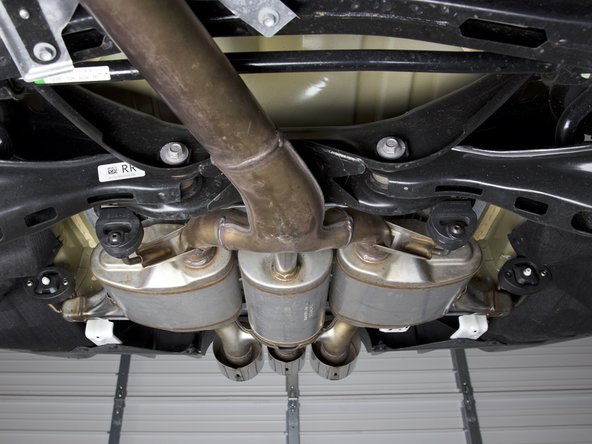
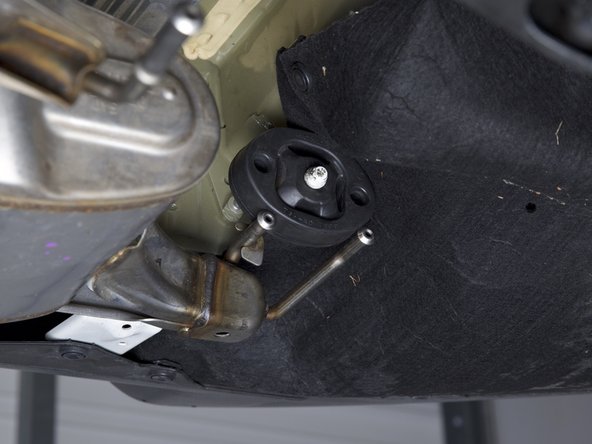
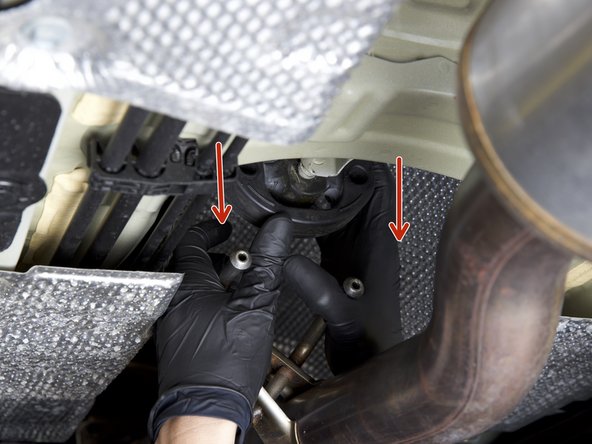
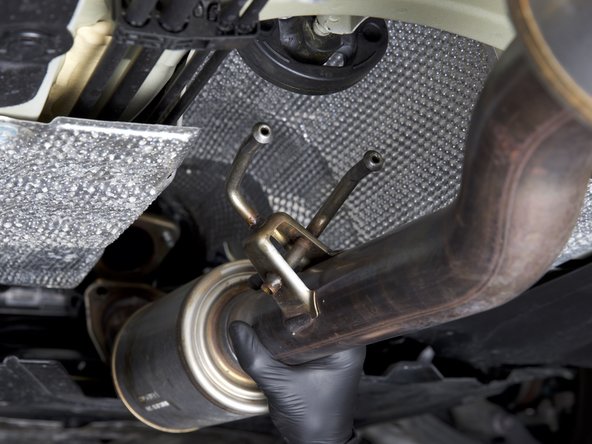
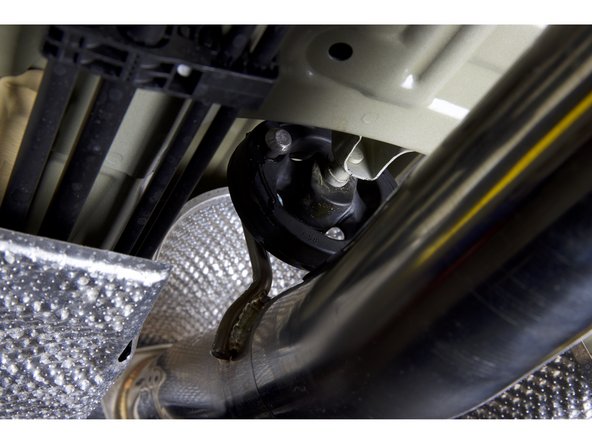
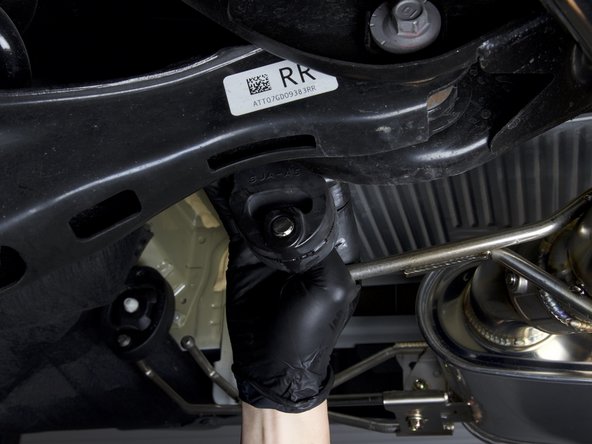
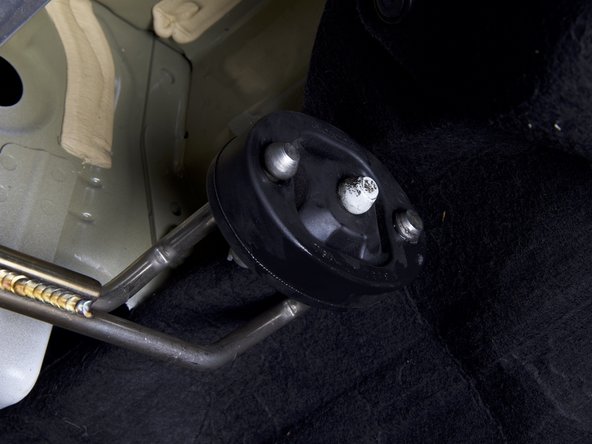
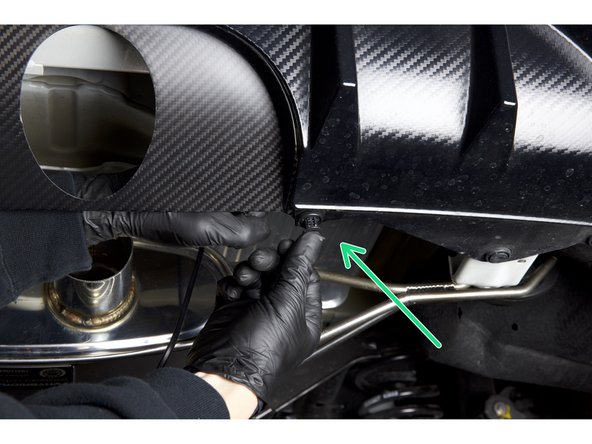
Disconnect the middle exhaust hanger.
-
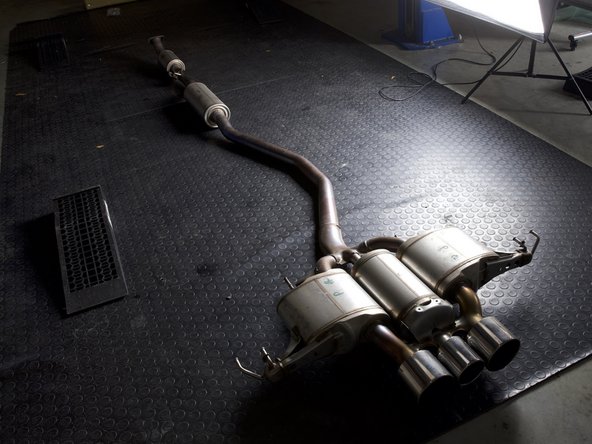
Pull downward to disconnect the exhaust and remove it from the car.
-
-
-
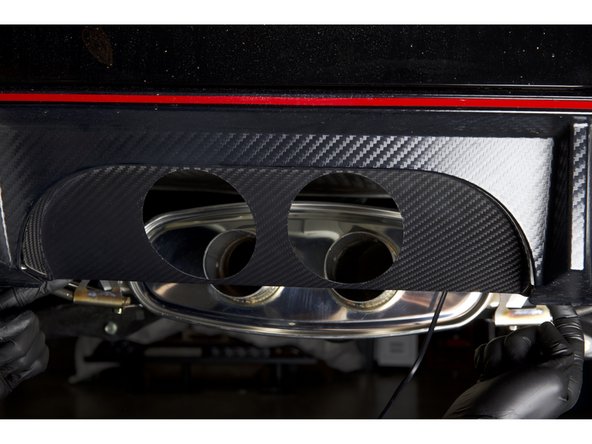
Before you can install the Hybrid Racing bumper trim, you must remove the factory insert.
-
Remove the two outer retaining clips using a trim tool.
-
The top section of the trim is held in with molded clips. You can use a flat tipped screw driver to depress the tips and remove the trim from the bumper.
-
Once this part is removed, you are ready to begin the installation of the HR exhaust.
-
-
-
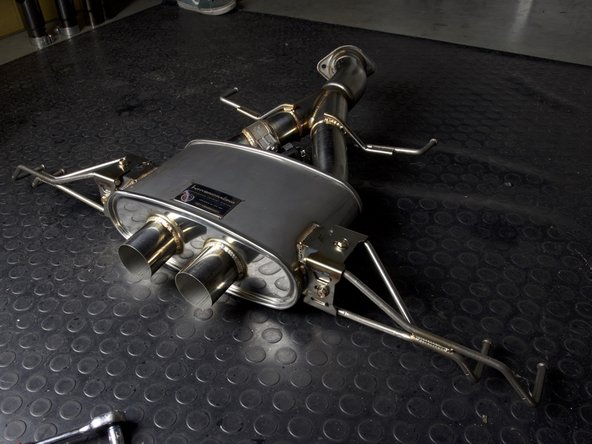
Begin by installing the mid-section of the HR exhaust. You can take this section and hang it from the center hanger.
-
-
-
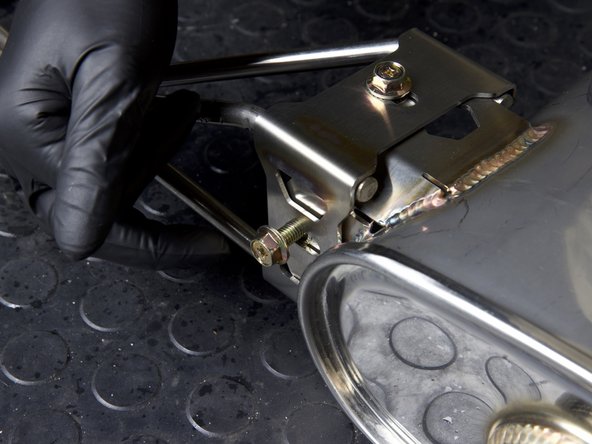
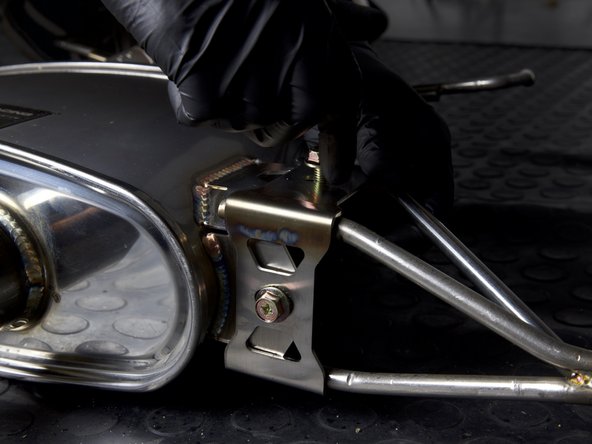
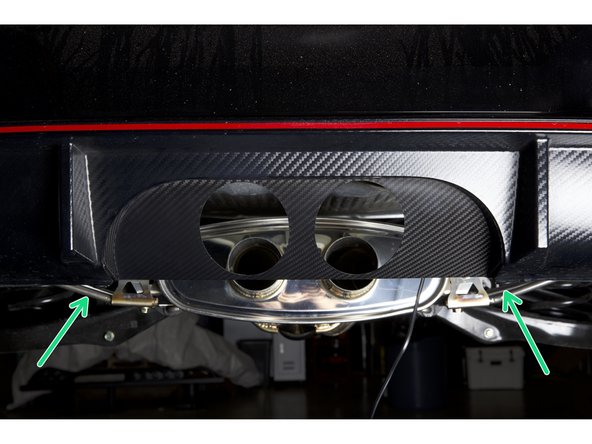
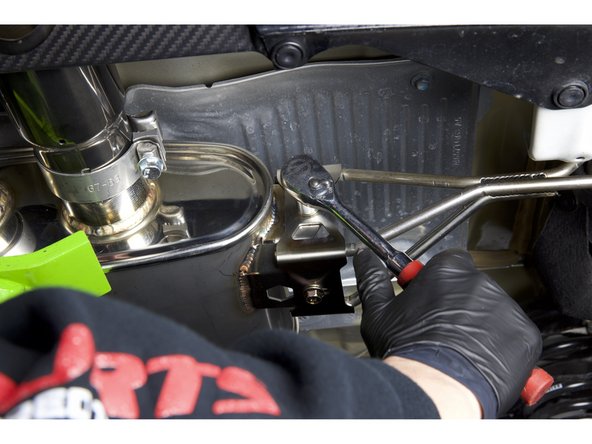
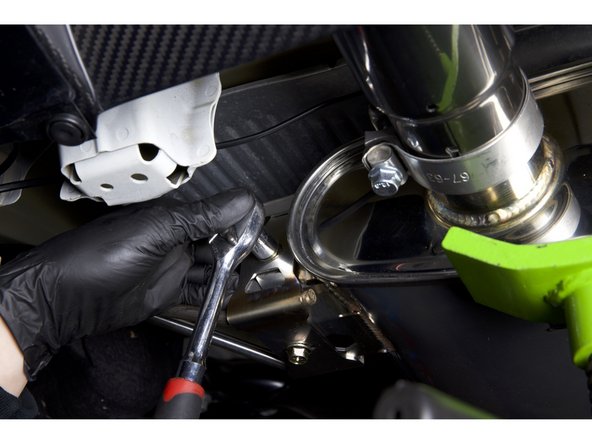
Locate and install the rear muffler brackets with the supplied hardware. Thread both sides together and be sure to keep them loose so the system can be adjusted once on the car.
-
-
-
We suggest just installing one hanger through the bushings at a time. Once you have one hanger in each bushing, you can rotate the rubber and get the other one through.
-
-
-
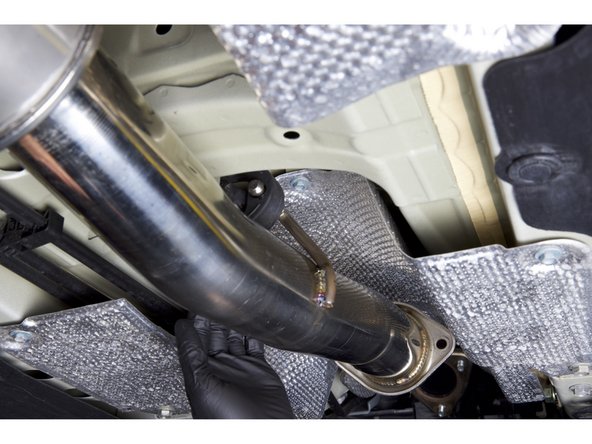
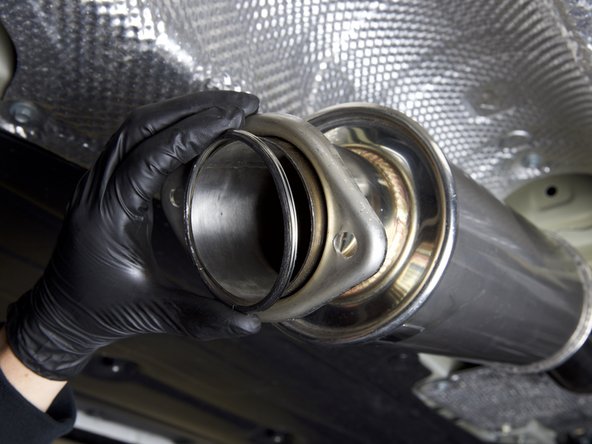
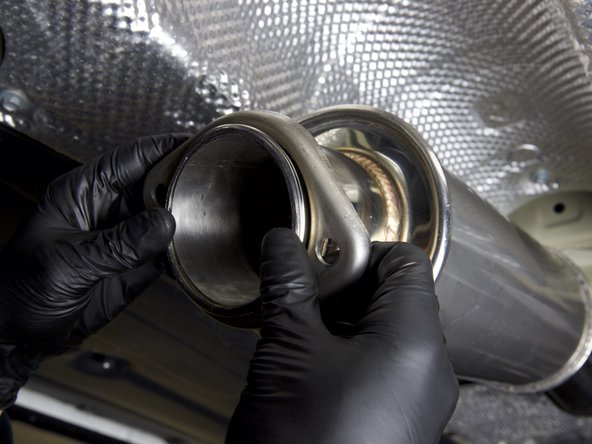
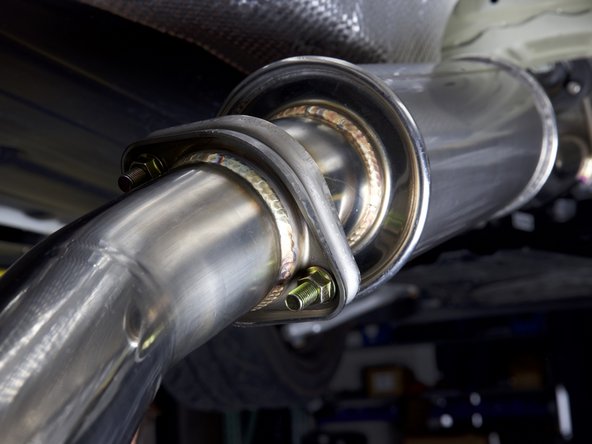
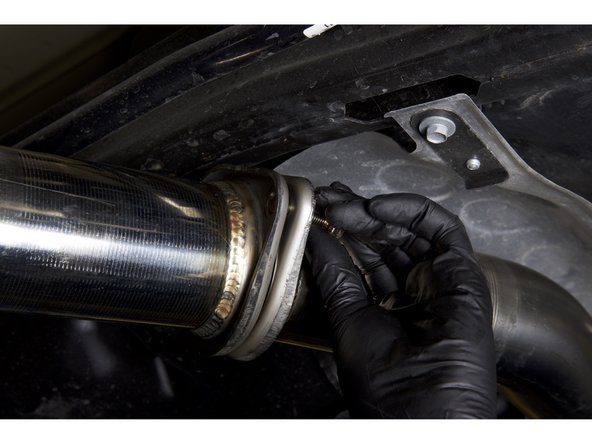
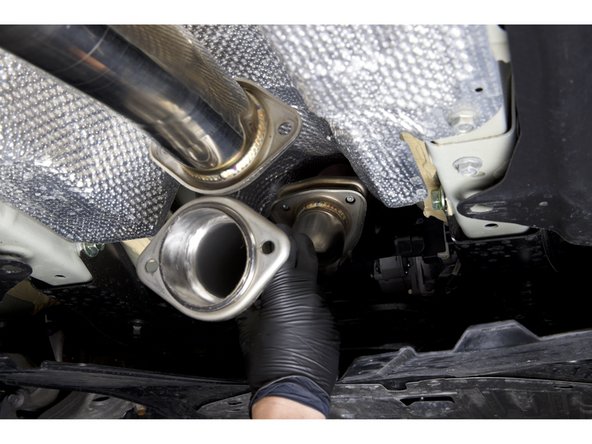
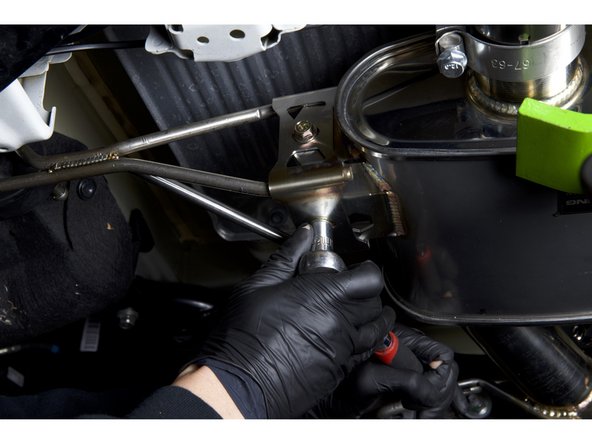
Install the supplied ring gasket onto the rear section of the B-pipe (mid-pipe) already installed on the car.
-
Make sure the gasket sits flush against the flange.
-
-
-
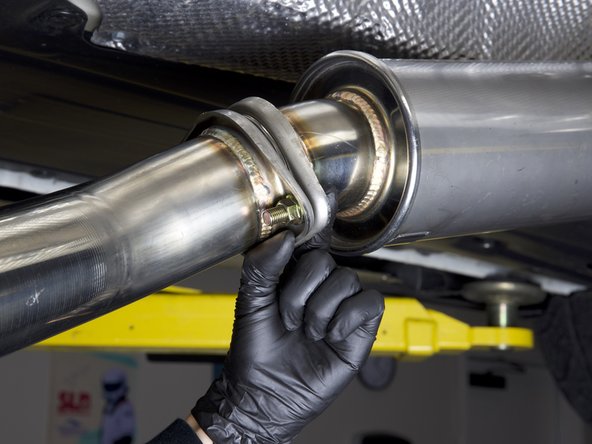
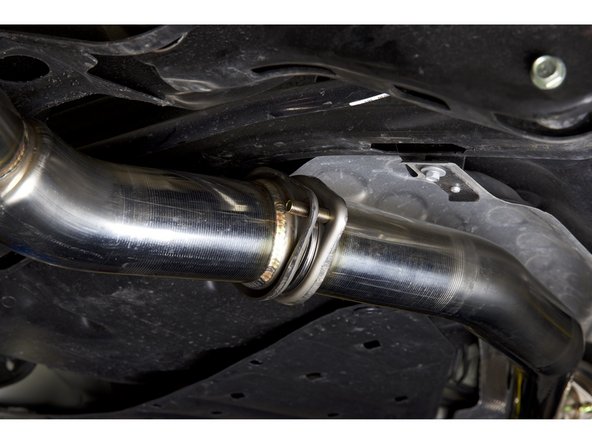
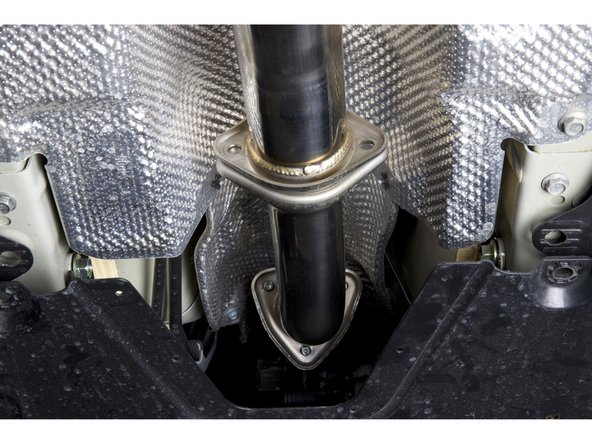
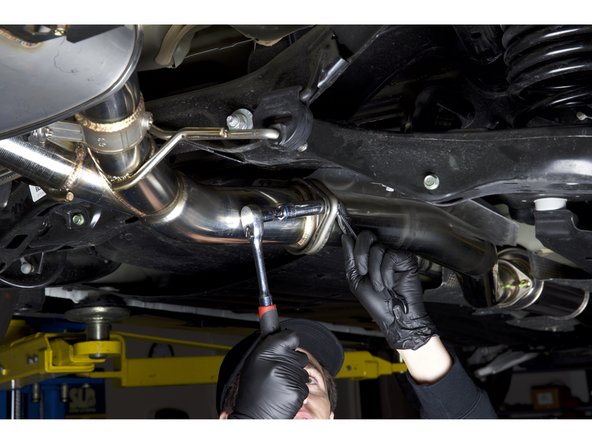
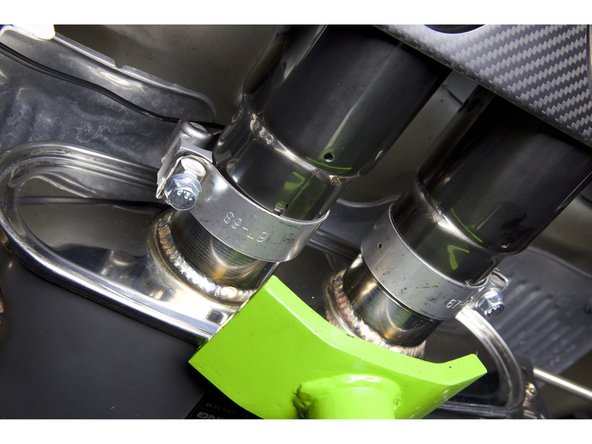
Use the supplied hardware and attach the pipes together. Finger tighten the bolts right now.
-
-
-
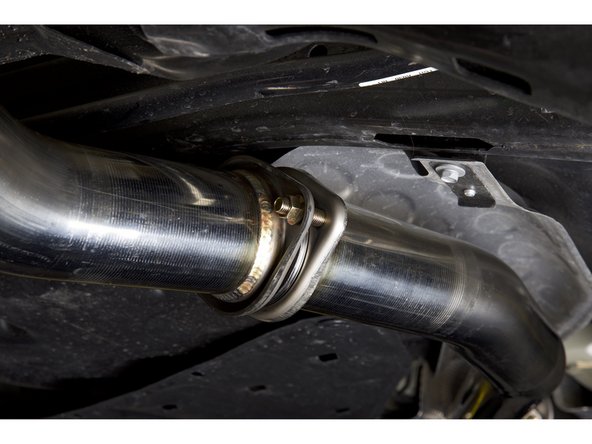
Like the previous step, install the ring gasket between the flanges and use the supplied hardware to bolt the exhaust pipes together.
-
Do not fully tighten the system.
-
-
-
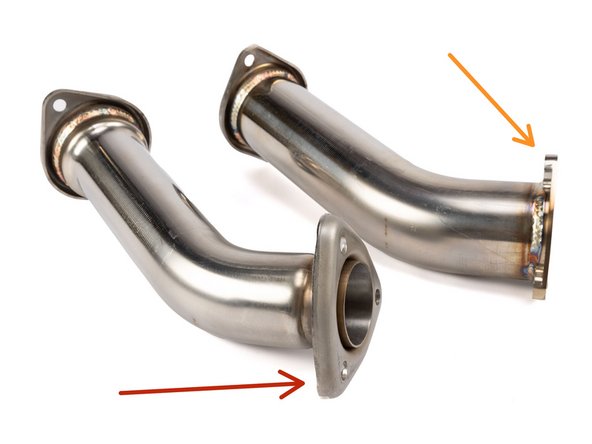
The Hybrid Racing exhaust includes both the OEM downpipe and aftermarket front pipe connections.
-
The larger 3 inch connection should be used with any aftermarket front pipe. This will not fit with the OEM front pipe.
-
The OEM style connection has a smaller, stamped flange and uses an OEM style gasket. This will not fit the aftermarket front pipe.
-
Choose the correct pipe for your application and install the gaskets.
-
-
-
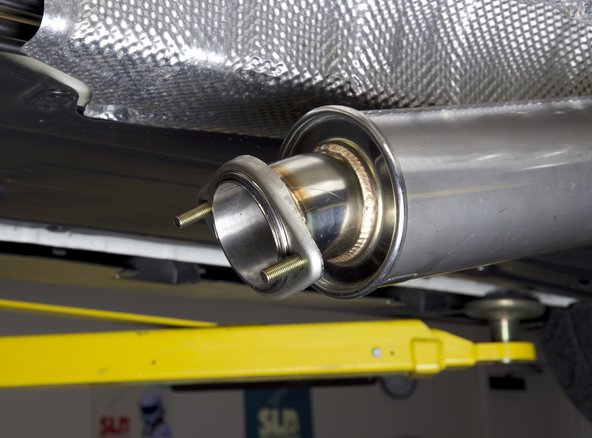
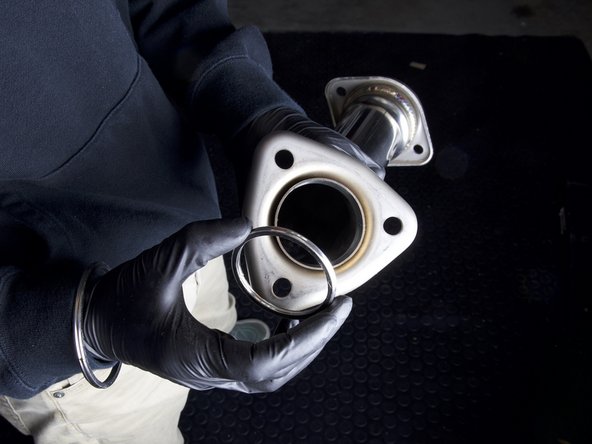
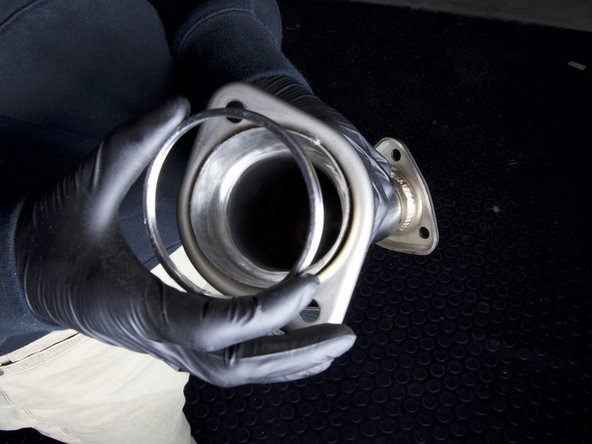
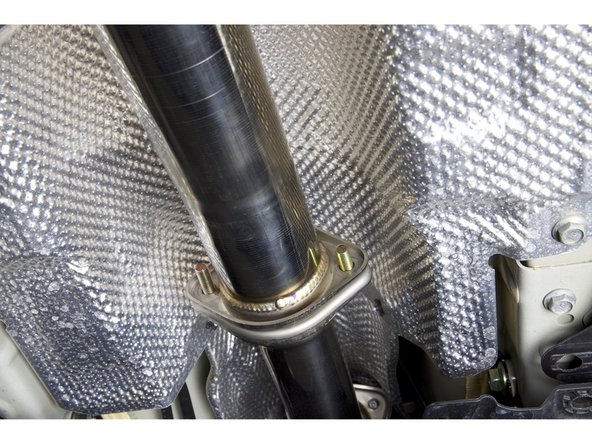
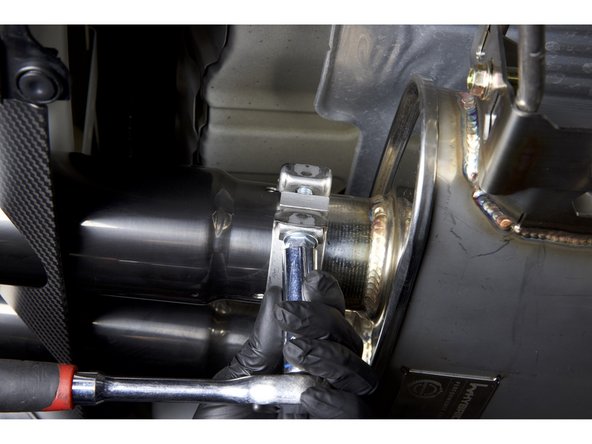
On the other end of the connection pipe, install the correct ring gasket.
-
-
-
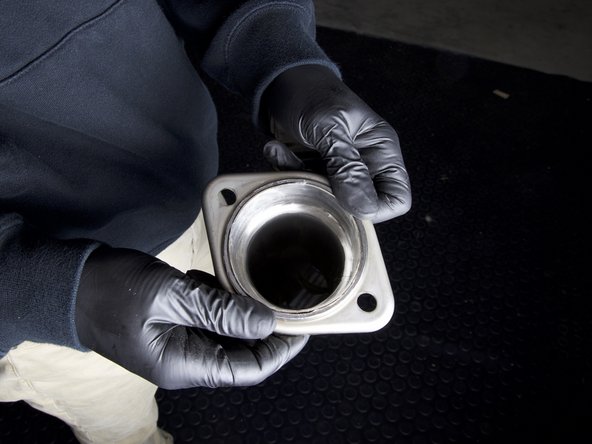
With both gaskets installed on the front pipe adapter, install it on the car. Be sure to keep the bolts loose for the time being.
-
-
-
Use the supplied hardware and install the front pipe adapter.
-
-
-
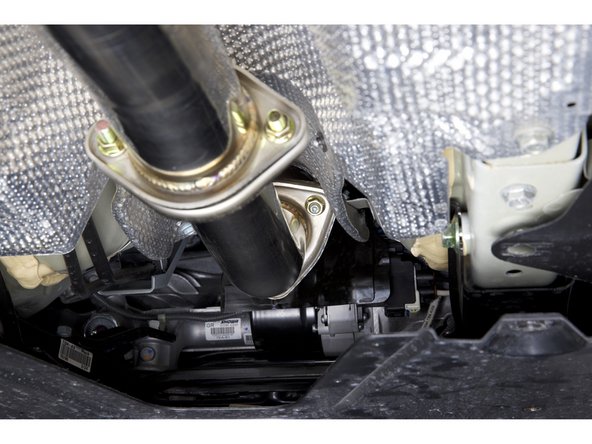
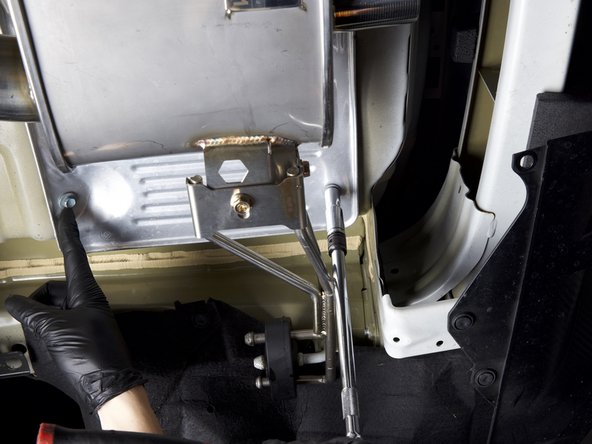
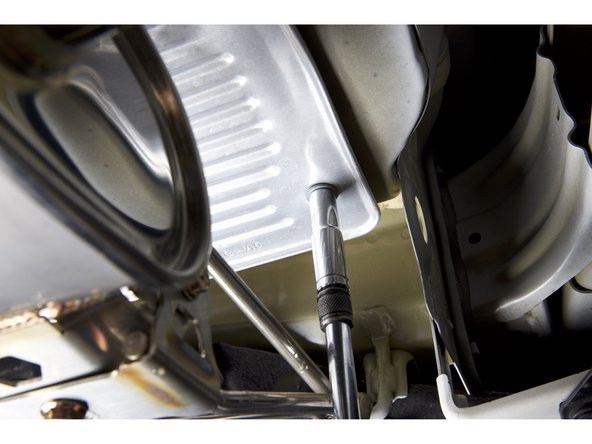
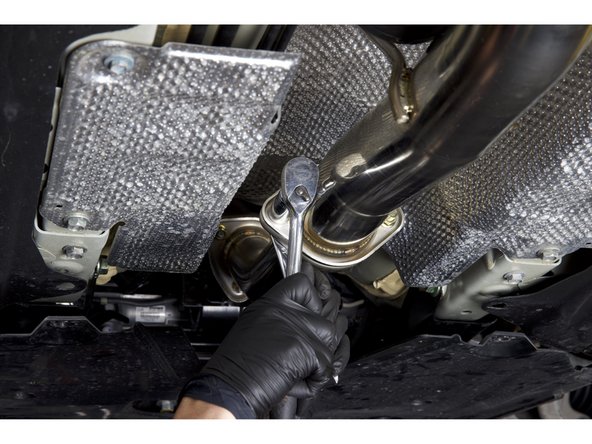
Prepare to install the valve controller by loosening the rear upper muffler heat shield.
-
You should only need to remove the LH side bolts. Once they are loose, you should be able to pull it downward.
-
-
-
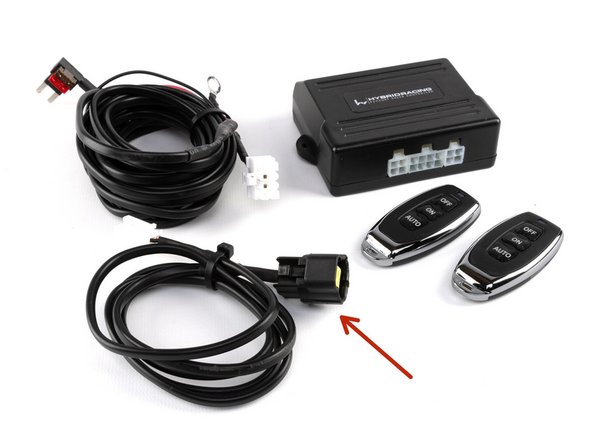
Supplied with this system are two wiring harnesses, an electronic control box and two RF controllers.
-
The harness with the black connector should be used to plug into the exhaust valve.
-
Run the wiring above the heat shield, make sure nothing touches the exhaust pipes.
-
-
-
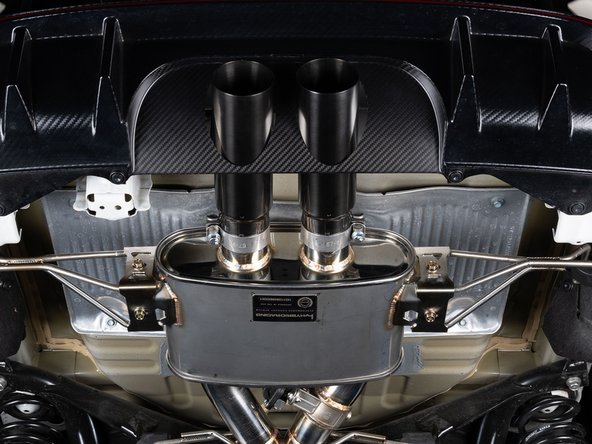
Install the HR carbon rear panel into the bumper using the factory clips. This panel should sit flush at the top and around the bumper seam.
-
-
-
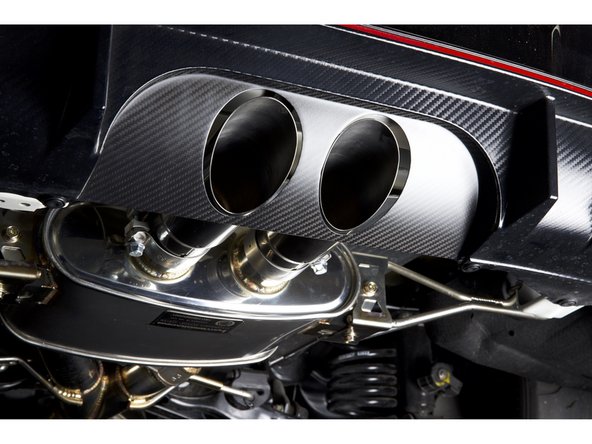
The exhaust tips are designed to slide in/out and the rear muffler can be shifted left/right.
-
Install your exhaust tips and position them to your liking.
-
If you are using the blown tips (slant cut) the tip should not rest behind the carbon panel. The tip should stick out slightly to avoid the hot gasses from melting the panel.
-
ANY HOT-GAS FROM THE EXHAUST WILL MELT THE CARBON PANEL. BE SURE THE TIP DOES NOT TOUCH THE PANEL. MAKE SURE THE EXHAUST GAS DOES NOT BLOW ONTO THE PANEL. IT WILL MELT.
-
-
-
Once everything is aligned, tighten the rear muffler hangers and the remaining pipe connections.
-
-
-
Once the hangers and pipes are tight, tighten the exhaust tips in alignment of the panel.
-
-
-
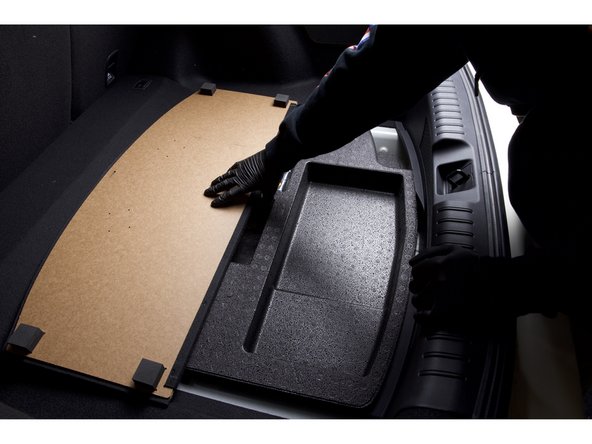
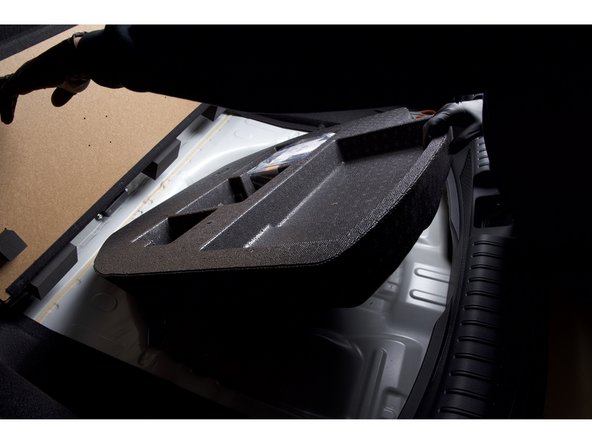
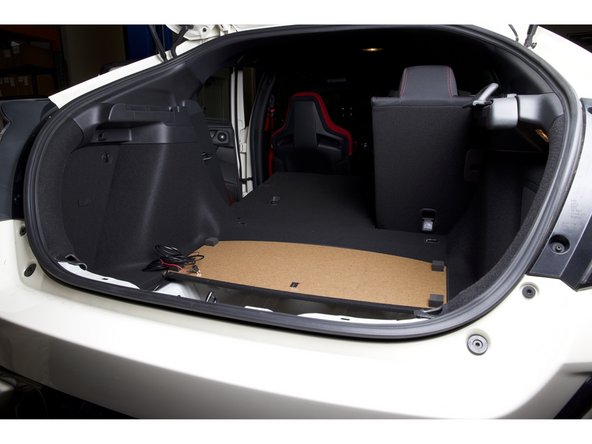
Begin installing the electronic valve controller by lifting and removing the factory FK8 rear foam tray.
-
-
-
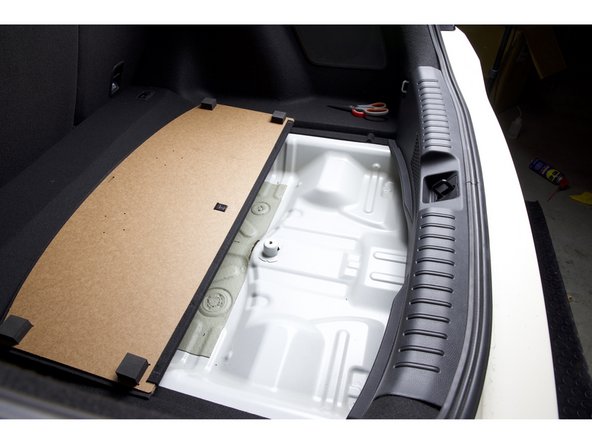
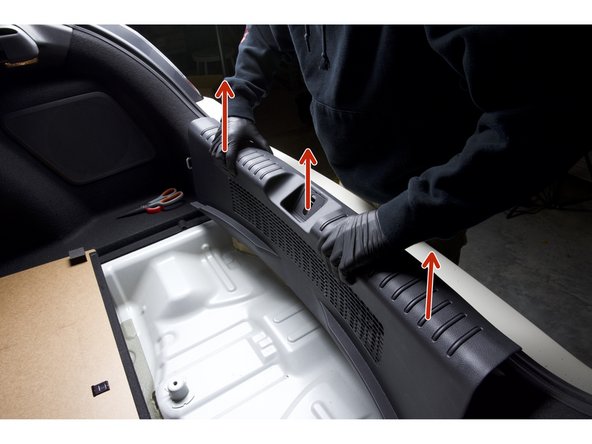
Pull upward on the rear plastic panel to remove it. Once removed, set aside.
-
-
-
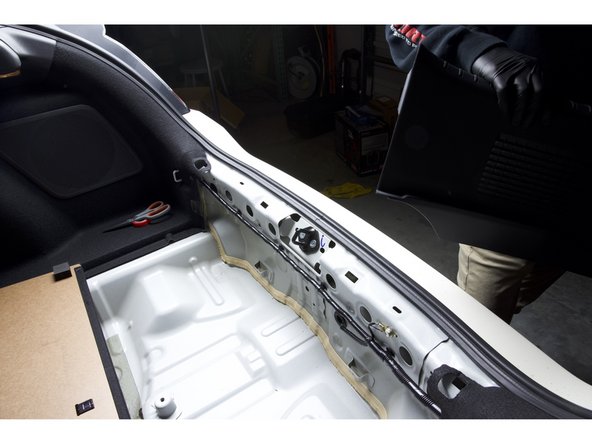
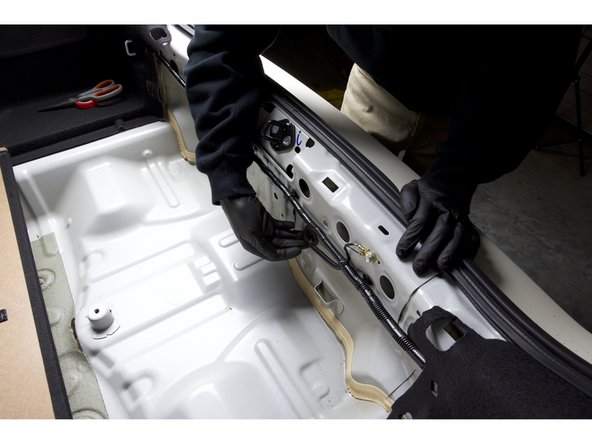
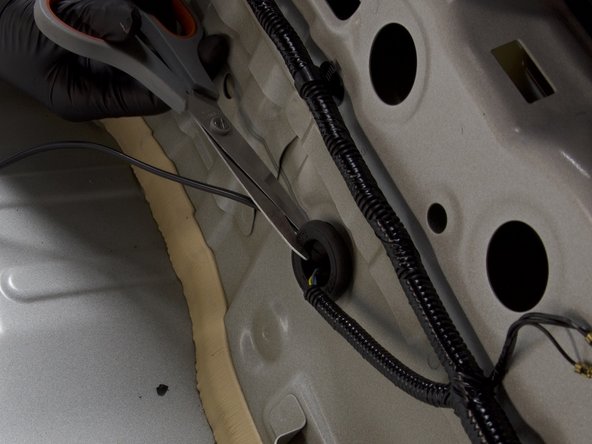
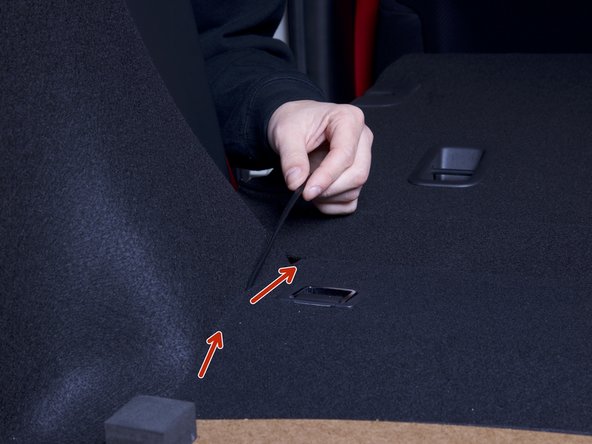
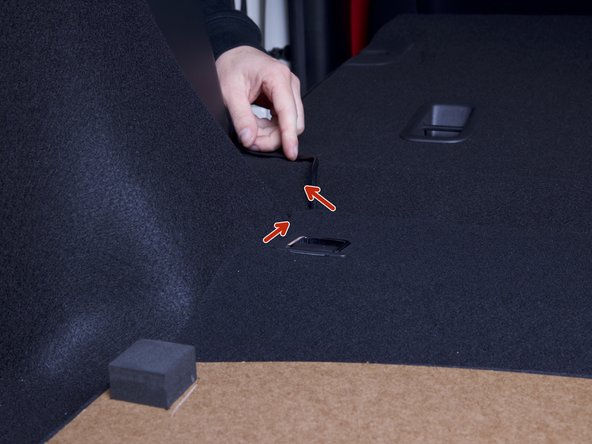
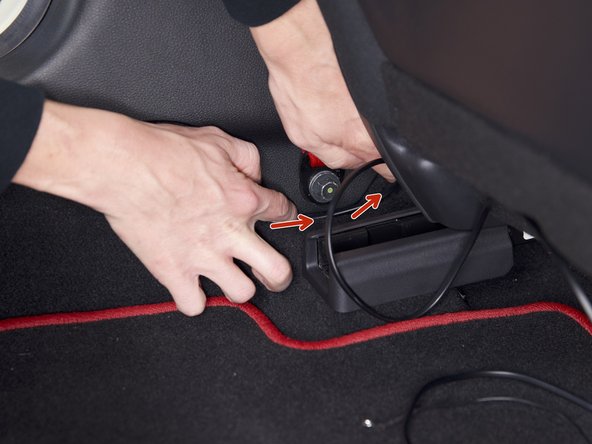
On the rear bulkhead, locate the rubber grommet in the center. Use your fingers or a flat-tipped pry tool and pull the grommet free.
-
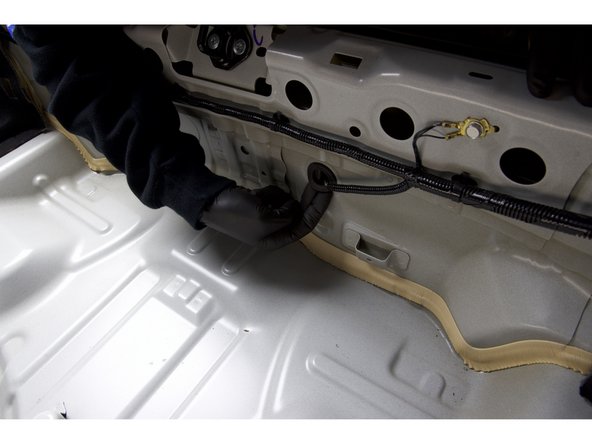
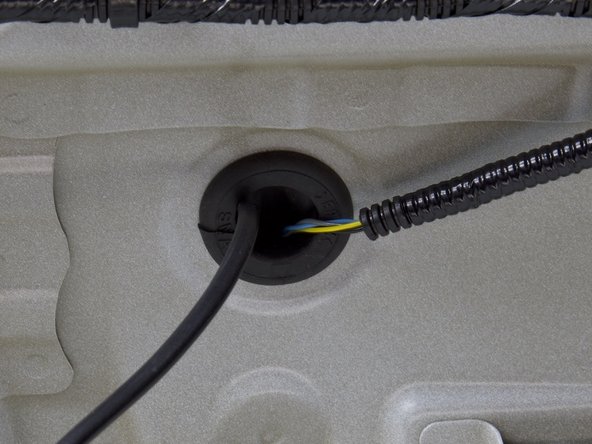
With the grommet free, you will need to fish the other end of the valve harness through the hole. This can be a little tricky but if you have a friend feed the wire, you can pull it through.
-
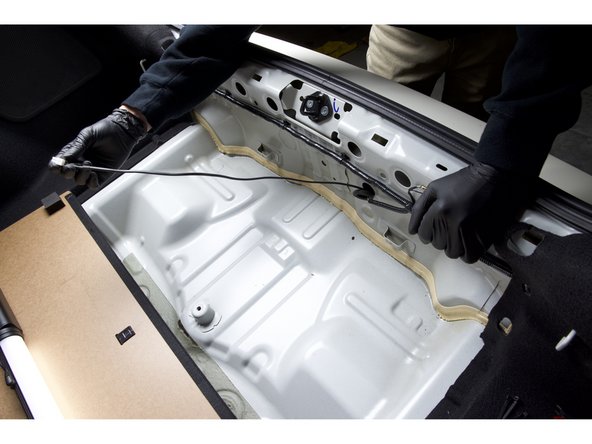
Pull all but a little slack through the floor and prepare to mount the controller box.
-
-
-
Use a pair of scissors or knife and cut a slit into the factory grommet. Feed the wire through the slit and re-install the grommet in place.
-
-
-
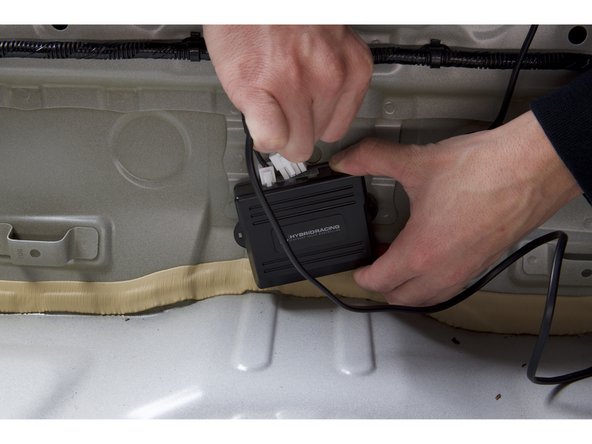
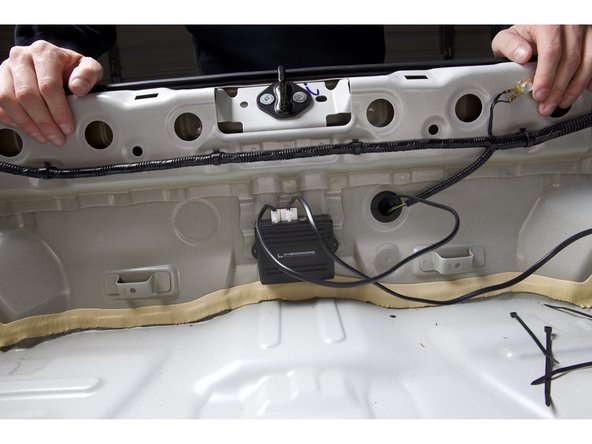
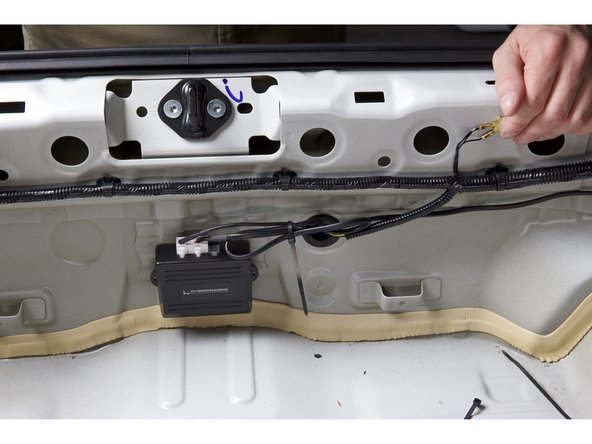
Connect both wiring harnesses to the controller box.
-
On the back, remove the tape backing and install the controller under the trunk latch.
-
Be sure this position does not prevent the panel from going back in place.
-
It is normal for the panel to bulge slightly after being installed. This is fine. It keeps the box from moving or rattling.
-
-
-
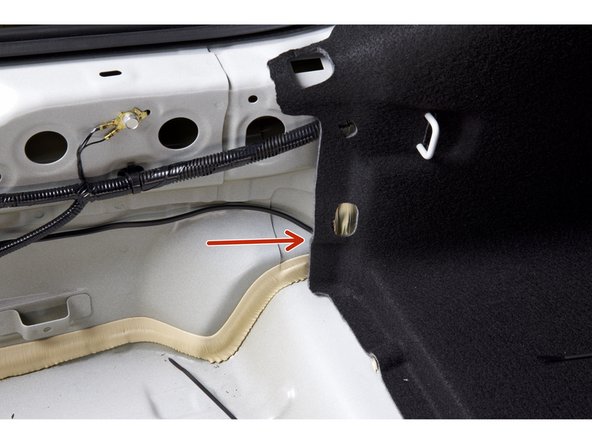
Secure the wiring harness that will travel to the front of the cabin. Use the supplied zip ties to tidy up the wiring.
-
Feed the power harness through the rear trim panel on the driver side.
-
For RHD cars, this should route in the opposite direction.
-
-
-
Fold the rear seat down to give you access to the panels.
-
You are free to route the wiring however you like. However the next few steps are how we suggest doing it.
-
Feed the wire though the rear panel and then under the corner of the rear seat.
-
-
-
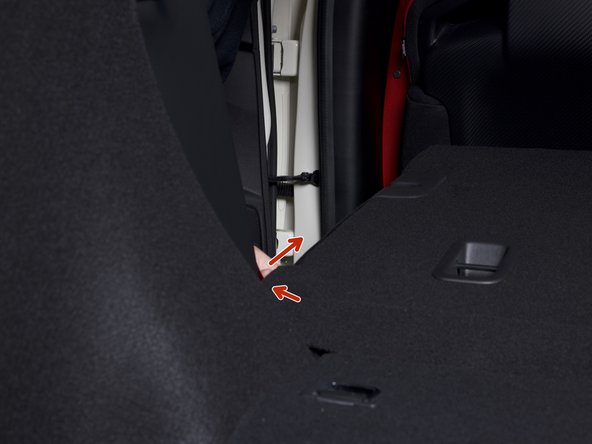
Route the power harness around the corner of the rear seat and down through the rear panel. Conceal the wire as best as you can.
-
-
-
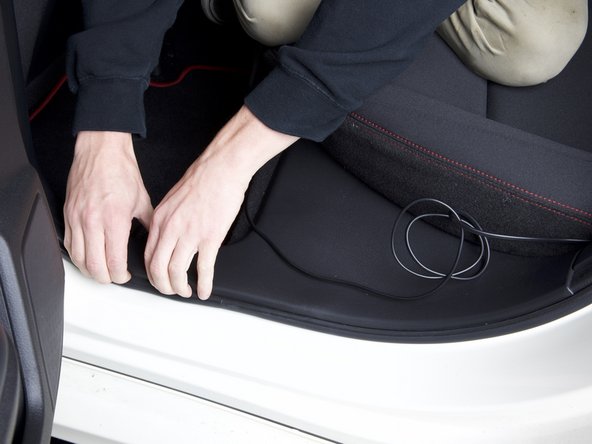
Route the harness through the bottom section of the seat.
-
From the seat, run the wiring under the side sill. You can lift the panel upward to make it easier.
-
-
-
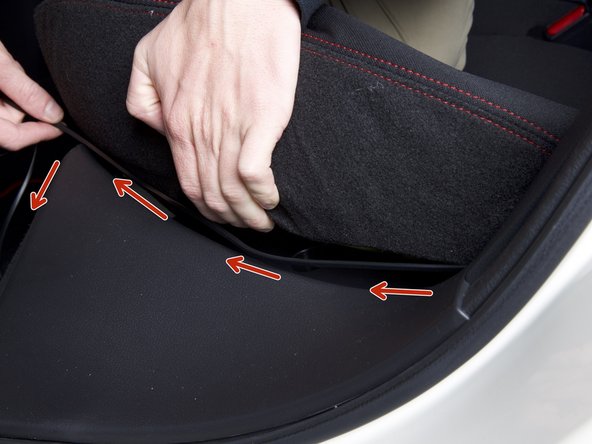
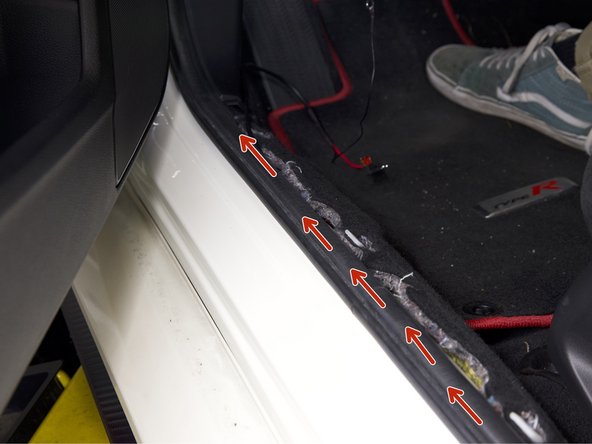
Route the harness under the panels along the sill. You can tuck the wiring under the panels, under the seat belt mount.
-
-
-
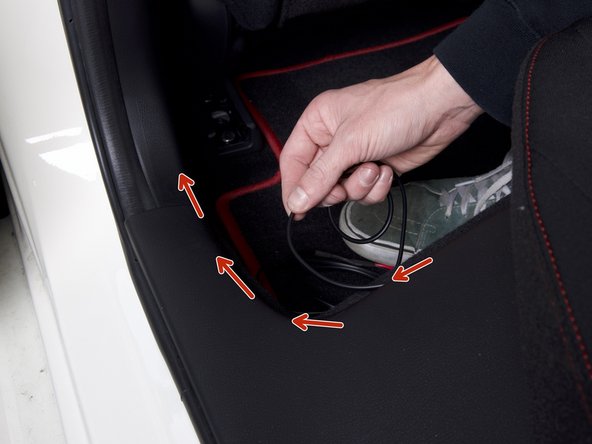
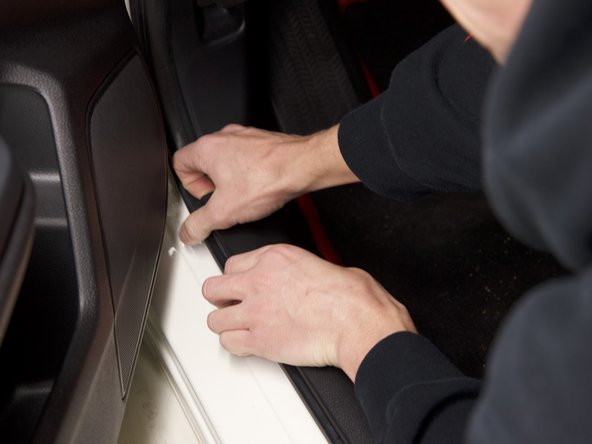
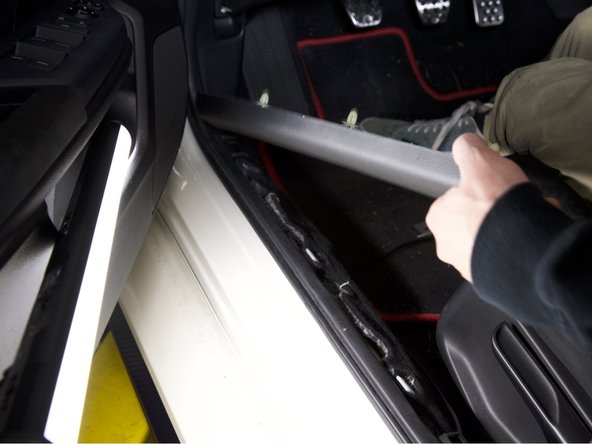
Gently pull upward on the sill cover.
-
Lay the power harness along the top of the carpet and make sure it reaches all the way to the fuse box.
-
-
-
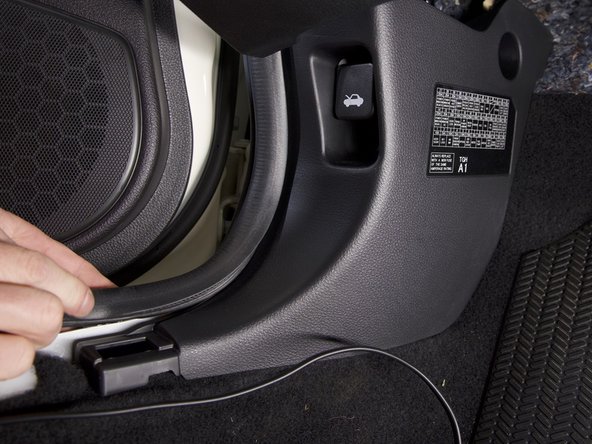
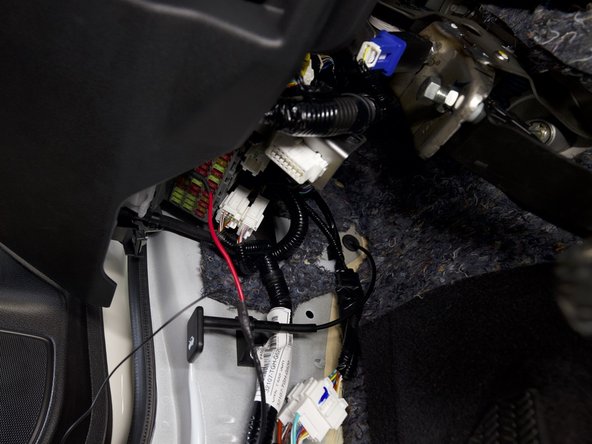
Pull gently outward on the kick panel to make it easier to access the under dash fuse box.
-
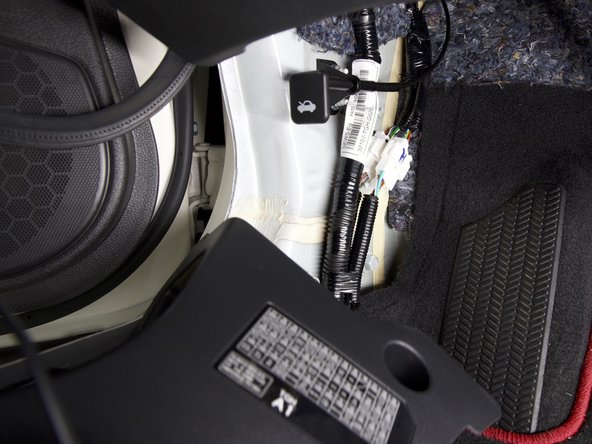
Route the wiring harness behind the kick panel and upwards toward the fuse box.
-
-
-
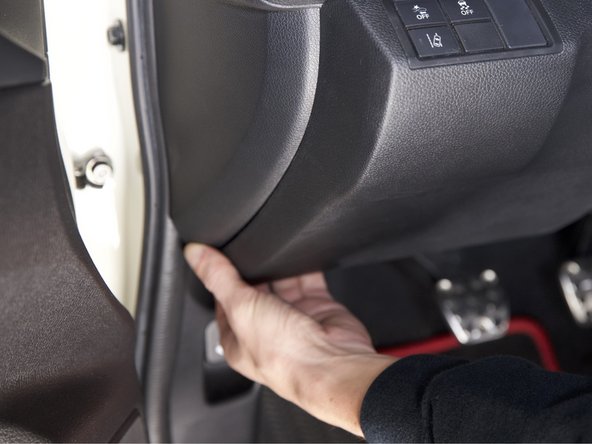
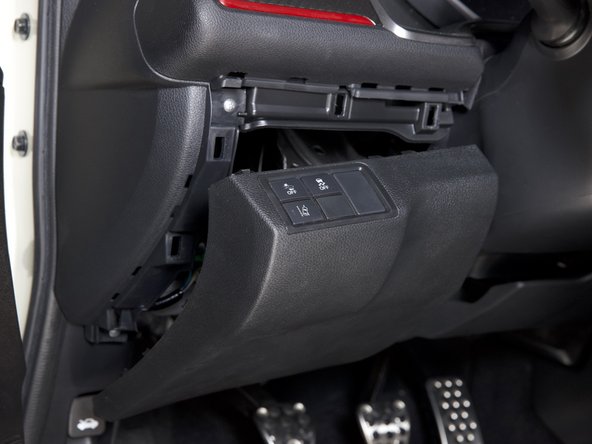
Pull outward on the bottom section of the lower dash panel. It should pop outward allowing you clear access to the fuse box and grounding location.
-
-
-
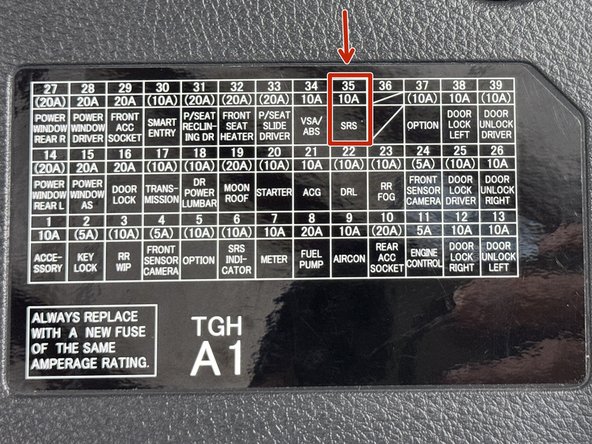
Locate fuse location 35, 10amp SRS system. We will use this location to power the EVC box. It will have 12v when the key is on, but 0v when the key is off.
-
This does not affect the SRS system because the fuse is still present.
-
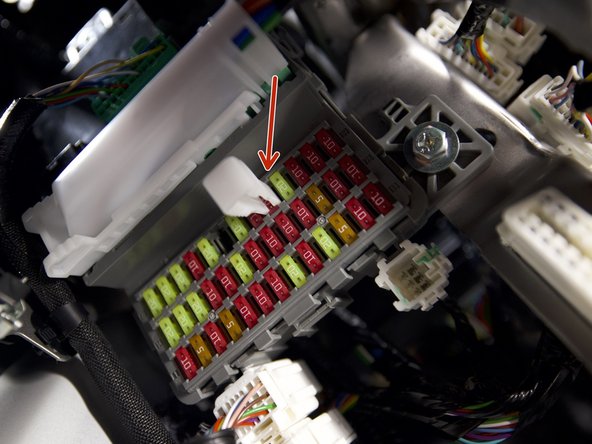
Use the OEM fuse puller and remove fuse 35 from the underdash fuse box.
-
Insert the fuse tap into the fusebox. Secure the remaining wiring and reinstall the kick panel.
-
-
-
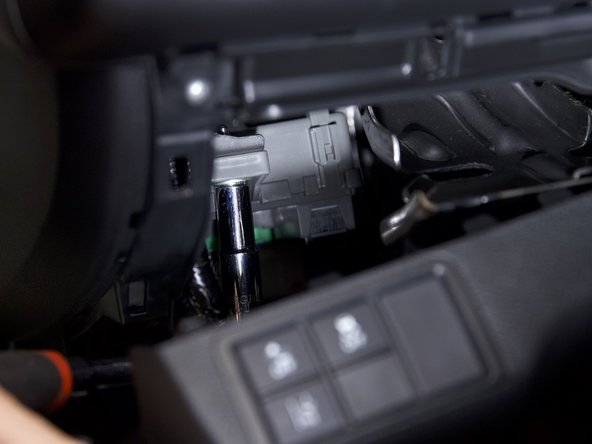
Behind the lower dash panel, there is a 10mm bolt that you can use to ground the EVC harness.
-
Remove the bolt, insert the bolt through the eyelet and reinstall the bolt.
-
You can now reinstall all panels and prepare to test the system.
-
-
-
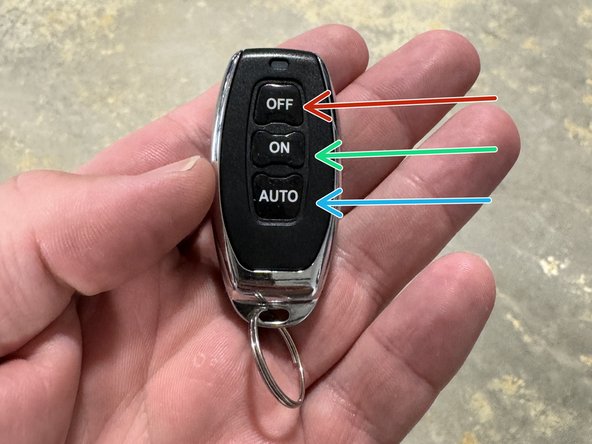
On the key FOB, there are three buttons.
-
Press OFF to fully close valve.
-
Press ON to fully open valve.
-
Press AUTO to step the valve open. You must press OFF first to close it. Pressing this button will allow the valve the step open slightly. You can continue to press AUTO to increase the step. Once you have pressed it enough times, the valve will be fully open. Press OFF to reset the system.
-
Be sure to test the valve operation before starting the vehicle. The EVC box will beep when the buttons are pressed. You should also hear the valve open and close.
-
IF YOU DO NOT HEAR A BEEP AND THE VALVE MOTOR DOES NOT REACT TO THE FOB, PLEASE VIEW STEP 44.
-
-
-
Start the vehicle and check for exhaust leaks. Once you have tightened the system and confirmed it is not leaking you are now able to actuate the valve and hear the audible change.
-
You can now complete the installation by replacing all panels and pieces that were removed for the installation.
-
For support, please call 225-932-9588 or email support@hybrid-racing.com
-
-
-
Our EVC module can be expanded to control two valves simultaneously. Connectors A and C are the outputs for the valve motor. Either A or C can power your exhaust valve motor.
-
The valve motor must have a ground and power signal, which are supplied by the EVC box.
-
Connector B in the center of the EVC box is connected to the chassis wiring. The chassis wiring will supply the EVC box with power and ground to control the valve motor.
-
B2 - should connect to a chassis ground, per the eyelet on our harness.
-
B3 - should connect to the underdash fuse box. This must be a key on 12v source. There is an inline fuse for protection.
-
-
-
Each key fob should already come pre-paired with your electronics box. In the event it is not, or you are using a replacement key fob, please follow these steps to pair.
-
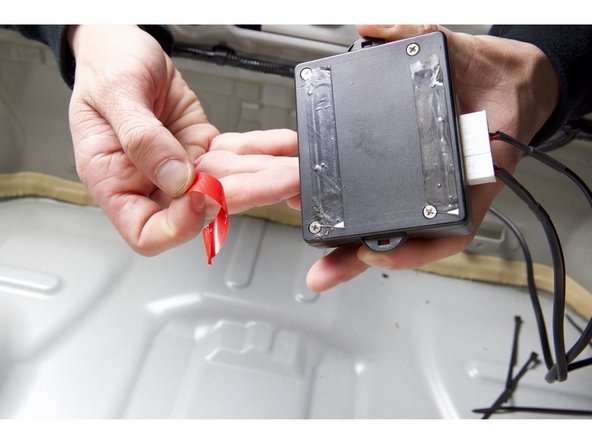
On the side of the box, there is a small button on he inside. Find a small pick and press it. You should hear a beep and a green LED will light up behind the connectors.
-
Take your FOB and press ON. If it is paired successfully, you will hear a beep and the light will go off.
-
You can now control the valve with the newly paired key FOB.
-
Please contact us with any questions if you have issues doing this.
-
-
-
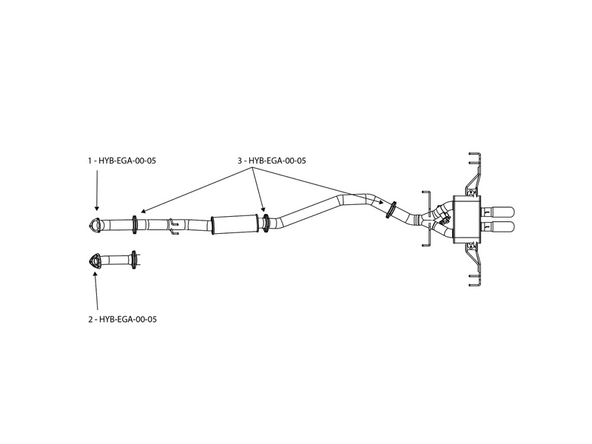
1- HYB-EGA-00-09 -Hybrid Racing Formula Exhaust Replacement 3" 3 Bolt Gasket
-
2- HYB-EGA-00-07 -Hybrid Racing Formula Exhaust Replacement 2.15" Ring Gasket
-
3- HYB-EGA-00-05 -Hybrid Racing Formula Exhaust Replacement 3" Ring Gasket
-