
-
-
Begin by pushing the shift boot collar down and use a wrench to loosen your shift knob.
-
-
-
Once you have removed the shift knob and removed the collar, use a plastic trim tool and carefully pry the console trim upwards.
-
Use plastic tools to reduce the chance of marring or damaging the plastic trims. These parts are held on with clips and may require a bit of force to pop them loose.
-
Once the trim is loose, disconnect the electrical connectors near the dash. Depending on your YEAR & MODEL, these connections will vary.
-
Set the interior panel to the side.
-
-
-
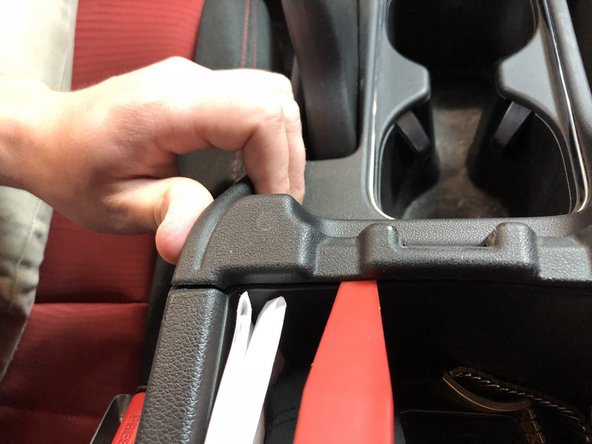
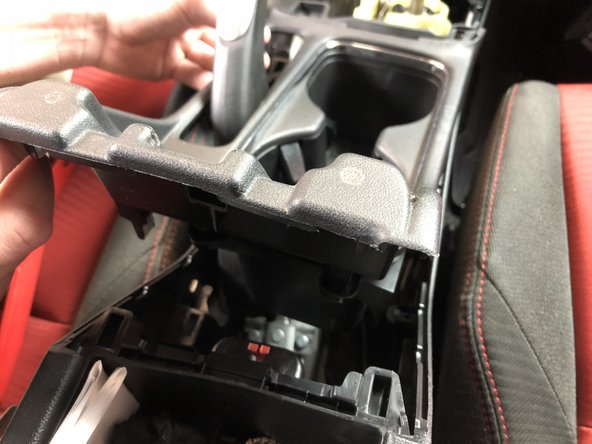
Open the center console storage compartment and use a plastic trim tool to pop the cup-holder section up. Start on the edges and pull upwards while prying. It will pop loose and expose the shifter and e-brake assembly.
-
-
-
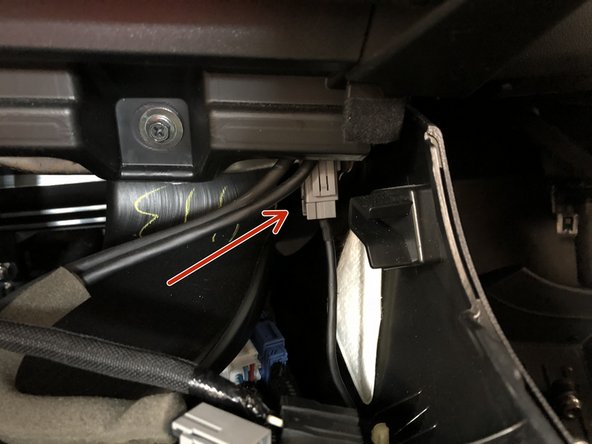
Locate and disconnect the gray electrical connector near the front RH corner of the console.
-
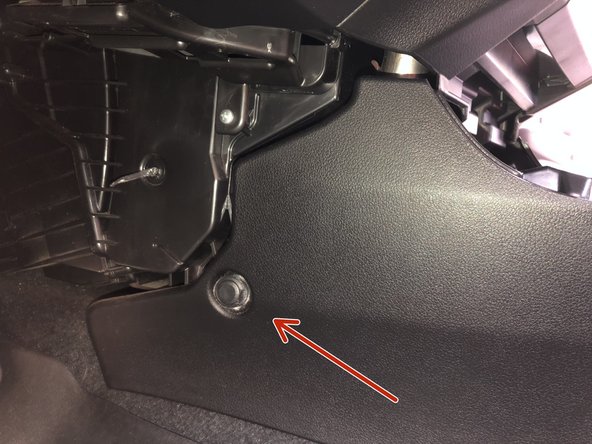
Using a plastic trim tool, remove the two push clips on the RH side and one on the LH side of the console. Set them to the side.
-
-
-
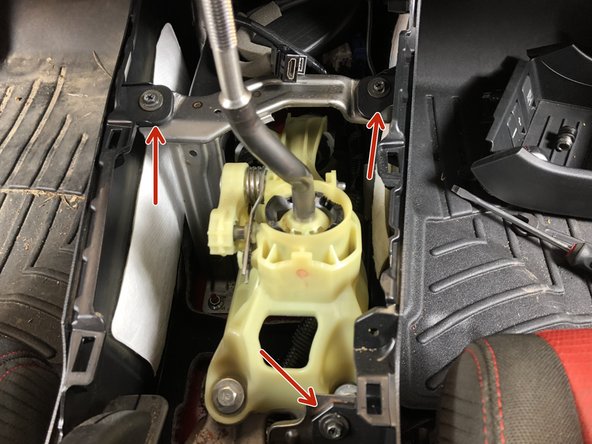
Remove the three mounting screws that hold the center console to the chassis brackets.
-
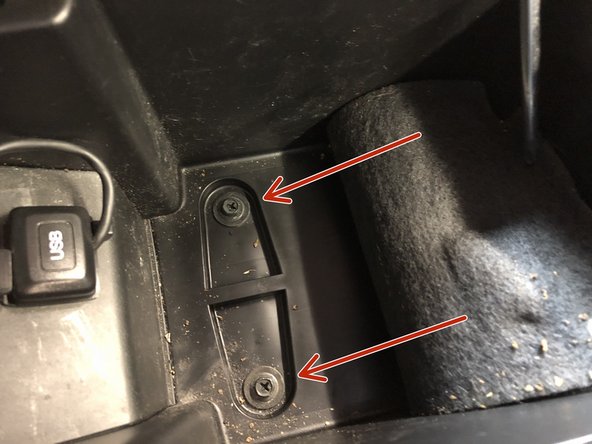
Inside of the console compartment, lift up the lower covering an expose the two Phillips head screws. Remove them.
-
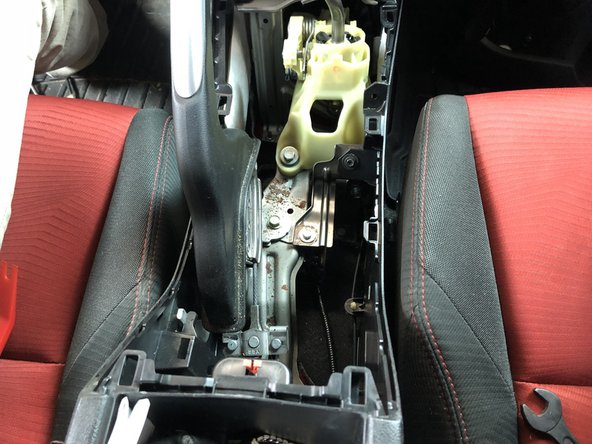
Once everything is disconnected, slide the center console to the rear seats. Lift up he back and remove the console completely.
-
Depending on the year of your car, there may be other wiring connectors in the center console that will need to be disconnected before it can be removed. Please use caution when pulling your console backwards.
-
-
-
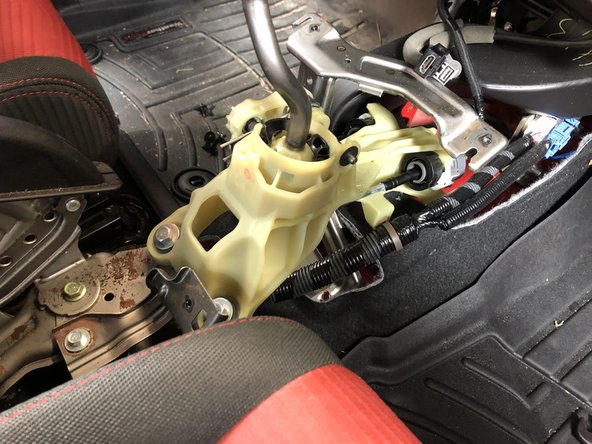
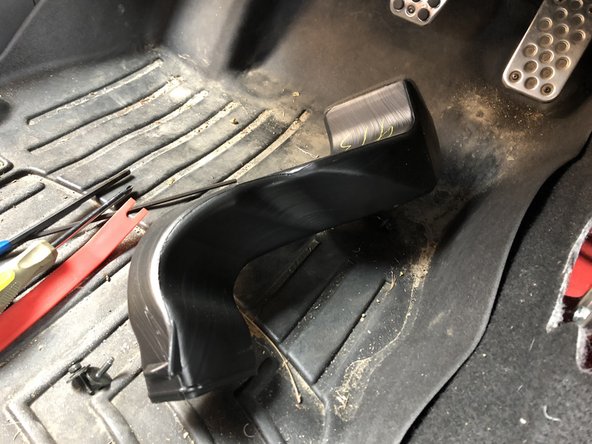
Remove the AC duct near the front of the shifter assembly.
-
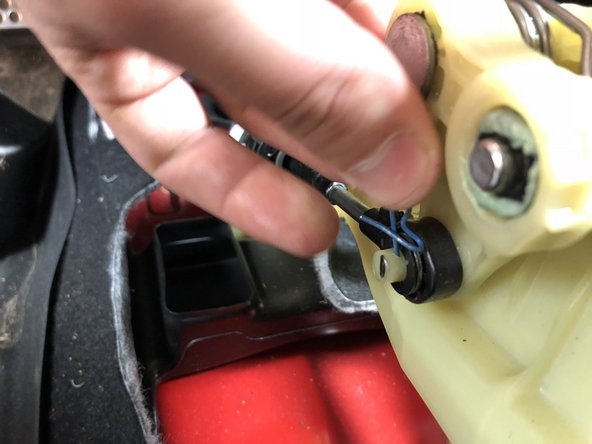
Locate the LH side shifter cable end and remove the clip holding it place. Slide the cable end off the shifter.
-
-
-
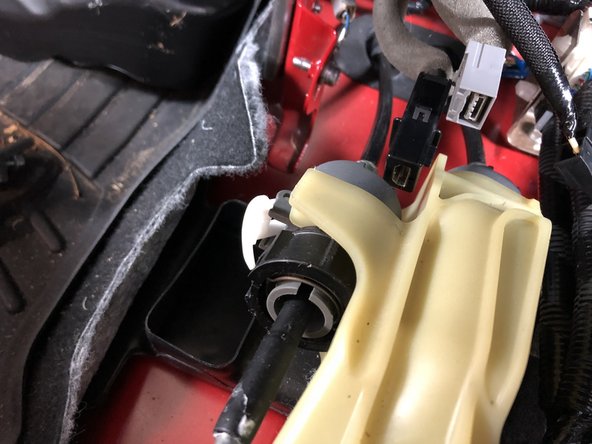
On the LH cable, push the white tab upwards to unlock the shifter cable.
-
Use your fingers (or a flat head screw driver) to spin the shifter cable. Make sure it spins freely.
-
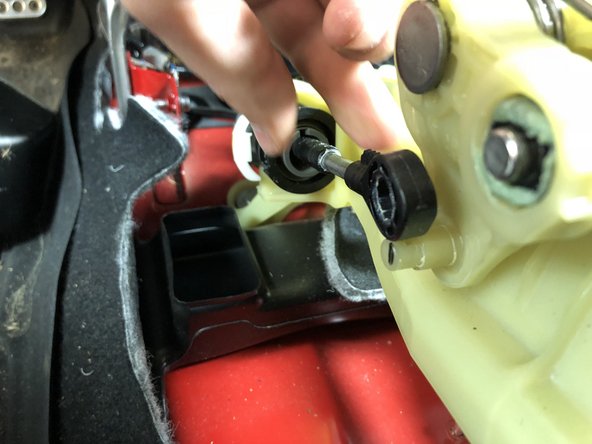
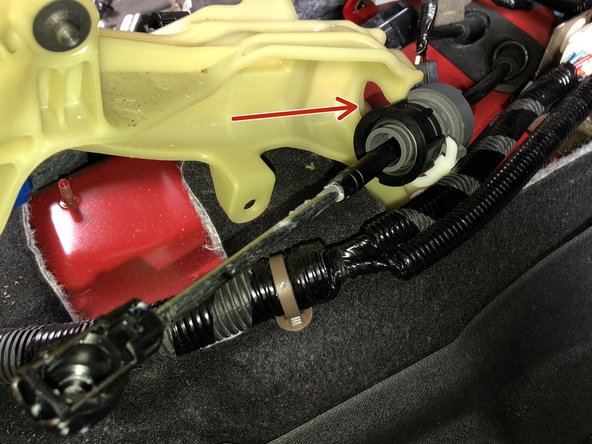
Rotate the cable lock all the way and slide it out of the shifter assembly.
-
These cable locks are spring-loaded and can be difficult to remove. Be patient and wiggle the cable assembly as you spin it. Once you have turned it enough, it will slide right now!
-
-
-
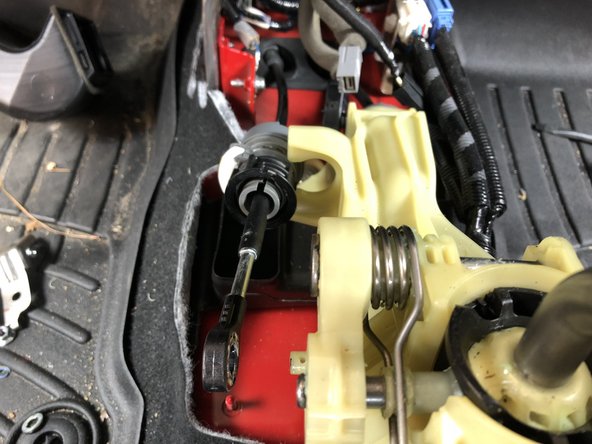
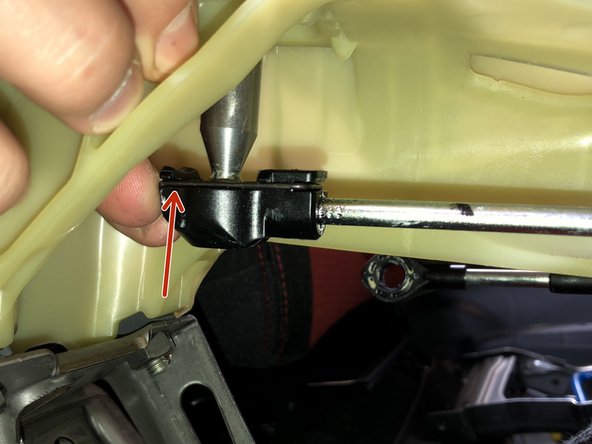
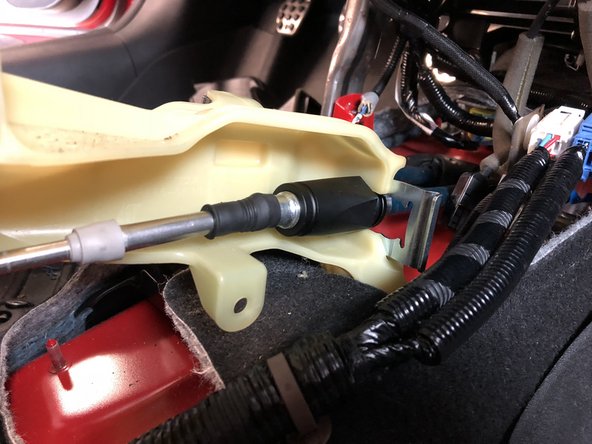
Underneath the shifter, locate the RH side cable end. To remove this from the shifter, you will need to pry the metal spring clip apart. Once the metal clip is off the cable end will slide off the shifter cup.
-
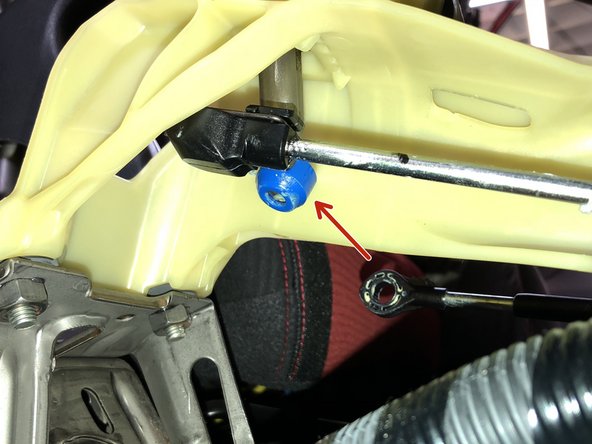
Repeat the process in step 7 and remove the RH side cable from the shifter. Unlock it, spin it, slide it out.
-
-
-
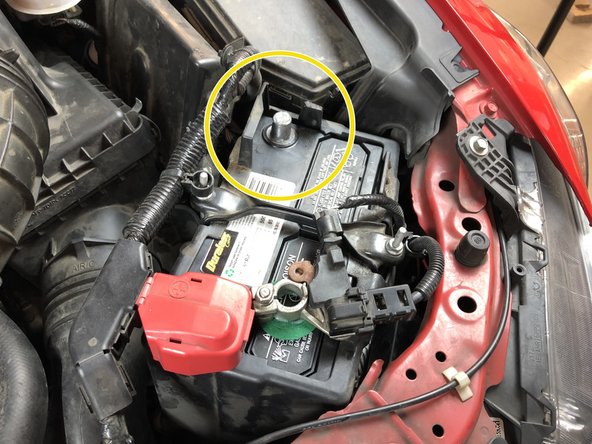
Under the hood, disconnect the battery for safety.
-
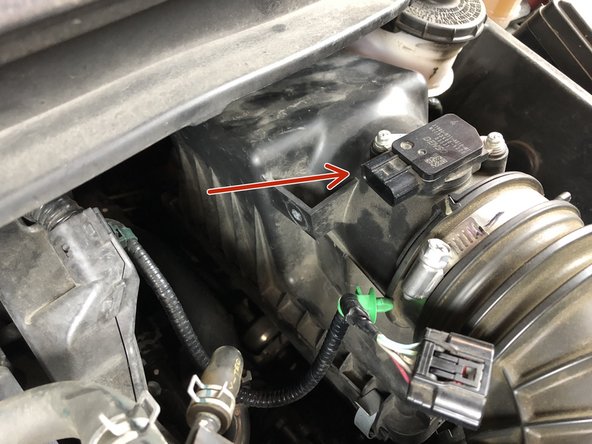
Disconnect the MAF sensor located on the end of the air box.
-
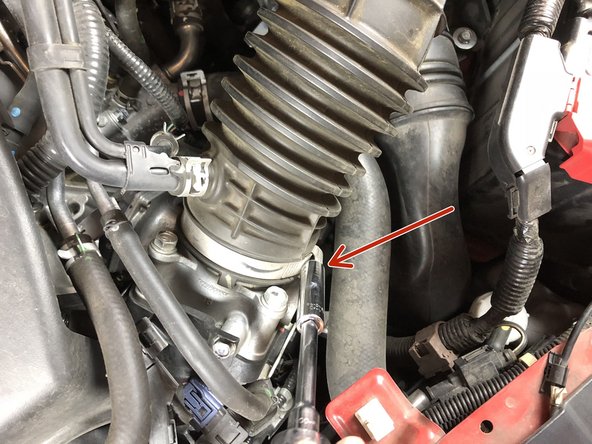
Unbolt the clamp on the end of the air intake pipe.
-
-
-
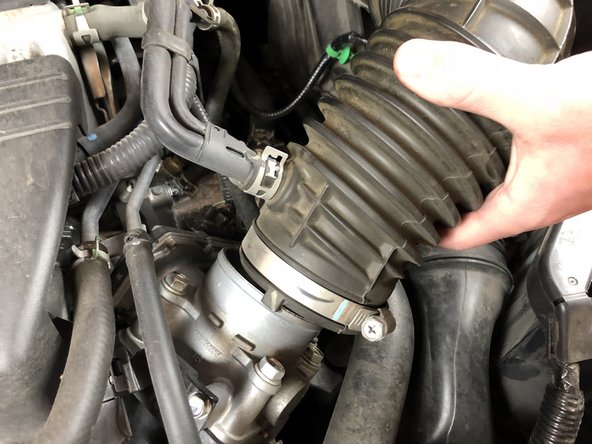
Use pliers to remove the remaining tube on the air intake pipe.
-
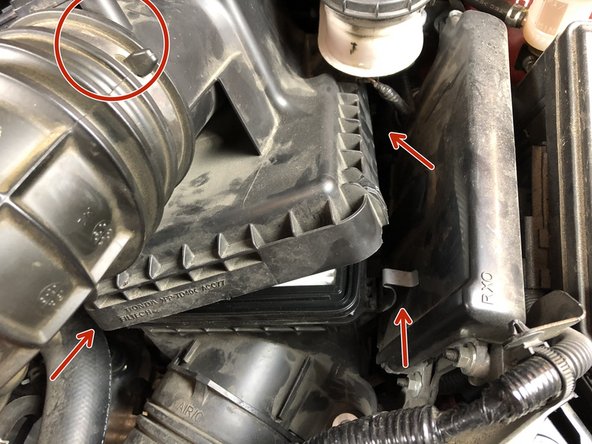
Unsnap the airbox cover and remove it completely from the car.
-
-
-
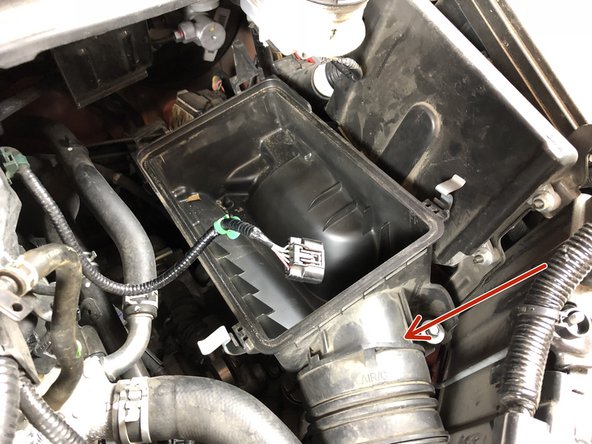
Disconnect the airbox from the lower tube.
-
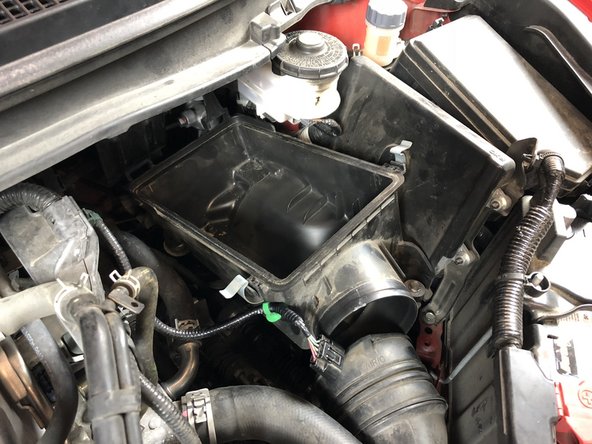
Using both hands, pull up on the airbox to remove it from the rubber mounts. This will expose the shifter cables.
-
-
-
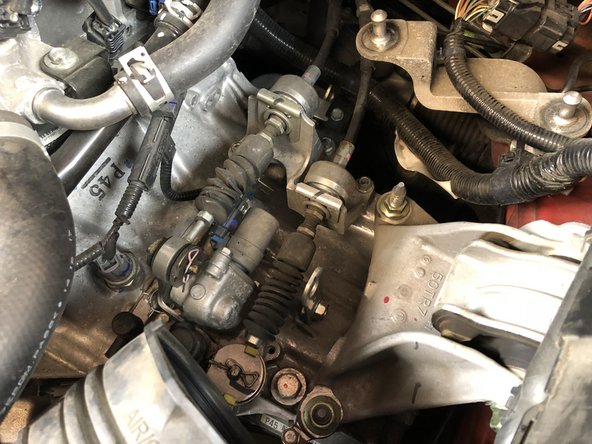
Remove the two shifter cable retaining clips. Use a Flathead screwdriver or pliers and pry them up.
-
Remove the shifter cable pins and slide the cables off the transmission.
-
-
-
Use jackstands or lift to access the underside of your car.
-
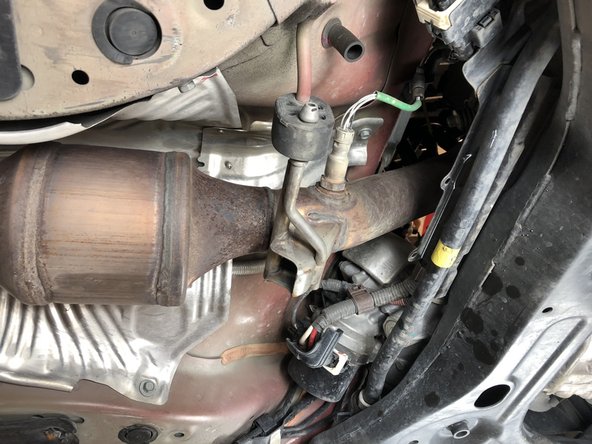
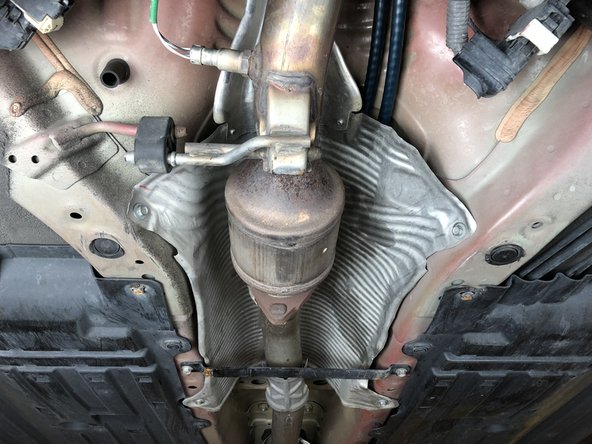
Locate the exhaust heat shield and remove the 10mm bolts holding it in place.
-
Remove the lower chassis brace.
-
Make sure your car is cold. Wear gloves while handling the heat shield because it is super sharp and will cut your hands.
-
Removing the heat shield completely is the best option. It is possible to slide it down and access the necessary parts but since it is so sharp it can get dangerous. You will need to bend it to get it out completely.
-
-
-
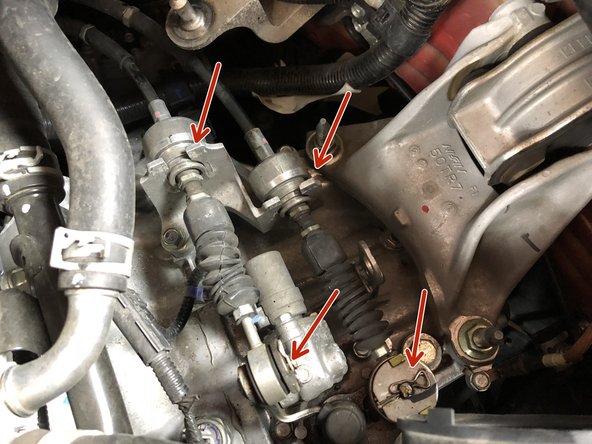
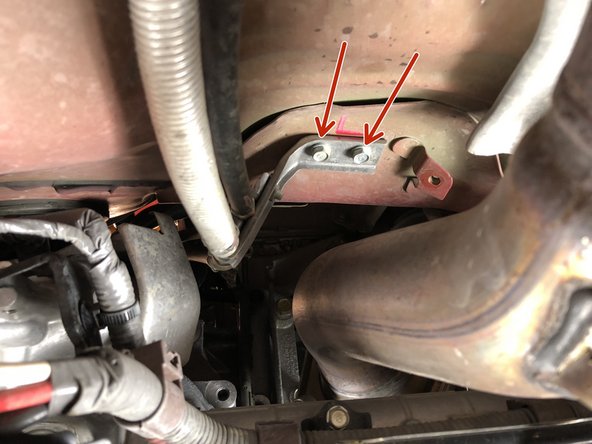
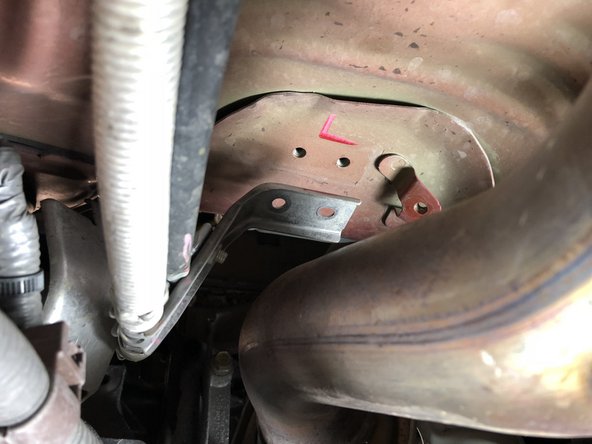
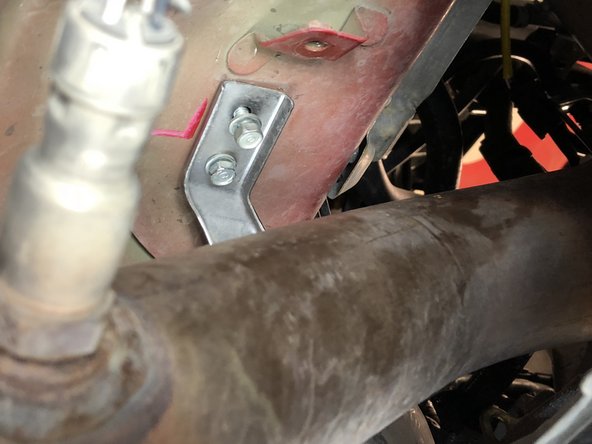
Once the heat shield is out of the way, located the 10mm nuts and bolts holding the shifter cables in place.
-
-
-
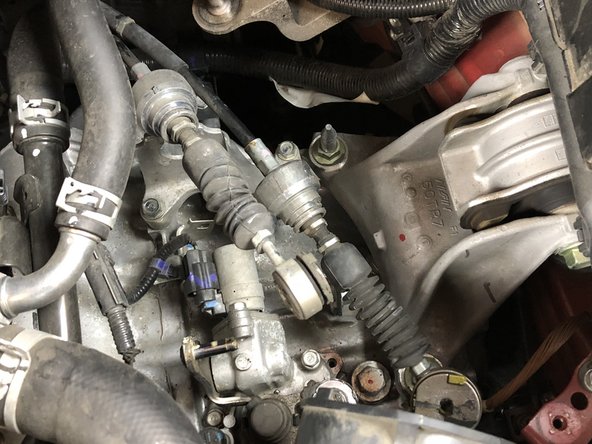
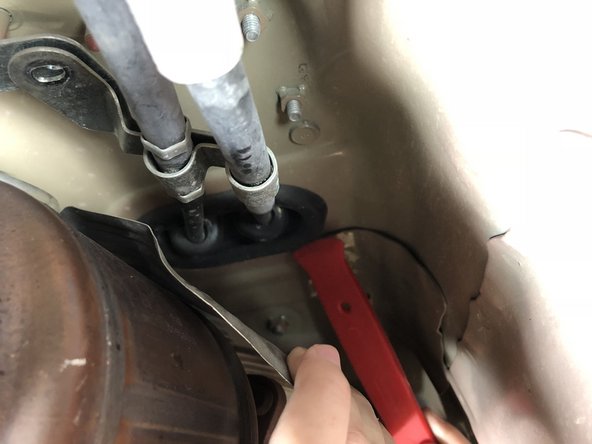
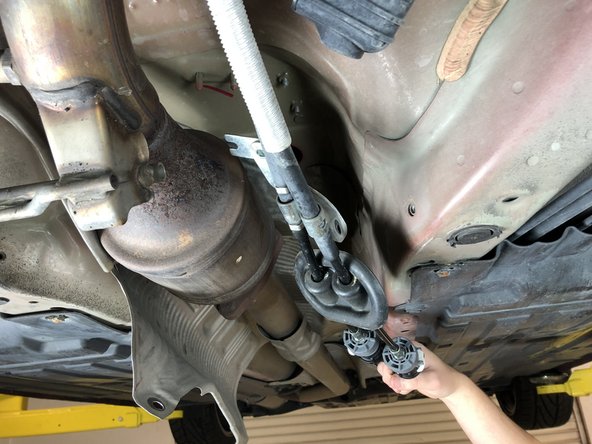
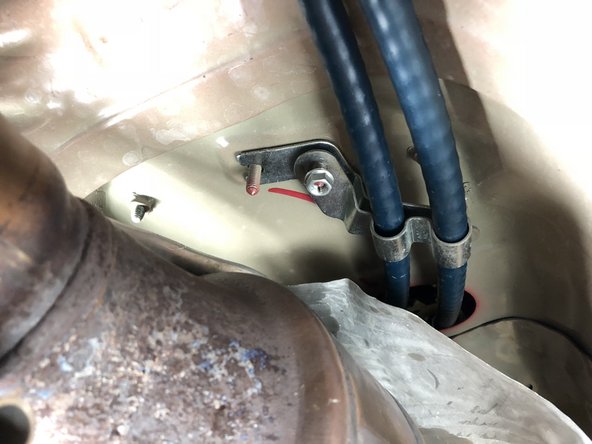
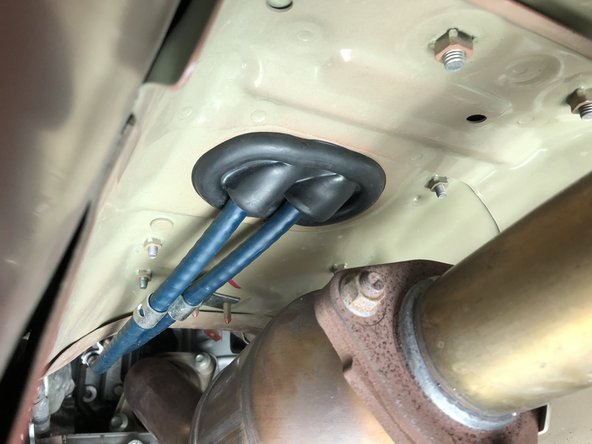
Using a plastic pry tool or flathead screwdriver, work your way around the edge of the shifter cable seal.
-
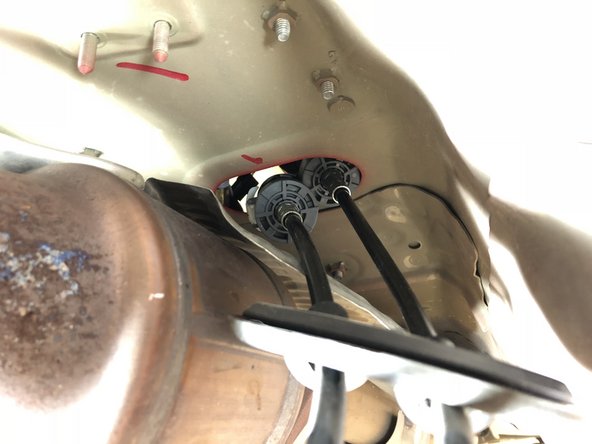
Once the seal is loose it should just pop out. This is the last thing holding the cables to the car.
-
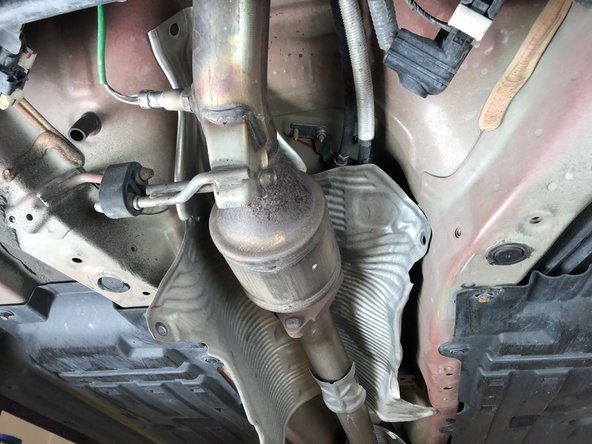
Remove the cables completely. Let the shifter side of the cables hang and slide the transmission side out through the bottom.
-
-
-
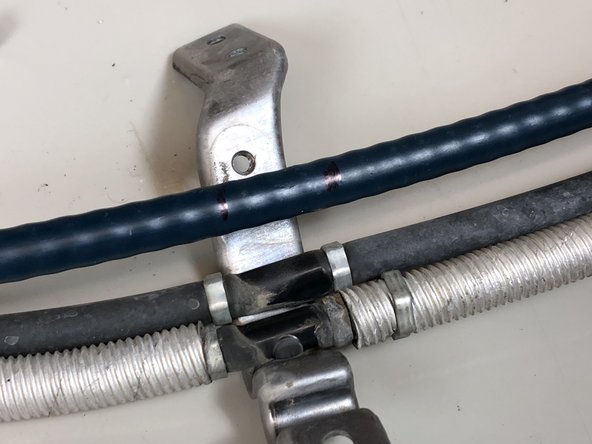
The Hybrid Racing shifter cables require the use of the factory brackets and seal.
-
With the cables side-by-side, line each cable up and mark the location of the bracket. This will be used to transfer the bracket to the proper location on the new cable.
-
Repeat these steps for the second bracket.
-
You will need to leave the main bolt loose as this will affect how the cables fit into the car. Putting this bracket in the wrong spot will prevent you from being able to connect the cables on one end. Leave them loose until they are installed in the car.
-
-
-
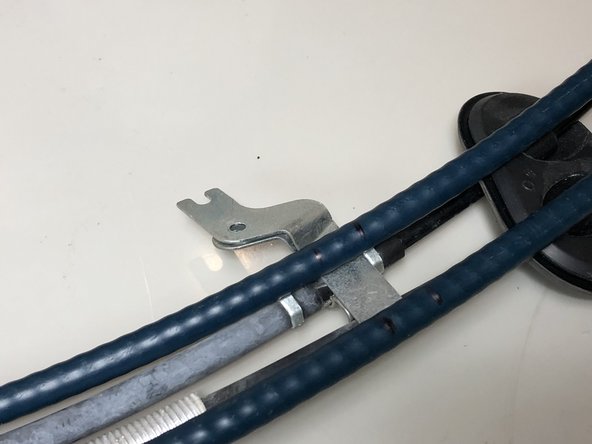
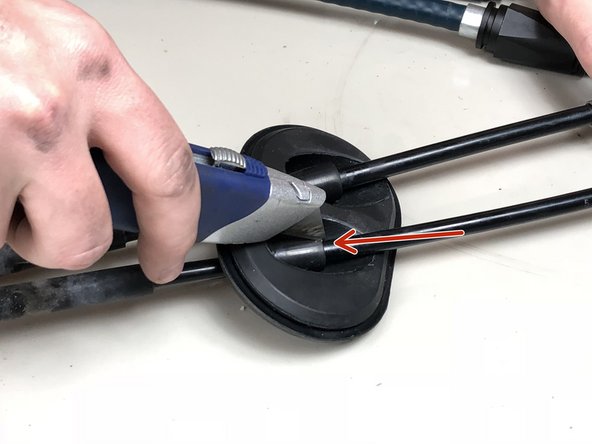
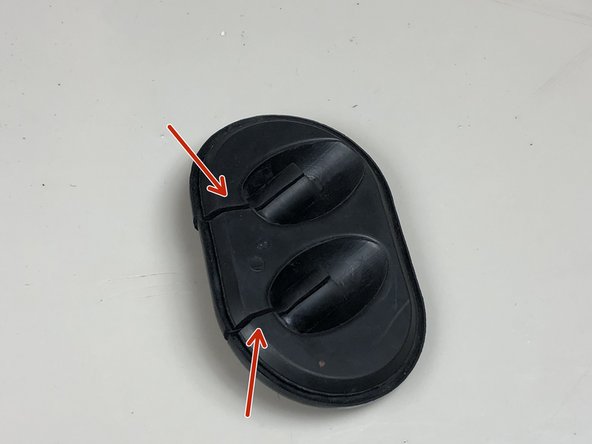
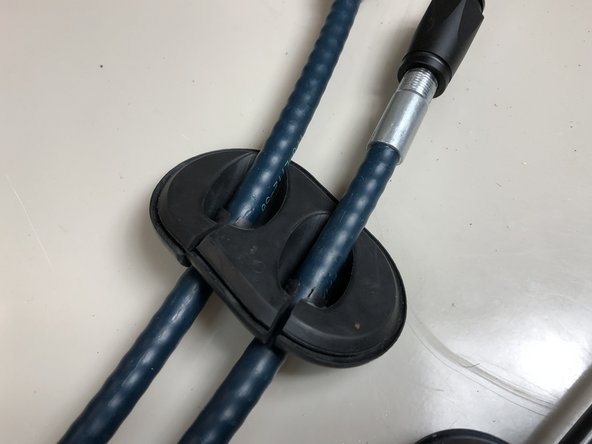
Use a razor blade or knife and slice the cable grommet down the center of each cable.
-
Two cuts will allow the shifter cable grommet to slide off.
-
-
-
Since the Hybrid Racing shifter cables have a larger and reinforced core they are thicker than OEM.
-
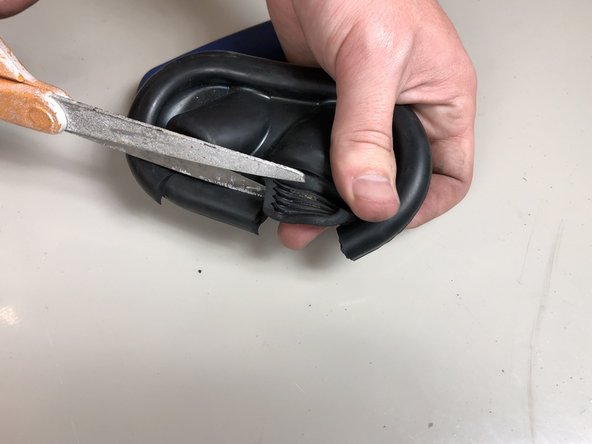
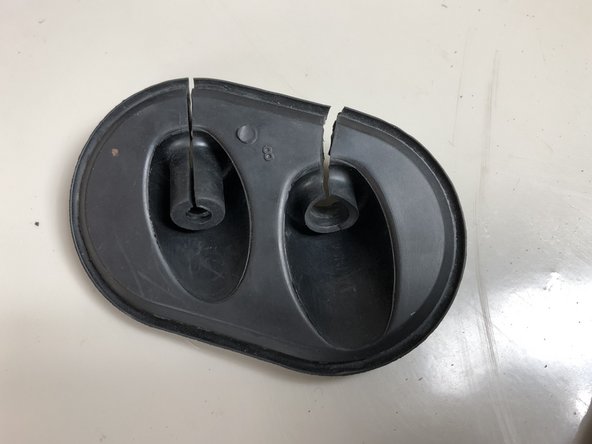
Cut the OEM cable seal down the inner groove to enlarge the opening.
-
Slide the OEM cable seal on the Hybrid Racing cables. Make sure you cut enough so the seal will squeeze around the cables.
-
Placement of the seal isn't critical right now as you'll adjust it once the cables are in the car.
-
-
-
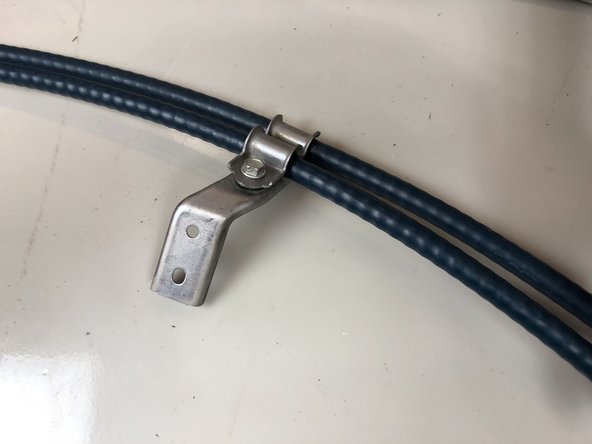
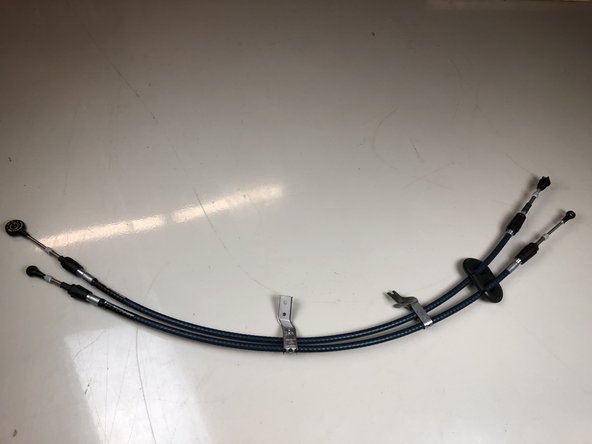
A completed set of Hybrid Racing shifter cables are ready to be installed back into the car.
-
install the shifter cables in the order you removed them. Feed them into the engine bay and then into the cabin.
-
These shifter cables are thicker and stiffer which makes them more difficult to maneuver. Take your time.
-
-
-
Install the cable seal. Make sure the entire seal is in the groove otherwise it will pop out.
-
Mount the shifter cables on the factory brackets. LEAVE THEM LOOSE FOR NOW.
-
-
-
Insert the shifter cables into the cable bracket. Use the factory cable clips to hold them in place.
-
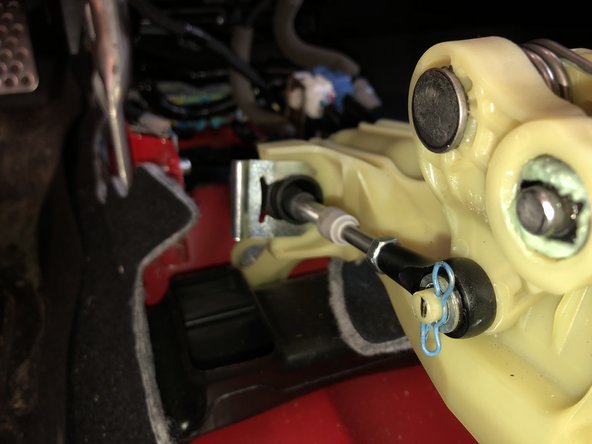
Slide the shifter cable end links onto the gear selector. Use the supplied cotter pins to hold them in place.
-
-
-
Slide the shifter cable into the shifter base and secure it using the supplied shifter cable C clip.
-
Install the cable end onto the shifter cup. Make sure to snap it in place and be sure the metal retaining clip is secure.
-
Repeat the same steps on the LH side of the shifter. Install the cable using the supplied clip, then slide on the cable end securing it with the retaining pin.
-
-
-
Complete the shifter cable install by securing the shifter cable brackets under the car.
-
Reinstall the exhaust heat shield and make sure it is not contacting the cables in any way.
-
Follow the guide to re-install the factory parts.
-


Cancel: I did not complete this guide.
One other person completed this guide.
