
Difficulty
Easy
Steps
20
Time Required
02:00:00

User-Contributed Guide
This guide is not managed by the site's staff.
Quiz
0
-
-
Begin by removing your shift knob.
-
The OEM shifter may have lock nut holding the stock knob on.
-
-
-
Remove the cup holders and console trim by grabbing the front section (near the shift boot) and pulling upwards. Start near the pockets and work towards the arm rest.
-
Open the cup holder lid and grab the inner corners. You may need to use a plastic pry tool if your console has never been pulled apart. It can be tough the first time but just take your time and pull upwards. There are only clips that hold this part in place.
-
Once it pops free, rotate it forward to expose the seat heater wiring.
-
-
-
Use your hands and pull the upper compartment outward. Only clips hold this part in.
-
Once it pulls out, remove the light and wire harness clip.
-
-
-
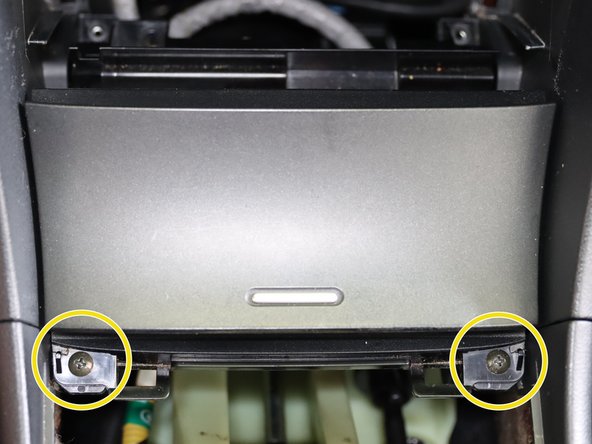
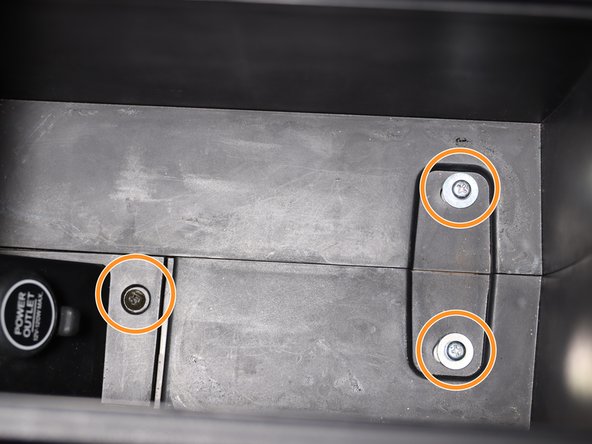
The lower coin pocked is held in with (x4) phillip screws. Two on top, two on the bottom. Remove all of them and the unplug the 12v socket on the back.
-
-
-
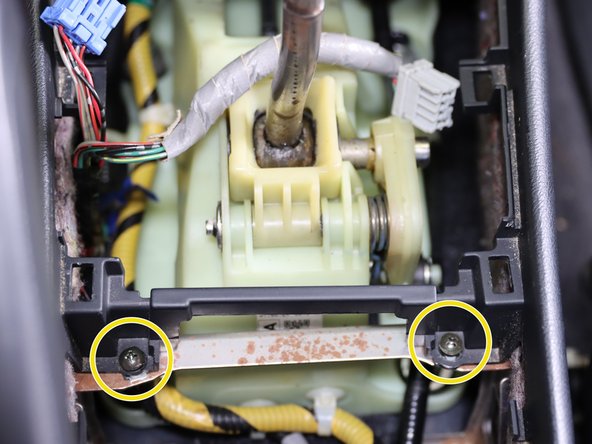
Remove the (x2) phillip screws holding the center console bracket in place.
-
Inside of the arm rest compartment, there are (x3) Phillip screws. Remove all three.
-
The armrest mounting screws are located under the rubber mat. Remove that to expose the screws.
-
-
-
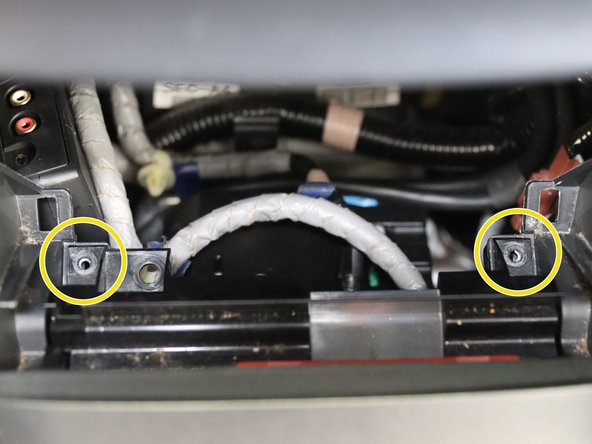
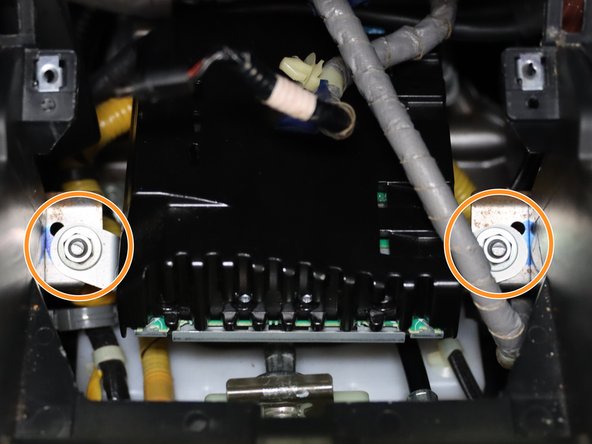
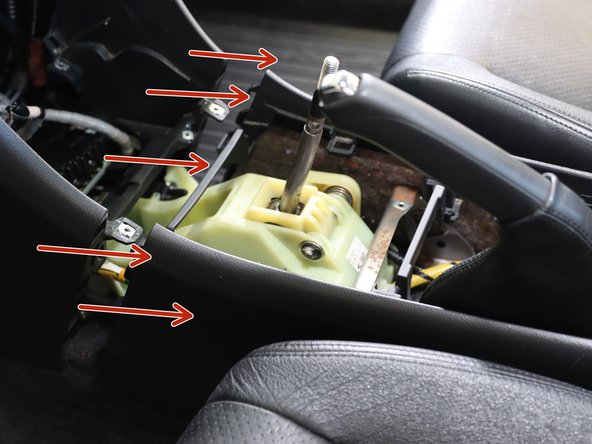
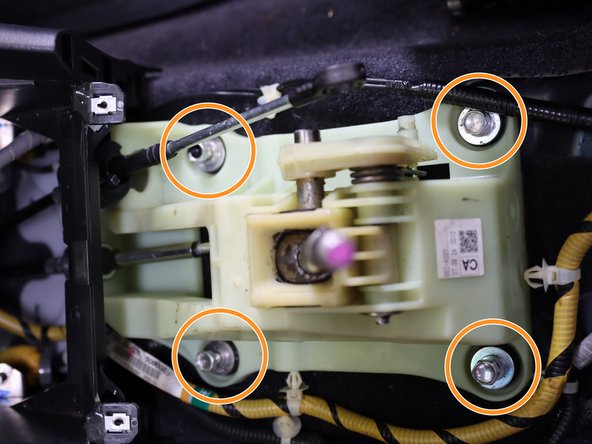
Mounted above the shifter is the stereo amp. There are (x2) 10mm nuts that hold it in place. Circled in orange, remove these two nuts and lift the amp out of the way.
-
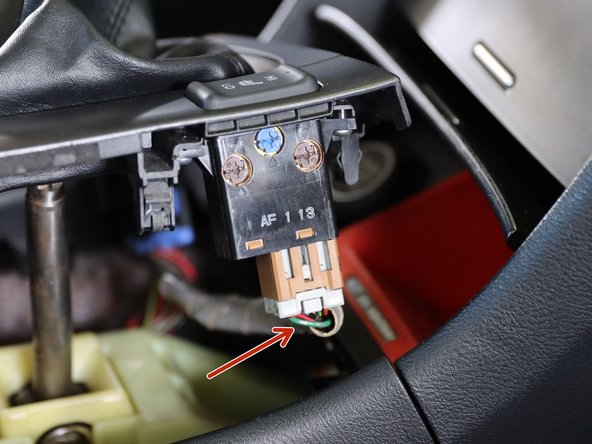
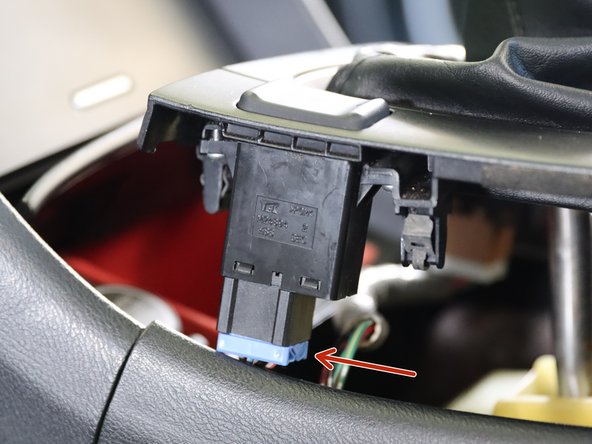
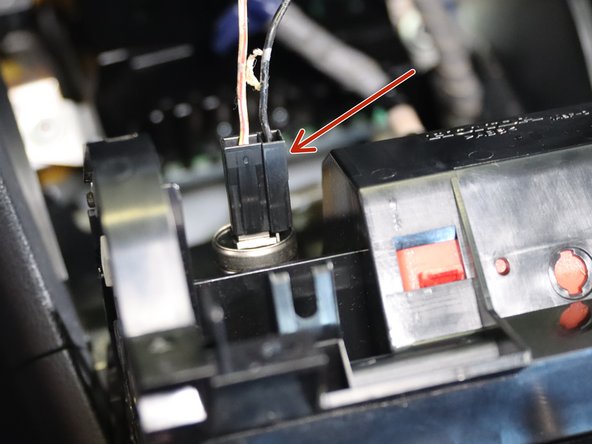
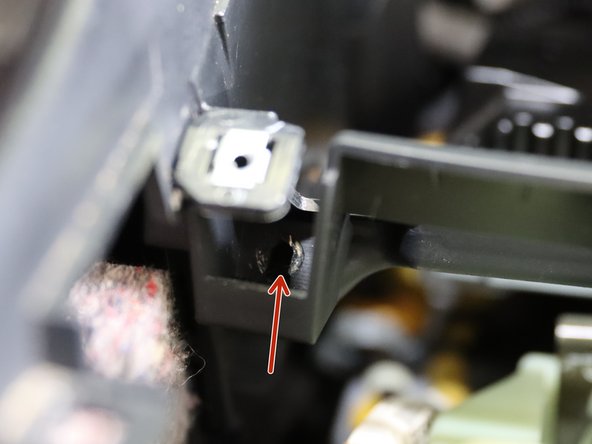
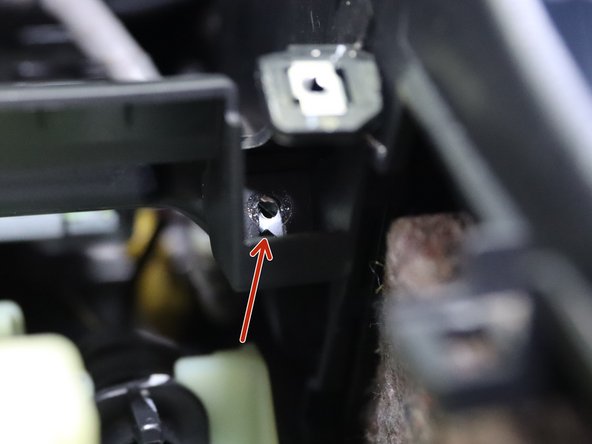
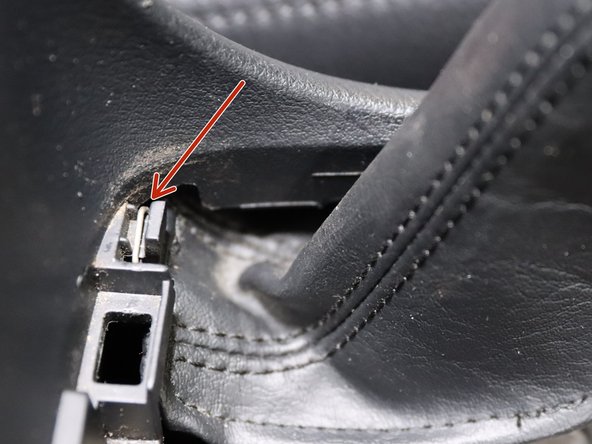
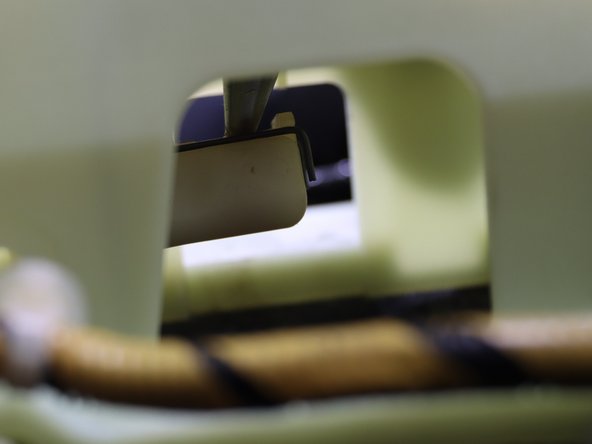
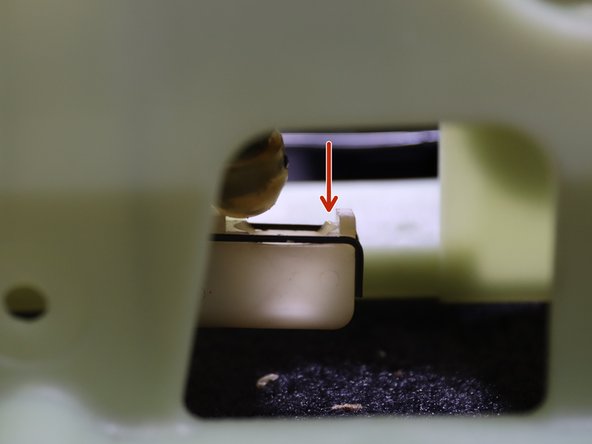
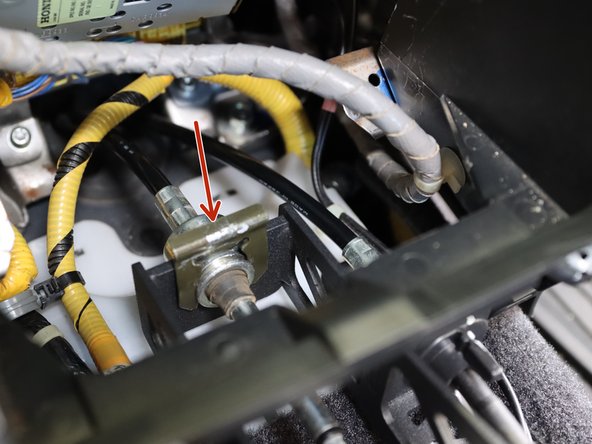
There are (x2) Phillip screws holding the front section of the console to the lower dash. They are hard to see and remove, but must be removed before the console can separate. The red arrows in images 2 and 3 identify their location.
-
-
-
Remove the e-brake boot cover from the console. There is a small metal ring hooked around the top section.
-
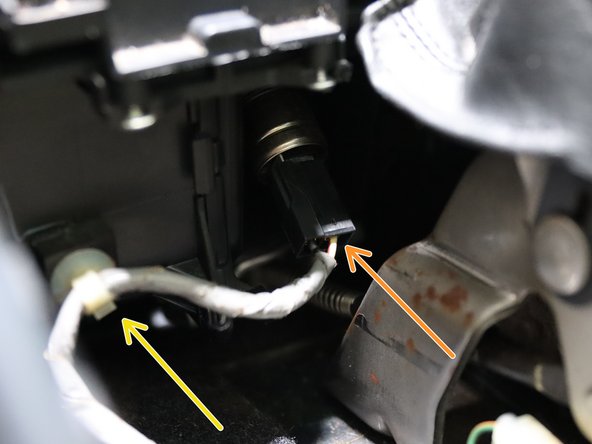
Locate and disconnect the 12v socket connector on the front lower section of the arm rest.
-
Remove the wire harness clip.
-
-
-
Slide the console backwards. Make sure nothing is still connected.
-
Lift the console up from the rear and angle it around the shifter and e-brake handle. Remove it from the car and set it aside.
-
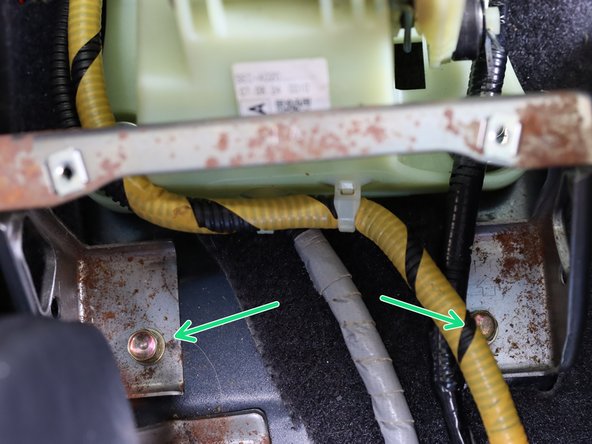
Remove the (x2) 10mm bolts holding the center support bracket in place.
-
-
-
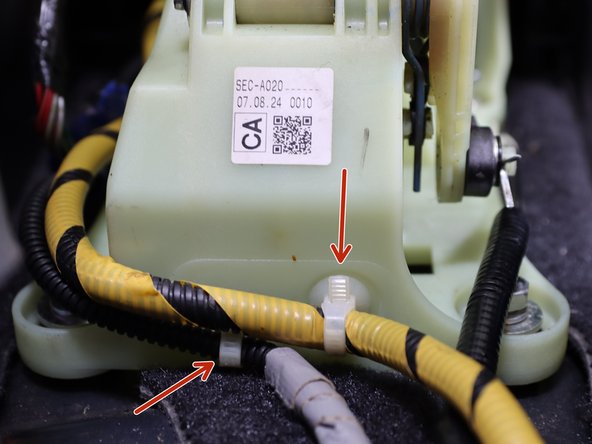
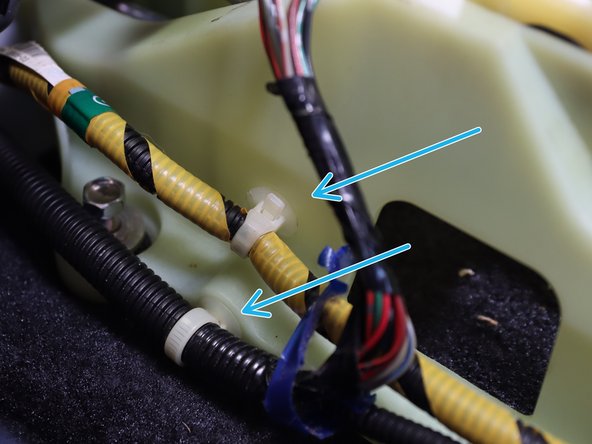
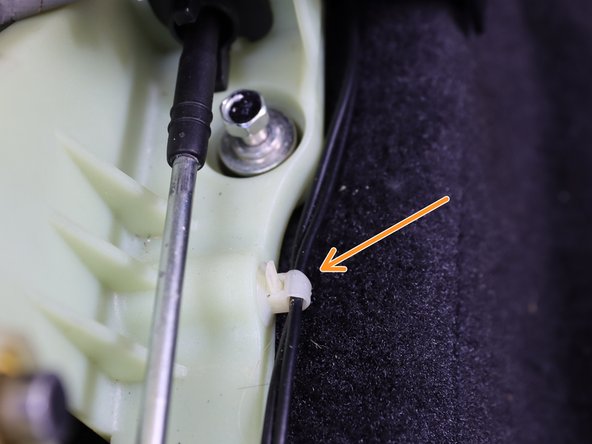
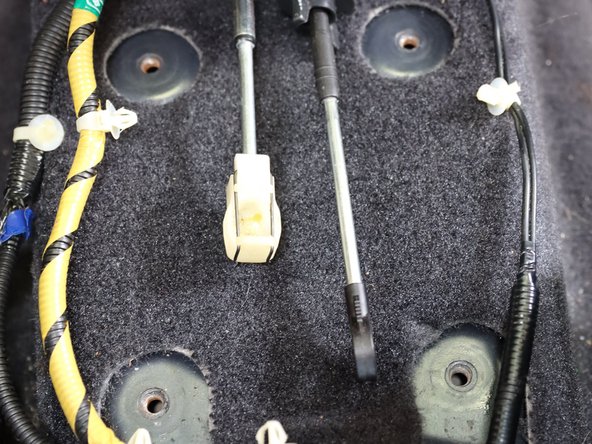
Use a plastic pry tool and remove all (x5) plastic wire harness clips from the OEM shifter.
-
-
-
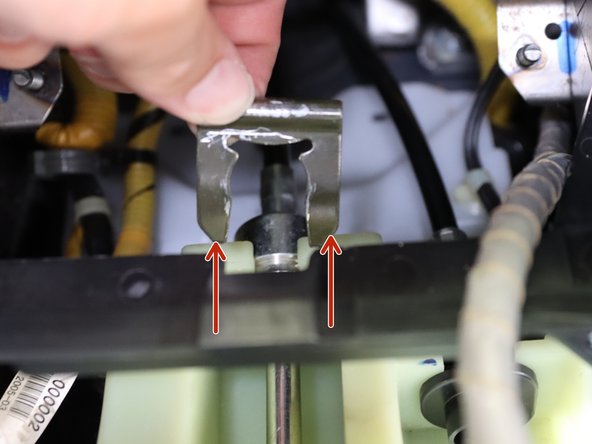
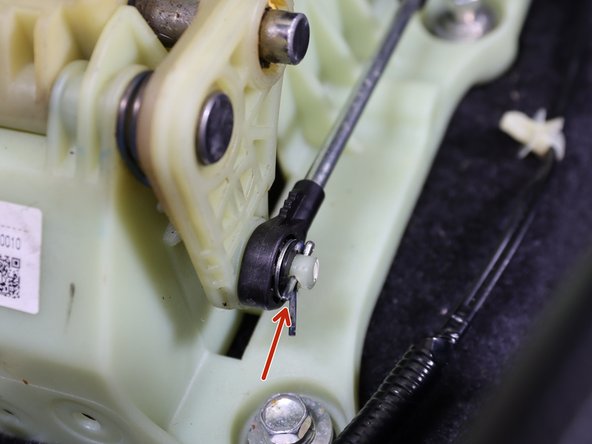
Remove the C clip holding the shifter cable in the shifter. These are typically tough to remove so use a flat head screw driver and pry it up. Pliers also help.
-
Remove the shifter cable cotter pin and slide the shifter cable off.
-
-
-
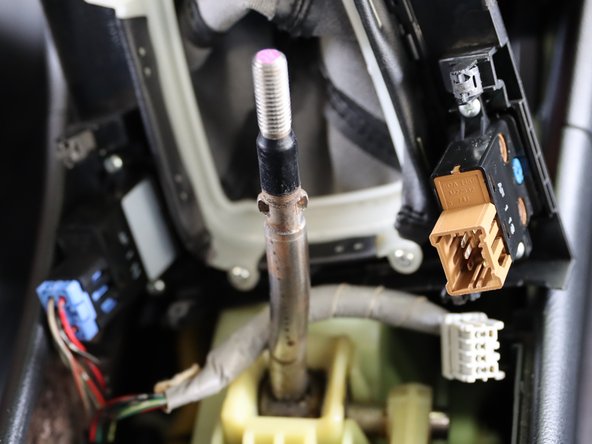
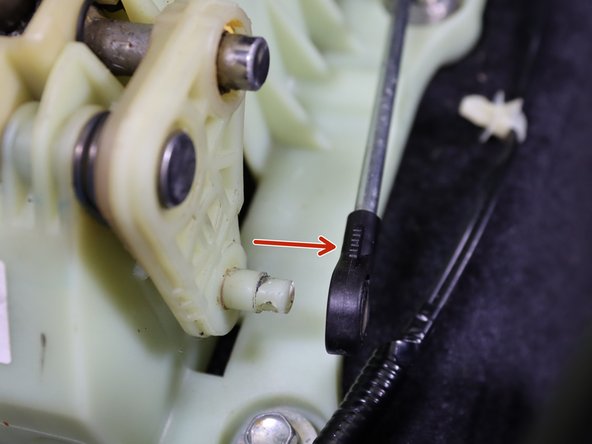
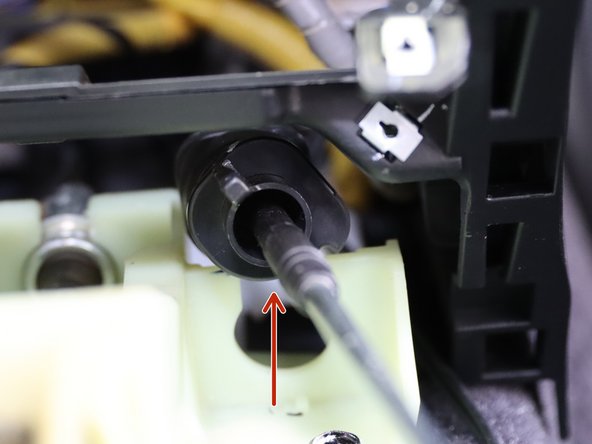
Remove RH side shifter cable from the shifter by twisting the cable counter-clockwise and lifting it up.
-
Once it spins, slide it upwards removing it from the shifter.
-
-
-
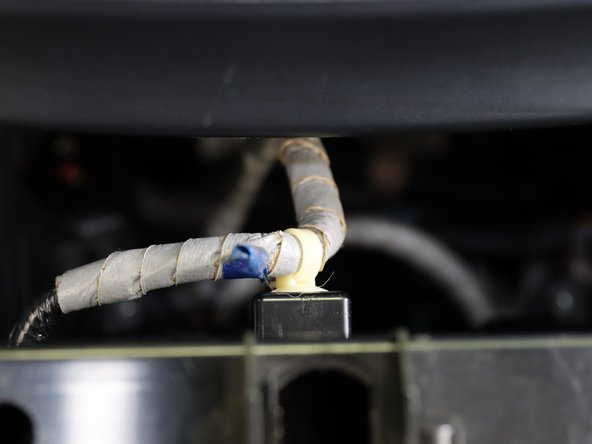
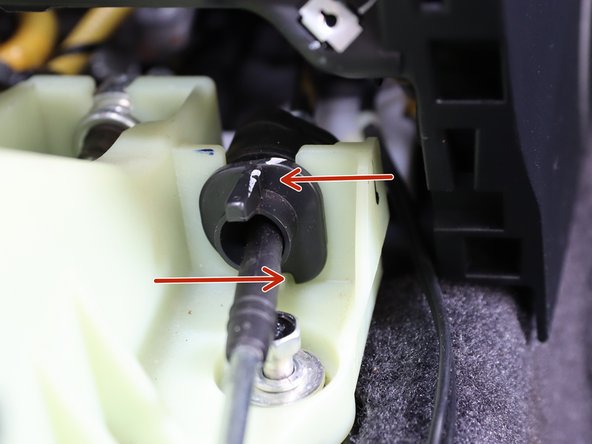
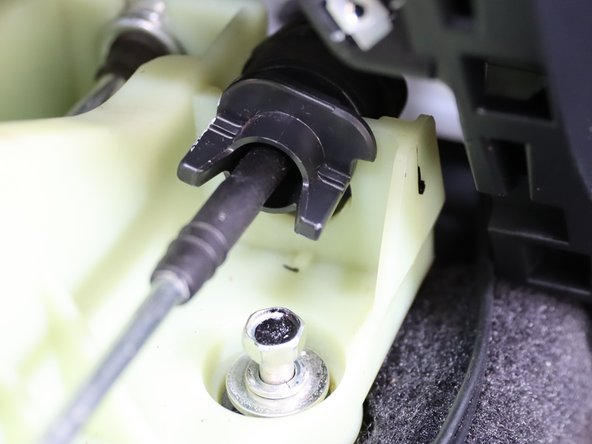
Remove the LH shifter cable from under the shifter. Spread the clip apart and pull it downward away from the shifter.
-
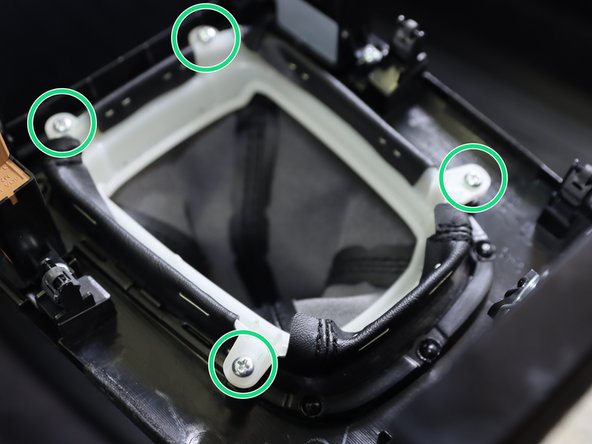
Now remove all 4 shifter mounting bolts.
-
-
-
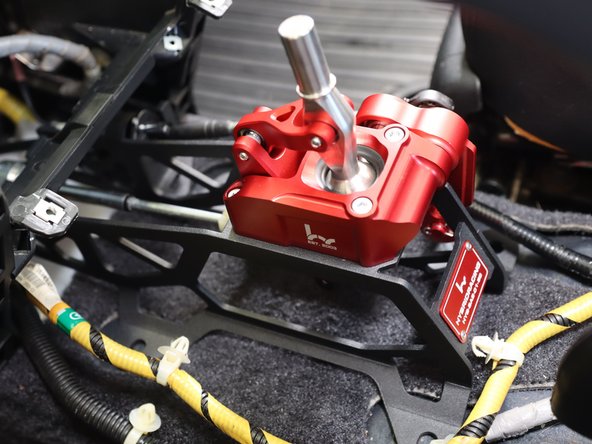
Once the shifter has been removed clean the surrounding area and then place your Hybrid Racing shifter in place.
-
Install the shifter cables on the HR shifter. You may need to push the cables forward into the floor seal. That is normal.
-
Re-install the shifter cable C clip.
-
Use the supplied zip ties and secure the wiring harness to the shifter base. BE SURE THEY ARE NOT IN THE WAY OF THE SHIFTER ARMS.
-
-
-
Use the supplied the shifter hardware and bolt the HR shifter to the floor.
-
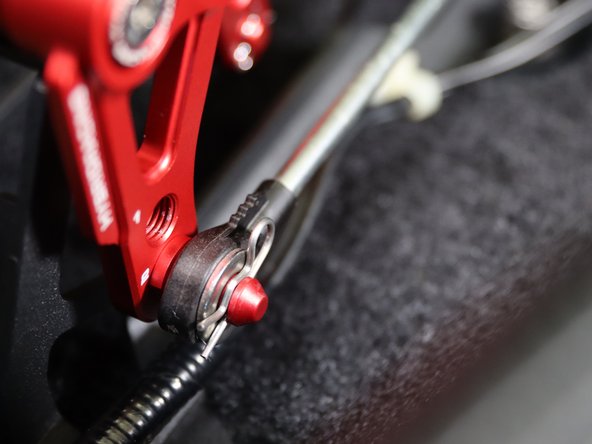
Install both shifter cable end links to the shifter. Use the supplied clip and washer on the RH side cable.
-
Some images may not reflect supplied hardware. *Pre-production items may be shown in these photos*
-
-
-
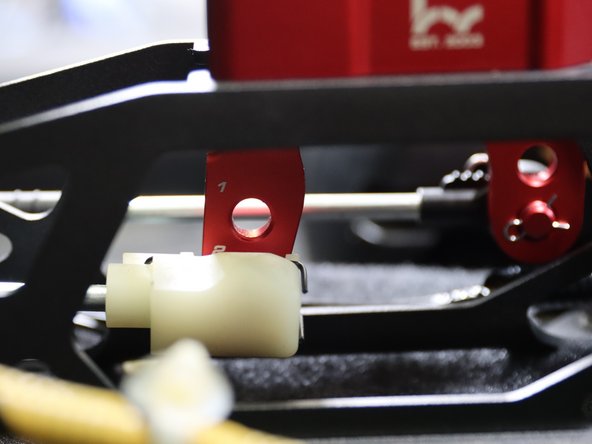
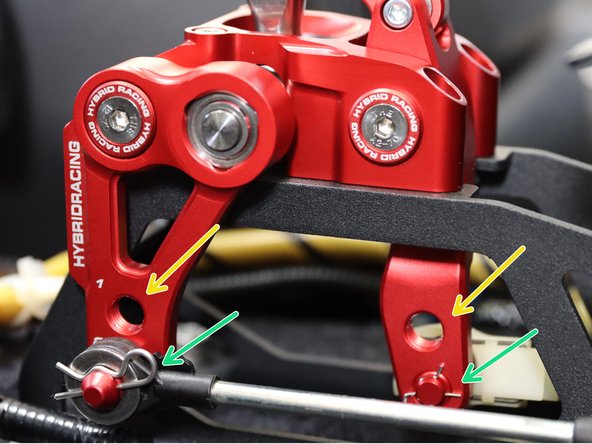
Determine your shortness settings.
-
Each cable has two adjustment settings.
-
Setting (1) is the longer of the two options. Setting (2) is the shortest throw option. You can select the side/side movement independently of the front/back.
-
You do not need to choose both (2) or (1), you can use any combination.
-
-
-
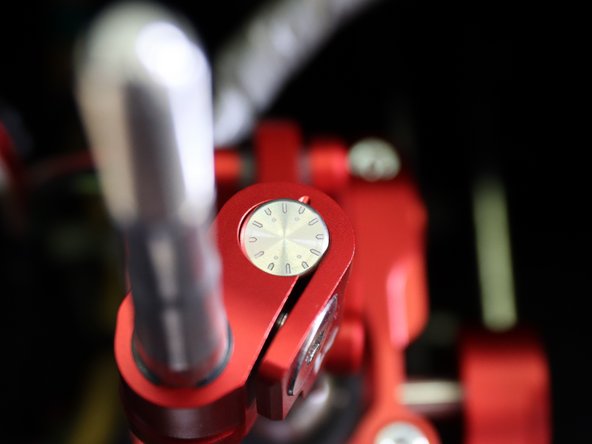
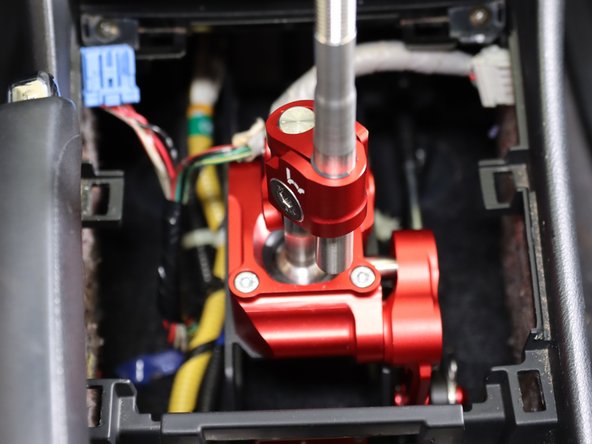
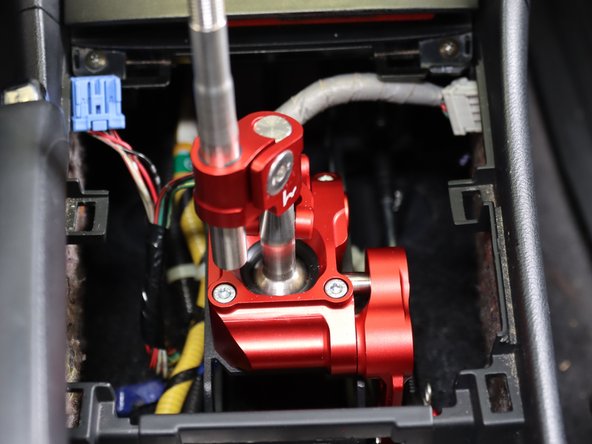
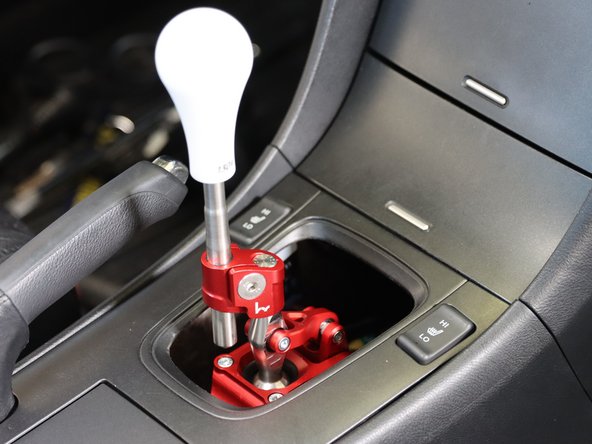
Determine the ideal position for the shifter offset and rod height.
-
The shifter offset can be rotated depending on your driving position. RHD & LHD cars are compatible.
-
-
-
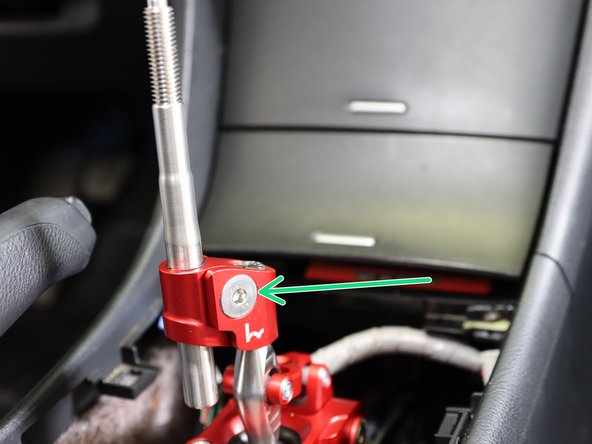
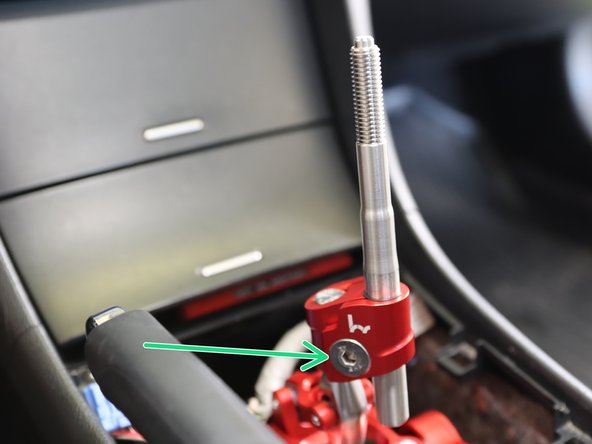
The offset has two bolts that hold it together. One will swivel the base, one will allow the upper rod to be raised or lowered.
-
Make sure these are tight before driving the car.
-
-
-
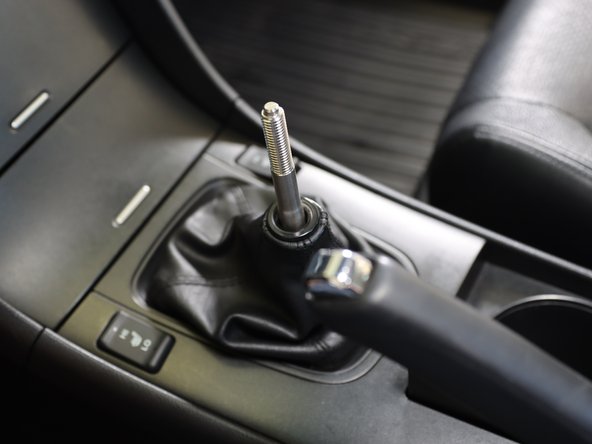
Reinstall the console by following these steps in reverse.
-
Our shifter works with the factory boot and console. Depending on the offset location and rod height the factory boot may be too short to use a boot collar.
-
If you prefer removing the shift boot, simple remove the 4 mounting screws and it will expose the shifter through the console.
-


2 Comments
The OEM shifter has an Electronic lockout that prevents you from entering Reverse when attempting to move from 5th to 6th. Is this feature maintained in this Shifter Assembly?
Cole Cooper - Resolved on Release Reply
The lockout is located on the transmission, not the shifter assembly. The reverse lockout function is fully retained and works as normal.