Difficulty
Very easy
Steps
3
Time Required

User-Contributed Guide
This guide is not managed by the site's staff.
-
-
Use these steps as a GENERAL guide to locate and install the K-Series Detent springs.
-
The transmission pictured is a K20A2 trans case. The detent spring locations will be the same for the K20A/A2/A3 & Z1 case. The K24 & K20Z3 transmission cases are slightly different, but all are in a similar spot.
-
You may need to remove the engine mount if you are doing this install while the transmission is still in the car. Some installs, like the Acura TSX CL7/CL9 can be accomplished without removing the mount.
-
-
-
Remove each of the three gear selector detent springs. On the K-Series transmission, they are located on the top of the trans case.
-
Once you remove the detent spring housing, remove it slowly making sure no dirt or debris fall into the case.
-
Be sure to keep the washer in place and do not lose it.
-
Swap the stock, silver spring for the longer black HR detent spring. The ball detent should remain inside of the transmission case.
-
Notice the Black Zinc Chromate plated HR springs are taller. You will remove the silver springs and install the taller ones.
-
-
-
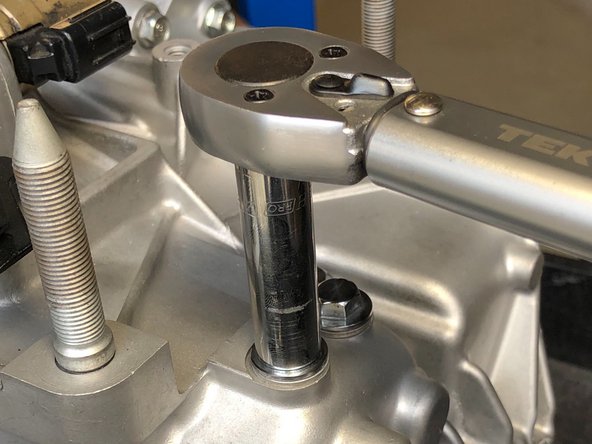
Once you have changed all three springs, thread the bolts back in by hand.
-
Be VERY CAREFUL, these are thin-walled bolts that can strip very easily.
-
Use a torque wrench and tighten to 16 lbf-ft (29 N-m / 3.0 kgf-m). Do NOT over tighten as the bolts will break.
-
Once all bolts have been torqued to spec, row through all gears and confirm everything feels right. The forward and back motions (1st to 2nd, 2nd to 3rd, etc) will be noticeably stiffer and direct. This is normal, the springs will require more force to move due to the increased length.
-
Check for leaks after driving, if all is good, enjoy!
-