Difficulty
Easy
Steps
15
Time Required
02:00:00

User-Contributed Guide
This guide is not managed by the site's staff.
Quiz
0
-
-
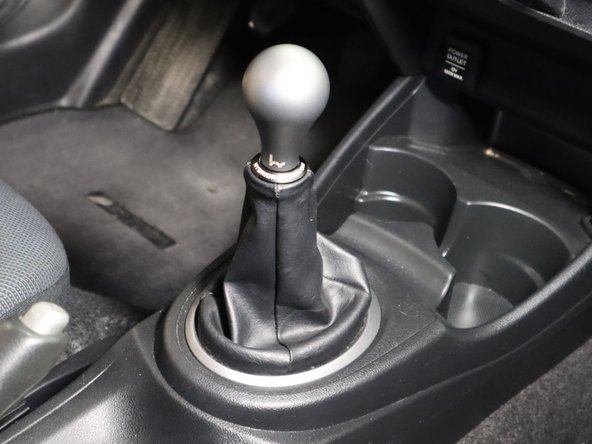
Begin by removing the shift knob and shift boot if one is installed.
-
In the bottom of the rear cup holder, remove the mounting screw.
-
-
-
Use a plastic trim tool to remove the center section of the console. It just pops out.
-
Locate the plastic clip holding the front section of the console in place. There is a clip on each side in the footwell. Use a trim tool and remove the clips.
-
-
-
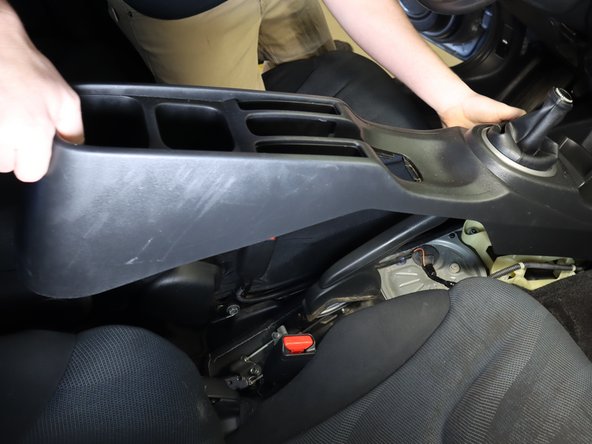
Fold the seats back so it is easier to remove the console.
-
With the e-brake pulled up, slide the console backwards and tilt the rear up.
-
Remove the console from the car.
-
-
-
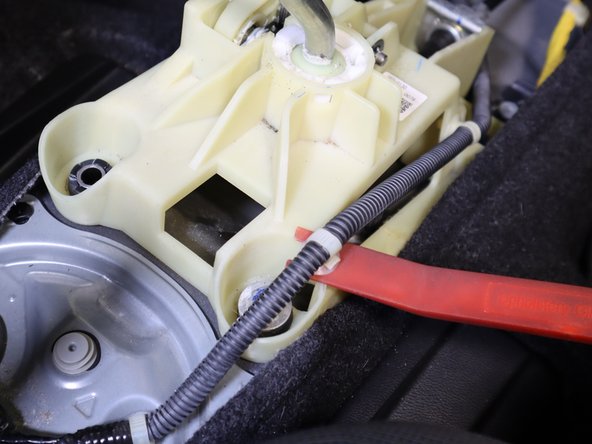
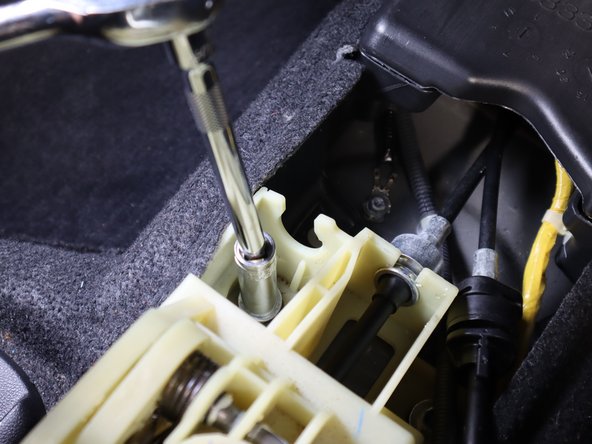
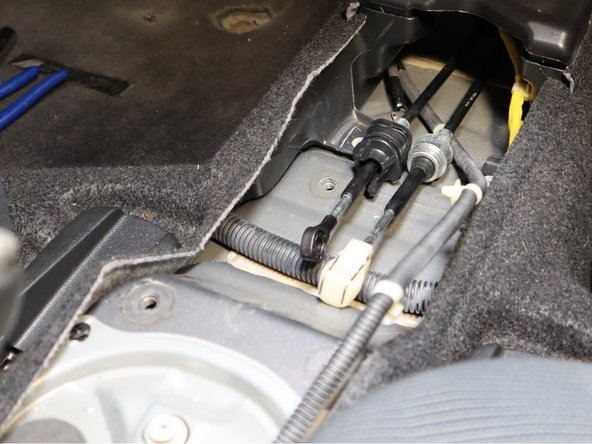
Remove the Left Rear shifter bolt.
-
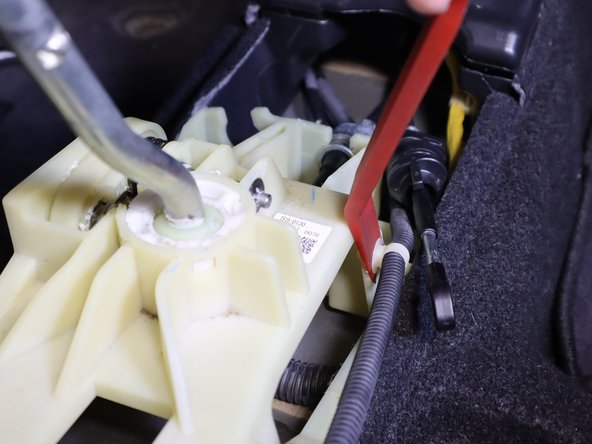
Use a trim tool to remove the clip holding the wiring harness in place. Once the wiring harness is out of the way, remove the Rear Right hand side bolt.
-
-
-
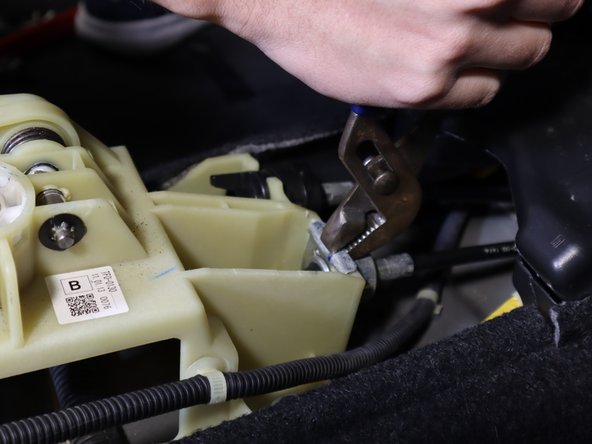
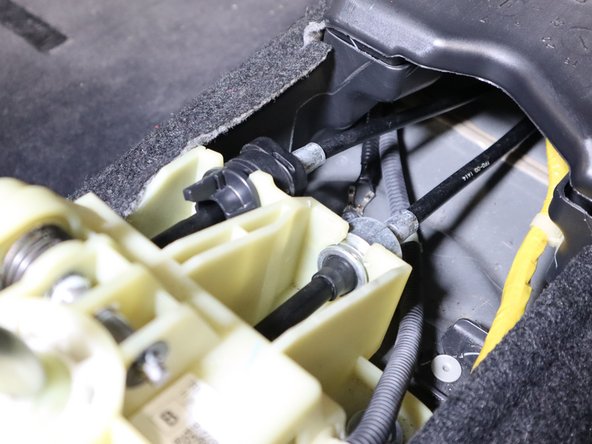
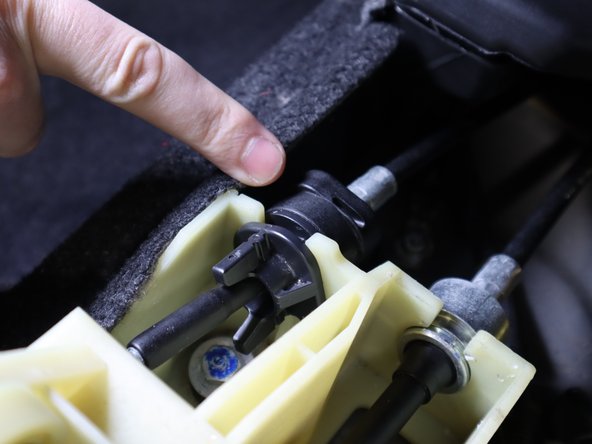
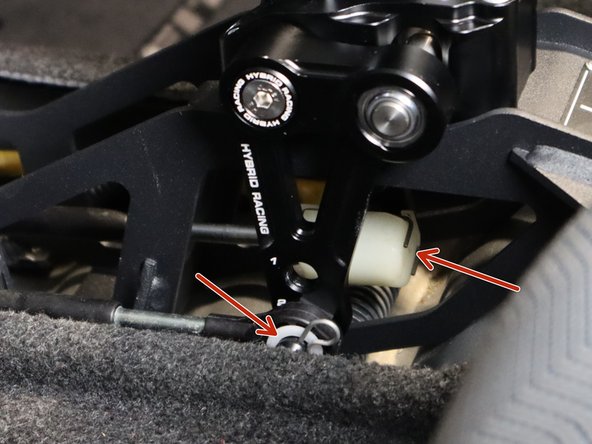
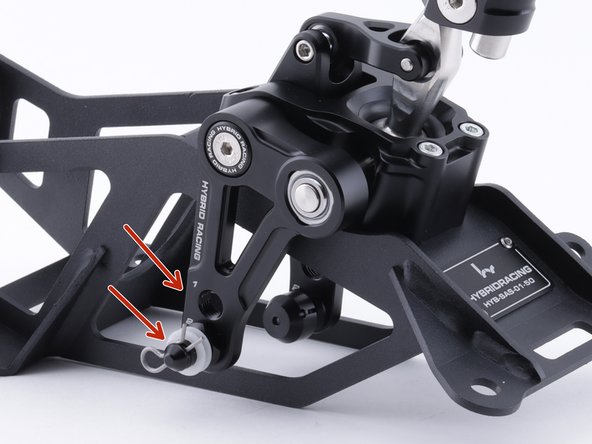
On the front of the shifter, use a pair of pliers and remove the right side shifter cable clip.
-
On the left side of the shifter, remove the pin that holds the left hand shifter cable in place. Slide it off the pin.
-
-
-
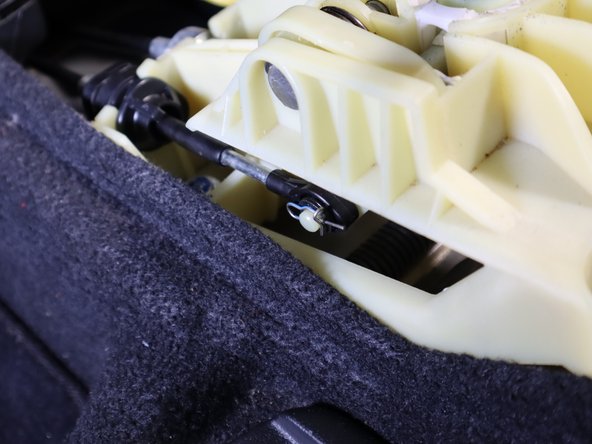
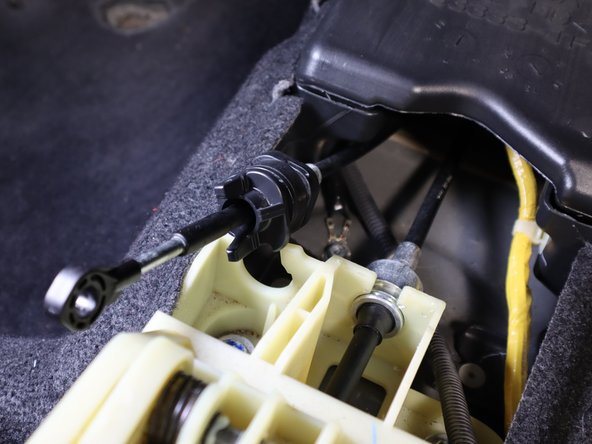
Remove the shifter cable by rotating the tab counter clockwise and sliding it out. The cable should be free.
-
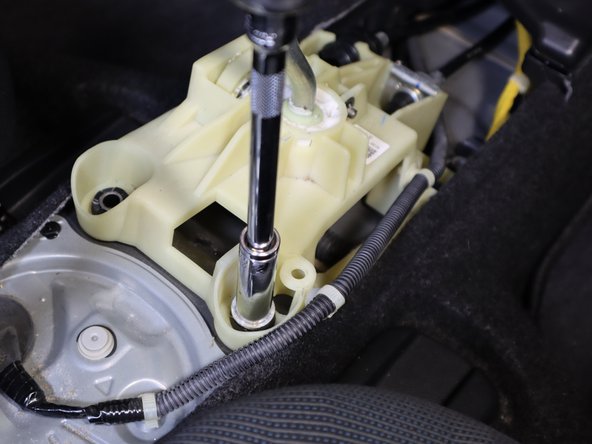
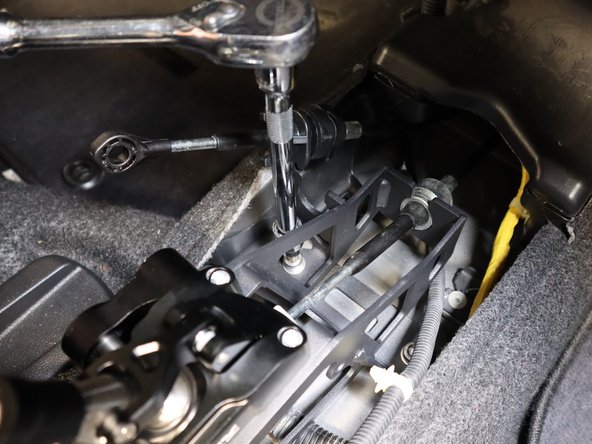
Remove the Front Left bolt from the shifter assembly.
-
-
-
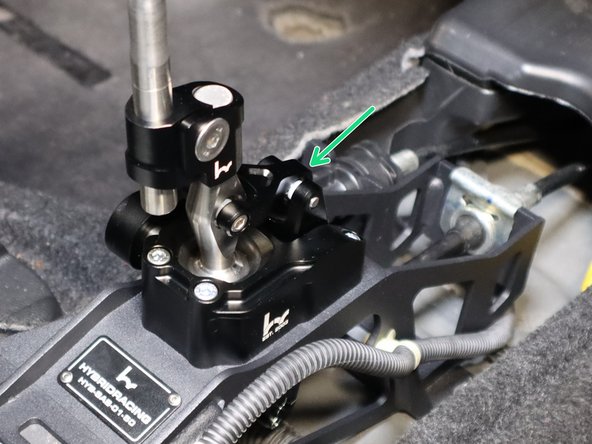
On the right side of the shifter, remove the wiring harness clip and move it out of the way.
-
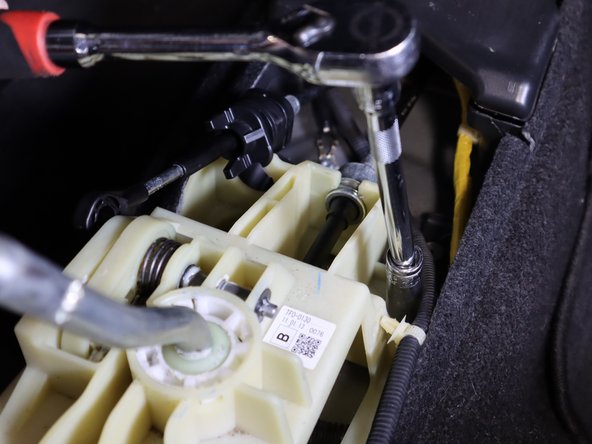
Remove the last shifter mounting bolt.
-
-
-
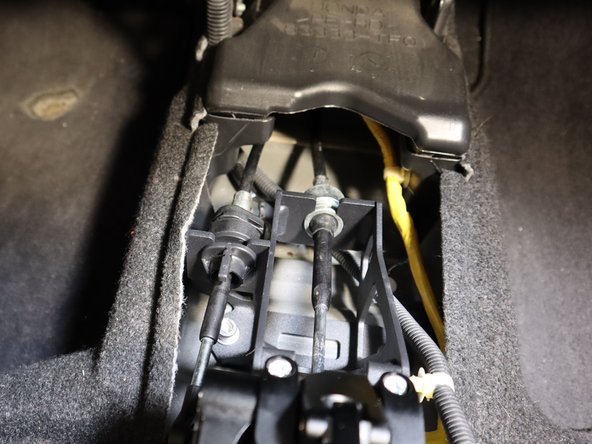
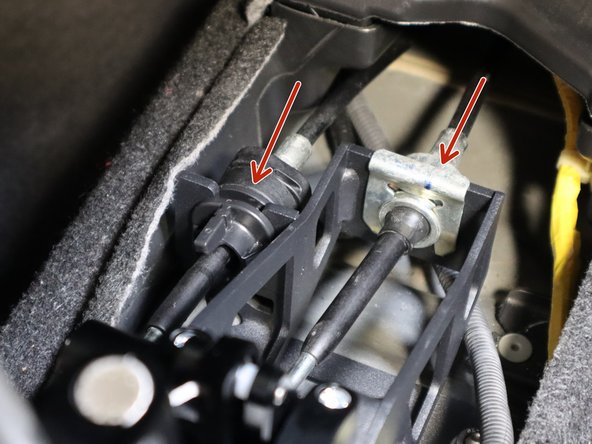
Pick the shifter assembly up and remove the shifter cable.
-
To remove the cable, spread the metal clips apart and the end link will slide off the shifter cup.
-
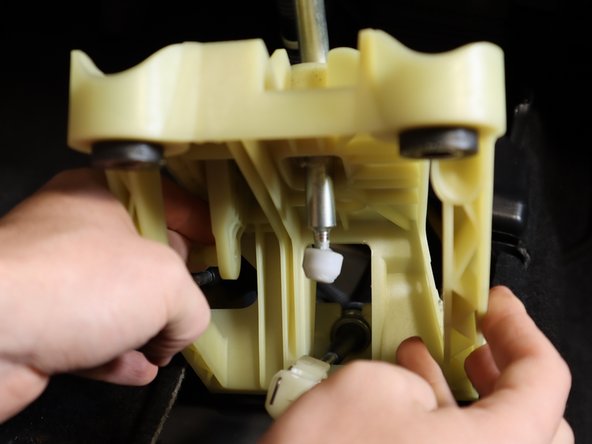
Remove the shifter assembly from the car.
-
-
-
Install the Hybrid Racing shifter using the supplied mounting hardware.
-
You may need to push the RH side cable through the grommet/floor to get it to align with the new shifter. This is normal.
-
-
-
Re-install the shifter cables and shifter cable clip.
-
Be sure to rotate the LH cable and slide it into place. Make sure it rotates back to lock into place.
-
Re-install the shifter cables. Use the supplied clip for the LH cable, and rotate the RH cable so it clips onto the new cup.
-
-
-
Once everything is tight, row through the gears to ensure everything feels normal. You should make your adjustments now before re-installing the console.
-
Depending on how you adjust the shifter, the offset / front wishbone may contact the stock shift boot surround. The console has slotted holes so you can loosen the screws and push the console as forward as it will go and then tighten the screws. That should give a few more millimeters of clearance.
-
You can loosen the offset and rotate it to your preference or driving position. You can also loosen the other bolt to raise or lower the knob height.
-
-
-
Front/Back Cable - Setting 1 - 20-32% shorter
-
Front/Back Cable - Setting 2 - 37%-45% shorter
-
Left/Right Cable - Setting 1 - 5%-18% shorter
-
Left/Right Cable - Setting 2 - 24%-35% shorter
-
-
-
The Hybrid Racing shifter comes pre-assembled with the SH (SUPER HARD) spring. This spring offers a snappy return however requires more force to move. If you feel this is TOO hard and would like to change to the H (HARD) Spring (included with the shifter) follow these steps.
-
If you are happy with the feel and function, enjoy your shifter and do not continue.
-
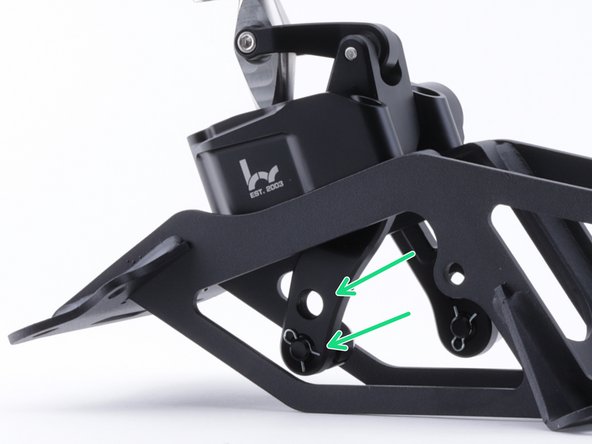
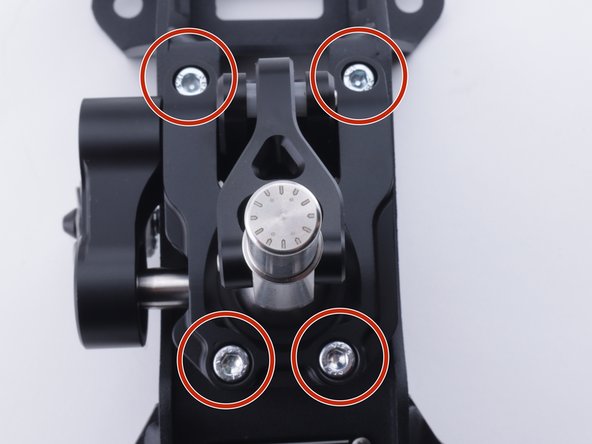
Begin by locating the four mounting bolts. These these bolts hold the aluminum shifter section to the steel frame.
-
Use a 4MM Allen and remove the mounting bolts in a cross pattern. Loosen each bolt a little at a time.
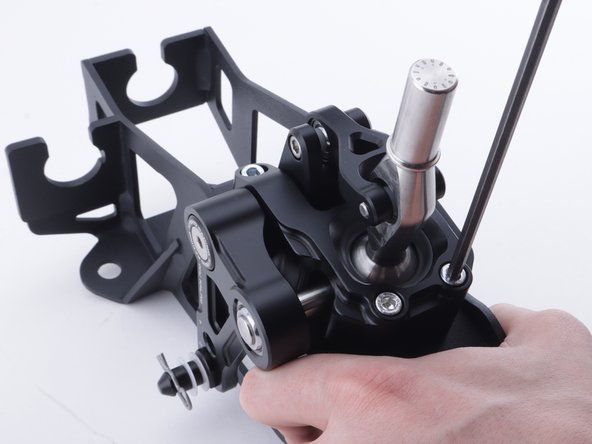
-
The entire assembly is under pressure so take your time removing the bolts. A little at a time until they are all loose. Be prepared to hold the housing as the spring can pop suddenly.
-
-
-
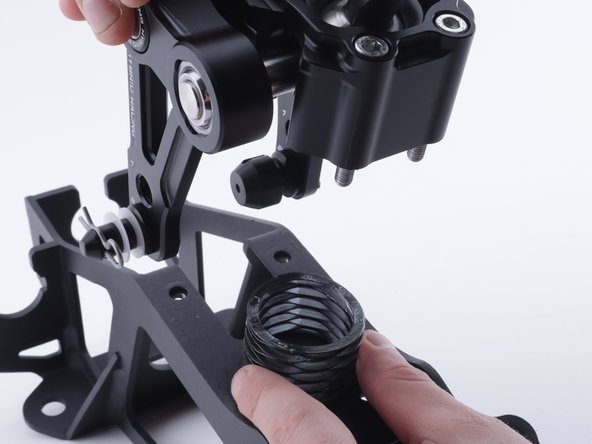
Remove the upper assembly from the shifter base. You can leave all of the hardware in place.
-
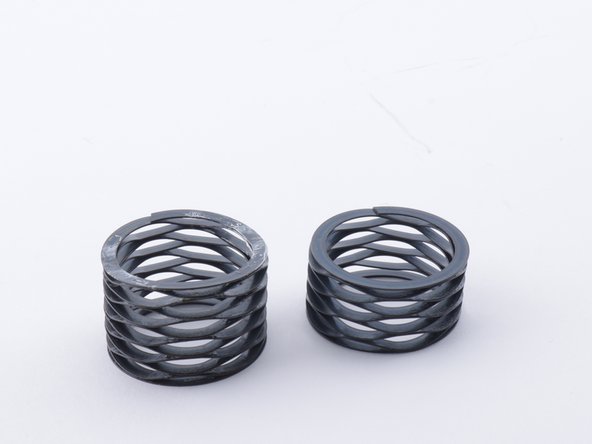
The SH Spring is considerably taller than the H Spring. This is an easy way to tell them apart at a glance. You can also compress them in your hand to feel the difference.
-
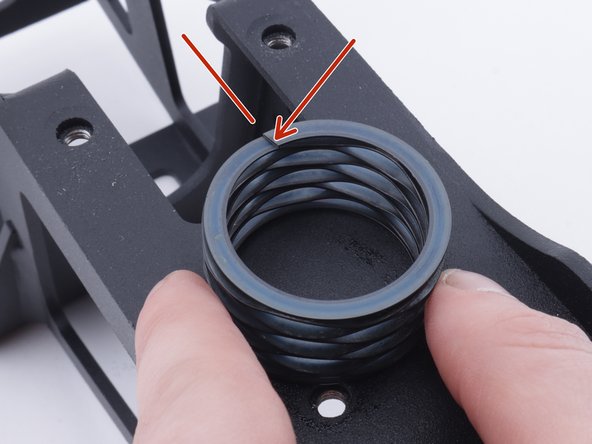
Install the new spring on the shifter base.
-
Be sure to align the spring groove at the 12 o'clock position. This groove should not be on the sides. Do not install the spring in any position other than shown in the image.
-
-
-
Tighten the screws down in a cross pattern. Make sure the spring does not get sandwiched between the lip of he aluminum housing. If it does, you won't be able to fully tighten the base.
-
Once the spring is in place and the bolts are tightened confirm there is no gap between the housing and the base.
-
Torque all 4 bolts to 6ft-lbs in a cross pattern.
-
Enjoy your softer spring!
-