
Introduction
Important!! Please read the entire install guide twice before starting your installation. No really, it’s a good idea to read it twice before you begin so everything goes smooth.
Hybrid Racing is not responsible for any direct or indirect, actual or incidental expense attributed to the use of any performance parts sold by Hybrid Racing LLC. Purchasers agree to all of the terms of this
Tools
Parts
No parts specified.
-
-
First start by pulling the emergency brake up and unscrewing the shift knob. Next, pull the shift boot off by pulling straight up on all four corners of the plastic base.
-
Next, remove the upper center console piece by grabbing right under the shifter and pulling straight up.
-
-
-
Next you will need to use your 8mm nut driver (Phillips head screwdriver will work) to remove the (4) bolts that hold the center console down. The front (2) are right in front of the shifter.
-
-
-
Now that the center console is not attached, slide it into the back seat to give yourself room to remove the cables from the shifter.
-
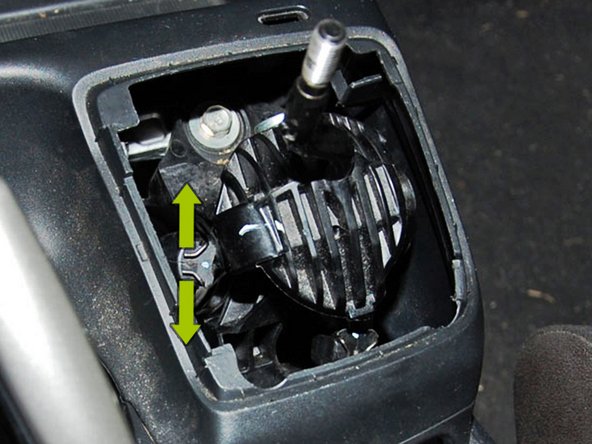
First, using your two thumbs separate the wire clips holding the endlinks on the shifter and slide them off of the ball joints
-
Second, you need to the remove the two bushings located at the base of the shifter by rotating them counter-clockwise and sliding out the side as shown in the next 2 images.
-
-
-
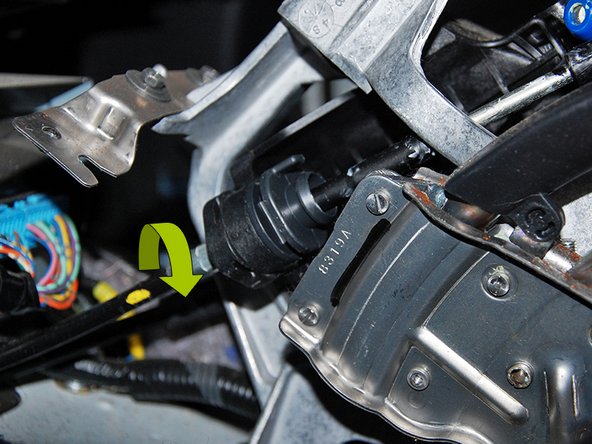
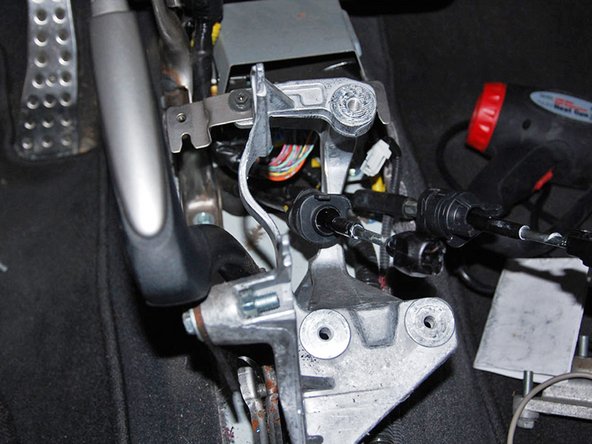
Using your 12mm socket, remove the (3) bolts mounting the shifter to the car.
-
Remove the OEM shifter from the car.
-
-
-
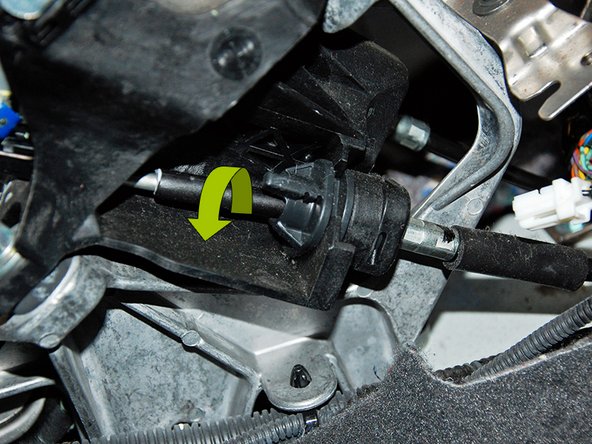
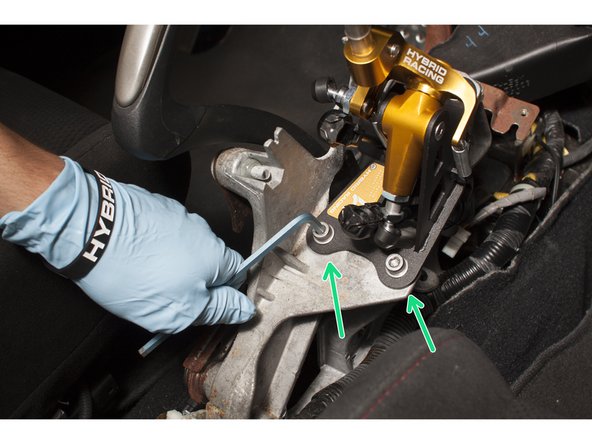
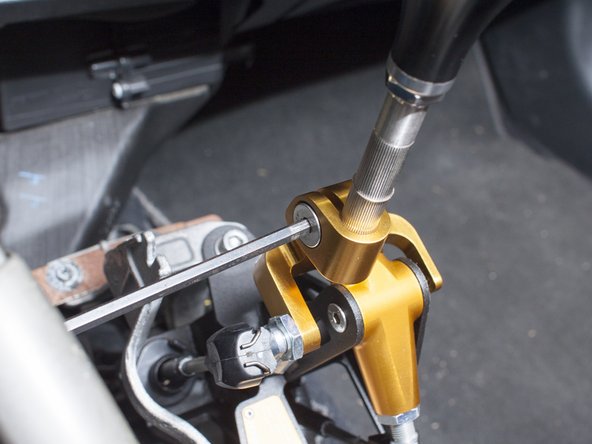
Slide the front-back cable end-link into the center hole of your Hybrid Racing shifter and place it onto the mounting bracket.
-
With a 6mm allen wrench install the (3) M8 bolts and washers provided with the shifter.
-
-
-
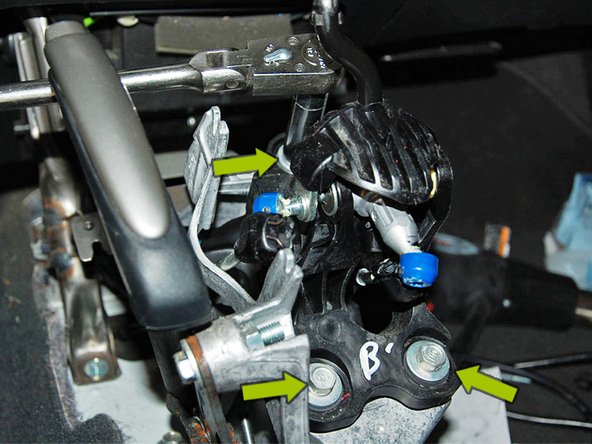
Rotate the cables into the cable keeper just as the were removed from the OEM shifter.
-
If you are using Hybrid Racing shifter cables, use the supplied C-clips to secure the cables into the shifter base.
-
-
-
Finally, press the (2) shifter cable end-links onto the shifter until both sides of the metal clip snap into place.
-
Once the cables are connected shift through the gears to make sure everything is working properly. If you like the way it feels you can reinstall the center console at this time. If you do not, review the next step for adjustment information.
-
THE SHIFTER THROW IS NOT SET WHEN THE ITEM IS NEW. IT MAY REQUIRE ADJUSTMENTS.
-
-
-
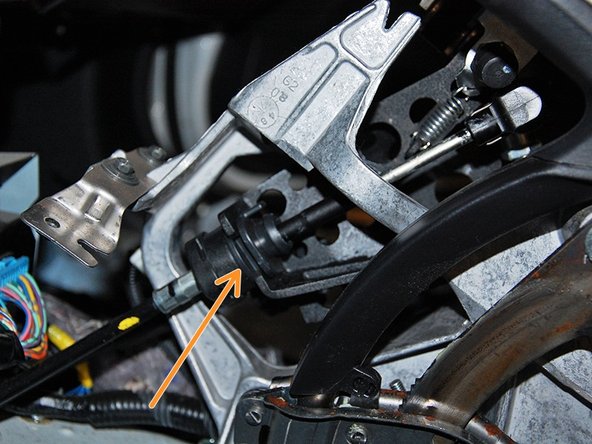
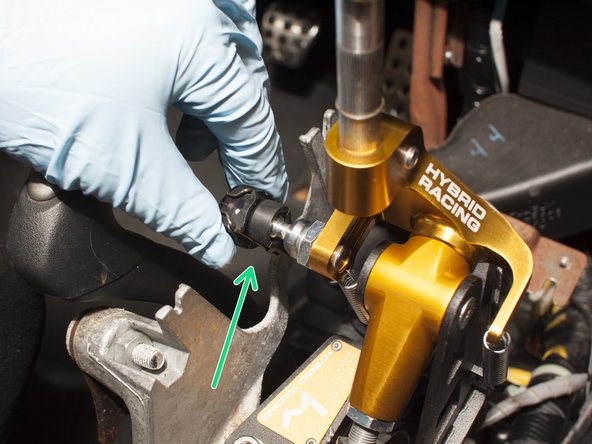
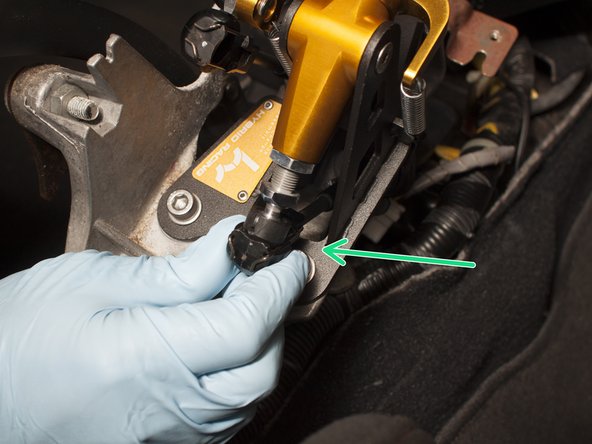
First, loosen the binding nut on the post with the 17mm wrench while holding the post with a 12mm wrench. Next, extend the length of the end-link by threading out the post as illustrated by the orange arrow in the first image.
-
Tighten the binding nut to the post once the desired length is reached.
-
To shorten the throw you will need an open-ended 17 and 12mm wrench.
-
-
-
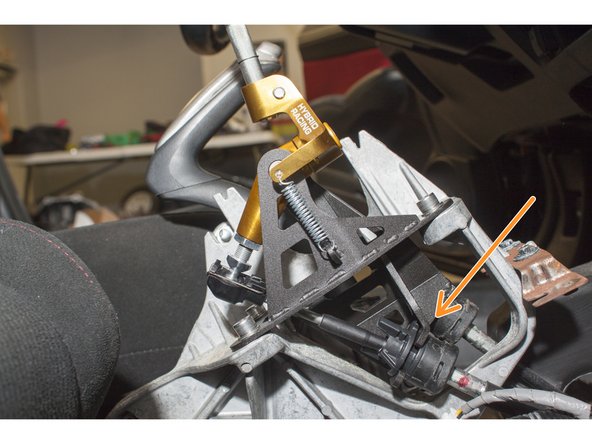
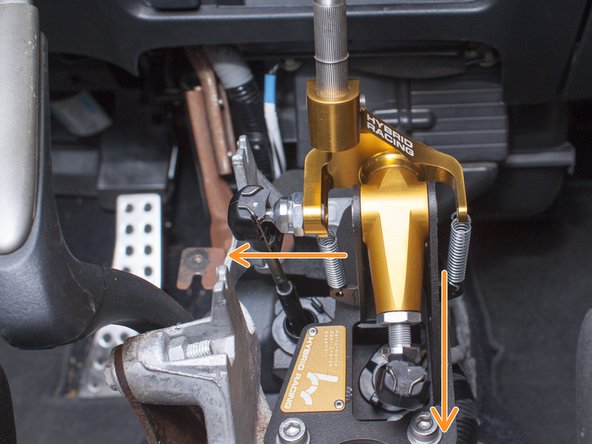
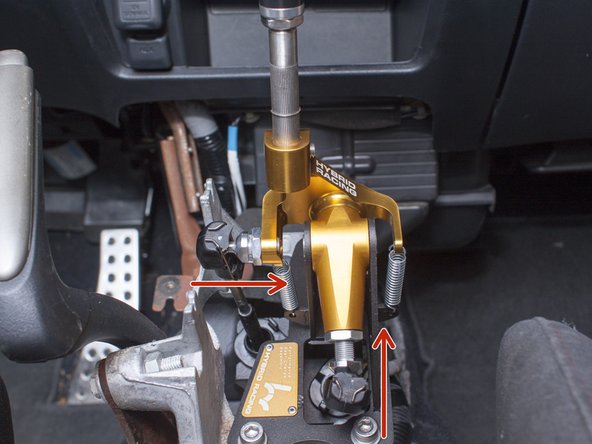
To lengthen the throw, do the opposite of the last step and thread the post inwards in the direction of the red arrows.
-
Tighten the binding nut to the post once the desired length is reached.
-
NOTE: In order to achieve the shortest/longest throw on the left/right movement, the binding nut will have to switch sides as shown in the images.
-
-
-
The throw can also be adjusted by changing the height of your shift knob.
-
To do so, loosen the clamping screw with a 5mm allen wrench as shown below. Adjust to the desired height, and re-tighten.
-
-
-
The easiest thing to do is use a dremel and grind the plastic out of the way, but It can be done with a razor blade as well.
-
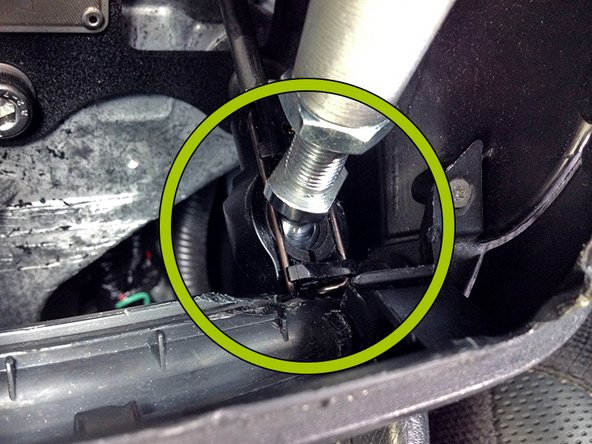
If you would like to adjust the shifter to the shortest setting, a small amount of trimming is needed.
-
Shown below in the green circle is where the trimming is needed to keep the end link from rubbing the console.
-
-
-
The final step is to decide if you want to install your shift boot cover, or leave it open to show off your beautiful shifter! You can also pick up an OEM automatic shift bezel that will clean it up nicely. (The automatic shift boot bezel does not have a shift boot. The automatic bezel provides a clean OEM solution to show off the shifter.)
-
Enjoy!
-


If you have any questions or comments, please email support at
support@hybrid-racing.com
Legal Disclaimer
Users assume all cost and risk associated with these or any other items purchased from Hybrid Racing LLC.
Parts sold or manufactured by Hybrid Racing LLC may not meet legal requirements for use on public roads. People thinking about purchasing product(s) from Hybrid Racing LLC should check with their local and state authorities for legality. It is the user’s responsibility to know and comply with all local and federal laws and regulations. Use or installation of Hybrid Racing LLC products may affect user insurance and/or vehicle warranty coverage. It is the user’s sole responsibility for consequences that may occur due to having the product installed in his/her vehicle.
Hybrid Racing LLC assumes no legal responsibilities and/or liabilities, whether to user’s vehicle, engine, person(s), and/or property(s), that result from the use of, or servicing of a vehicle of which a Hybrid Racing LLC product has been installed/attempted to be installed, or to any other vehicle(s) and/or person(s), regardless of whether or not this product has any involvement
directly or indirectly and/or liability, and/or whether or not proper installation has been carried forth.
All engines, engine parts and electrical components are for OFF ROAD USE ONLY/RACING
VEHICLES ONLY. They are not for or to be used on public roads in the USA.
Acquisition of a Hybrid Racing LLC product will act as an acknowledgement of the legal disclaimer stated herein.
Hybrid Racing LLC reserves the right to change this disclaimer at any time without any prior
consent or notification.
Should you need to contact us our details are as follows:
Hybrid Racing LLC, 12231 Industriplex Suite B, Baton Rouge, LA 70809
www.hybrid-racing.com
Cancel: I did not complete this guide.
One other person completed this guide.

3 Comments
Why an automatic shift bezel? I recently bought an FA5 with this shifter already installed and had to order the 6 speed manual shift bezel but it doesn’t click into place. Does the automatic one?
The automatic shift boot bezel does not have a shift boot. The automatic bezel provides a clean OEM solution to show off the shifter.
why wont my k tuned shifter cables go on my hybrid shifter box