-
-
If you have an OEM shift knob:
-
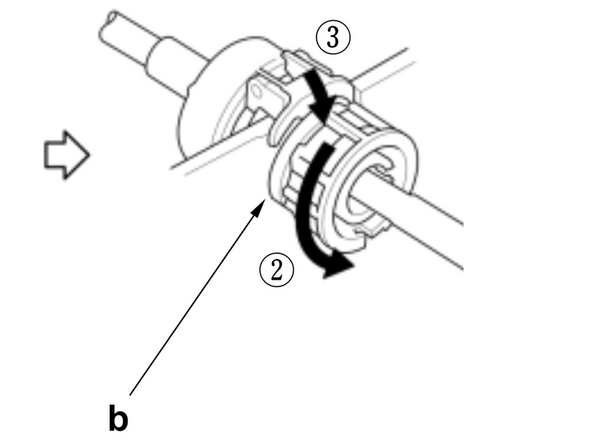
Push the factory shift boot collar downward. This will reveal the locking nut.
-
Loosen the shift knob lock nut.
-
Remove the shift knob.
-
-
-
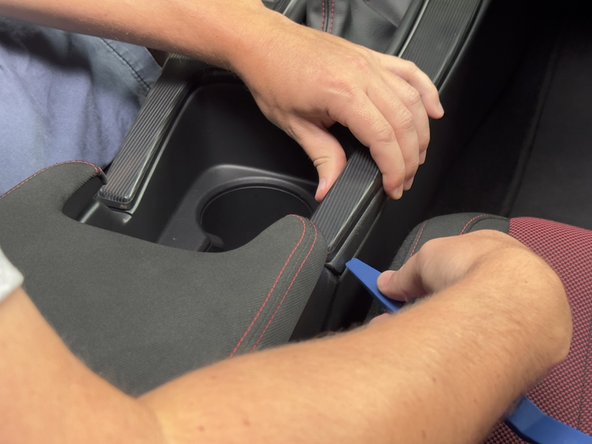
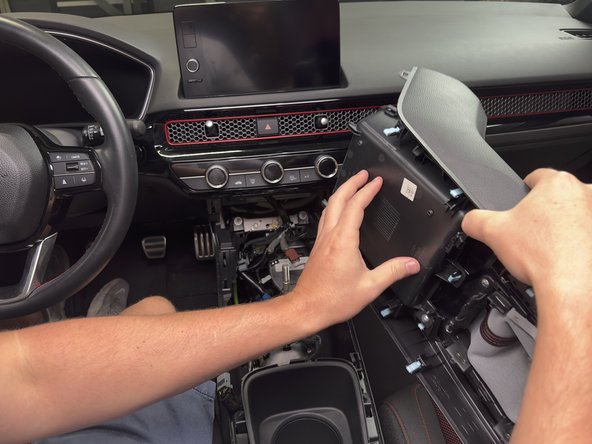
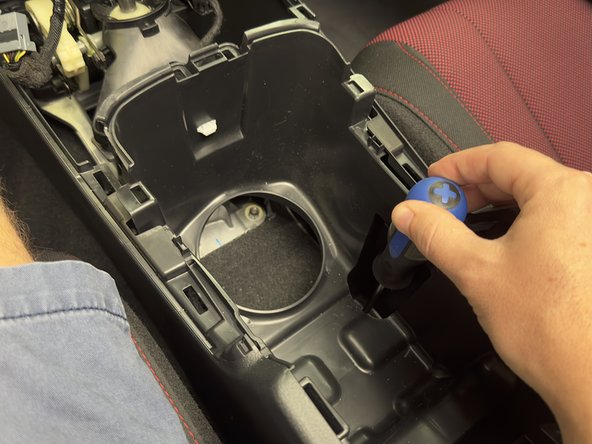
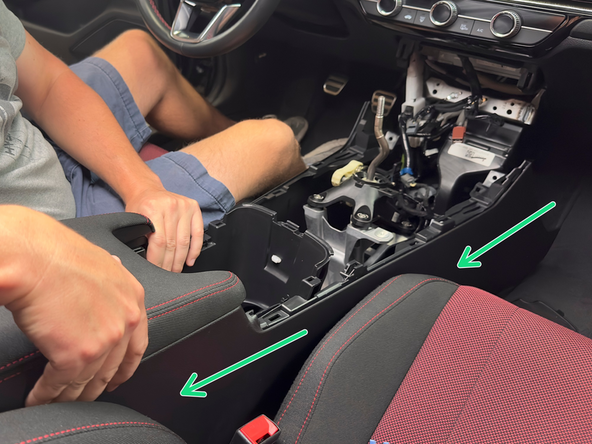
Use a plastic trim tool and unclip the upper portion of the console.
-
There are no bolts or screws. Pull up gently and the cover will unclip.
-
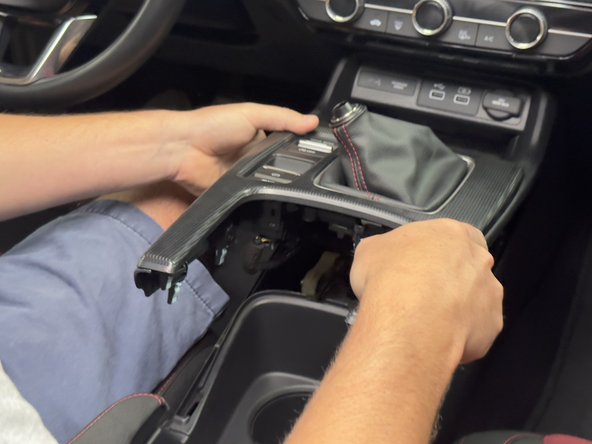
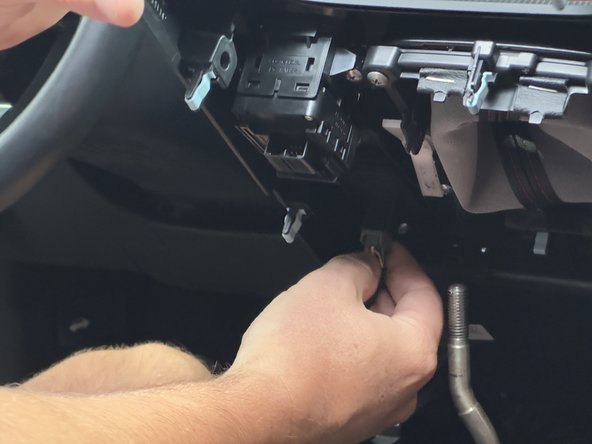
Lift the cover up to gain access to the wiring and connectors underneath.
-
-
-
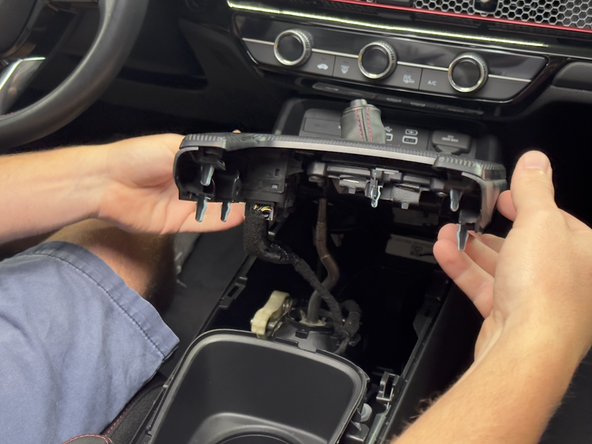
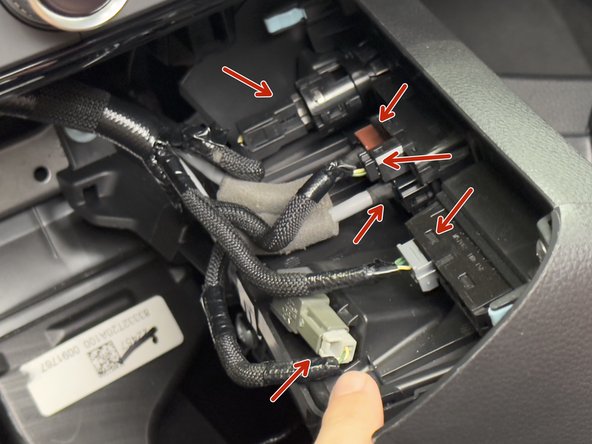
Disconnect the buttons and switches. Depending on the model, there may be 3-5 connectors. (The Si trim is shown in this guide)
-
-
-
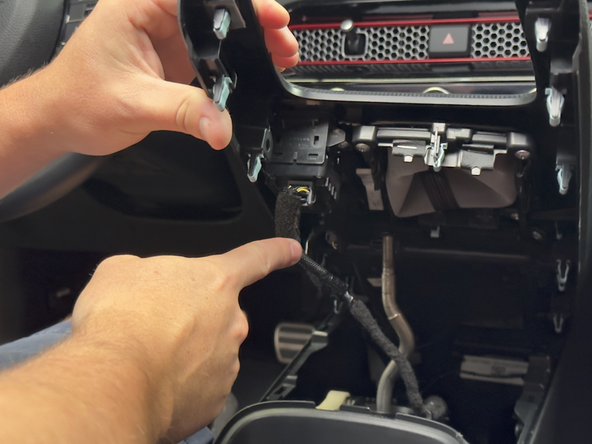
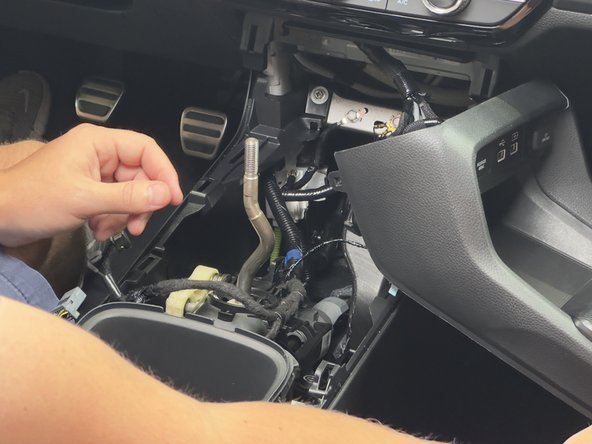
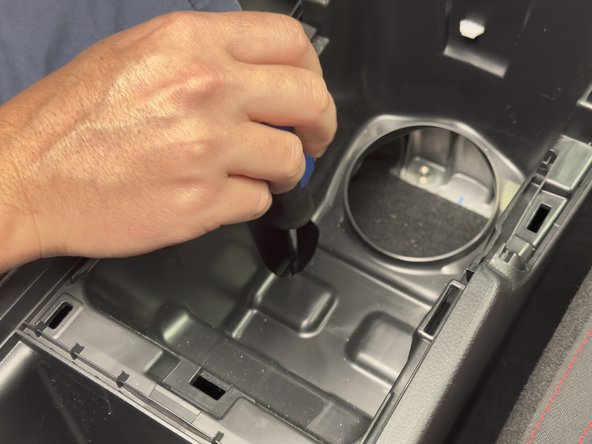
The back of the console cover holds USB ports, and other misc connections. Remove all so you can remove the console from the car.
-
Be sure to disconnect the wireless charger (if equipped)
-
-
-
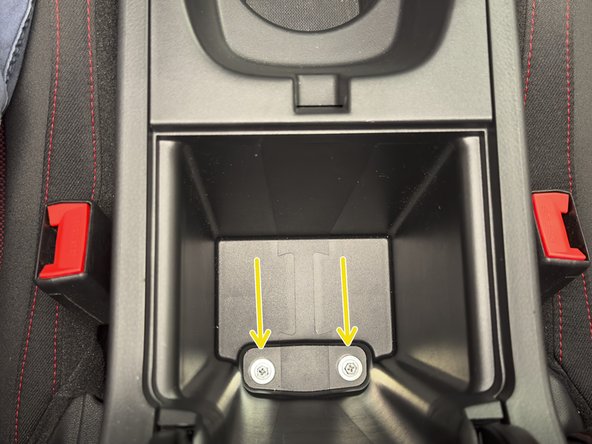
Inside of the arm rest, under the rubber cover, there are two 10mm bolts. Remove them.
-
Pull upward on the cup holder section to unclip it. Remove it and set aside.
-
-
-
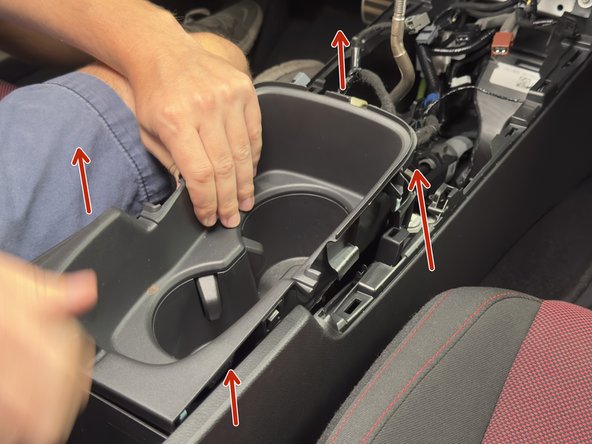
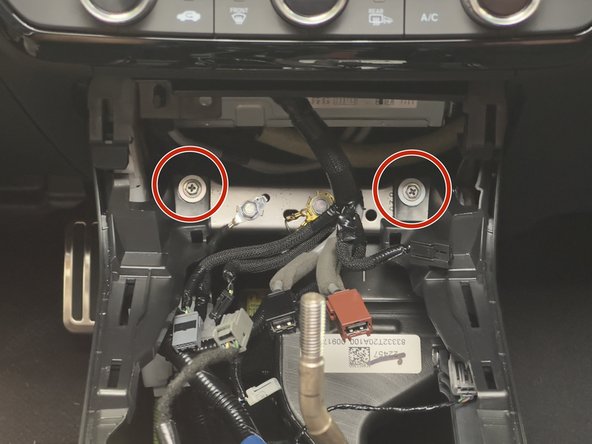
Remove the two 10mm mounting bolts on the front section of the console.
-
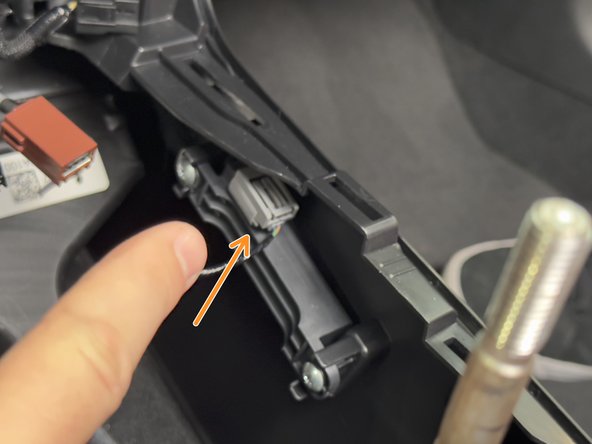
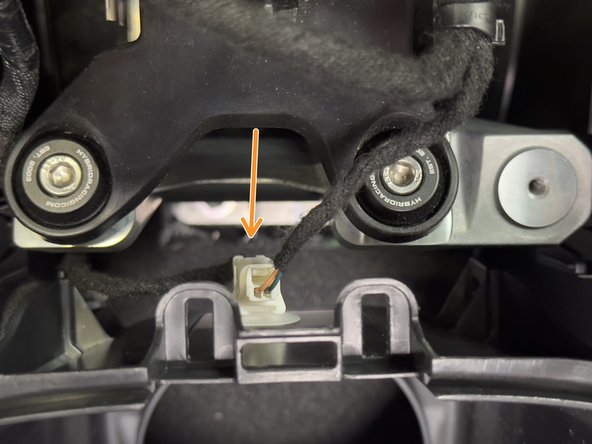
Disconnect the two connectors inside of the console.
-
One is an LED light, the other is the Key Fob Sensor.
-
-
-
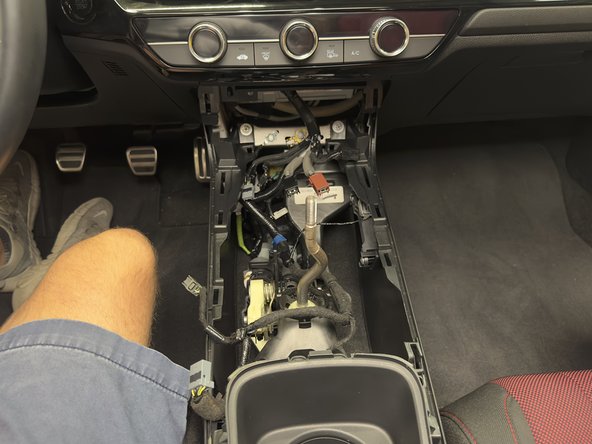
Slide the console backward and remove it from the car. It should be completely loose and free of all wires and bolts.
-
-
-
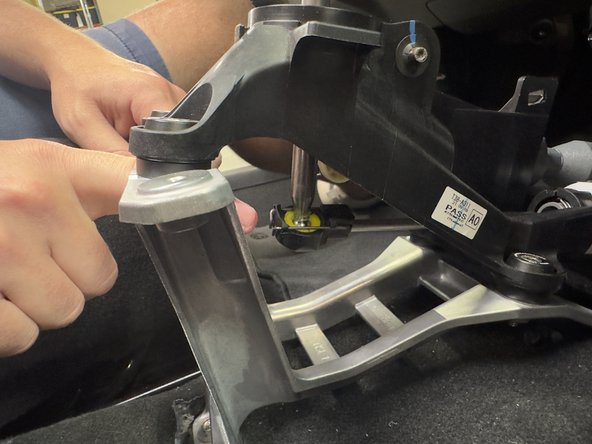
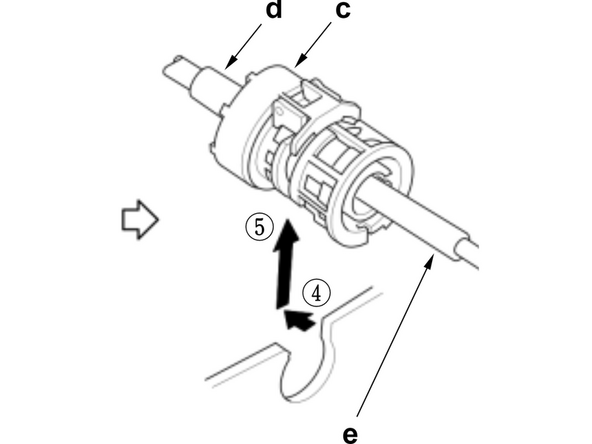
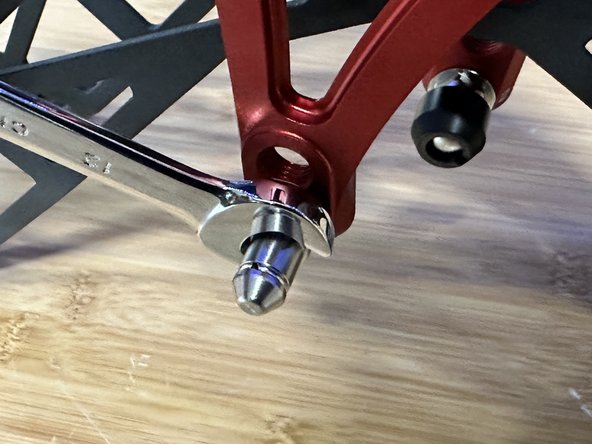
Under the shifter, you will need to remove the cable.
-
Spread the metal clip apart and pull it back on the shifter cable end. It should slide off. Then, slide the shifter cable end link away from the shifter, seperating it from the ball.
-
-
-
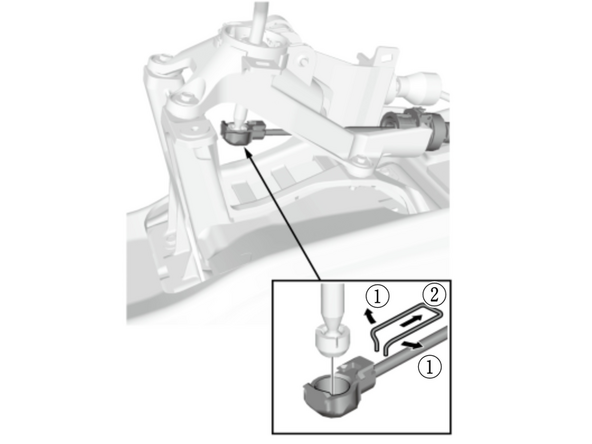
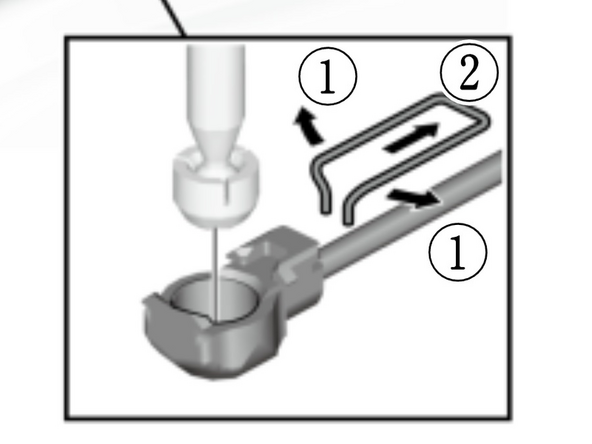
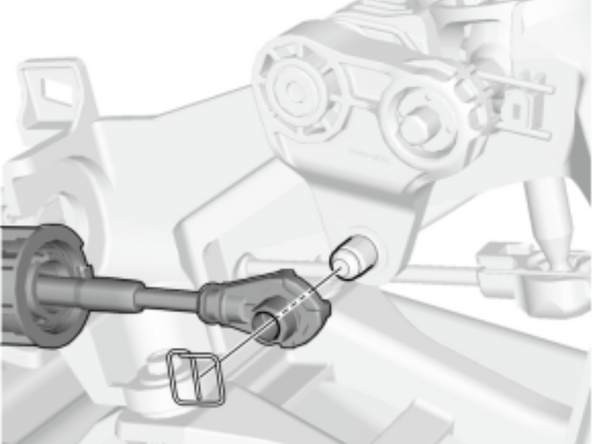
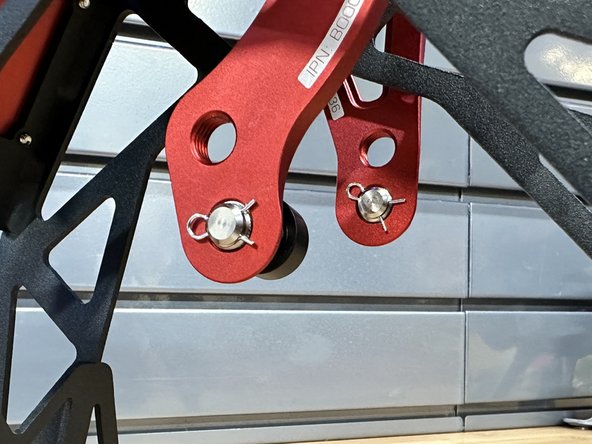
Remove the retaining clip from the shifter cable end link and slide the cable off.
-
-
-
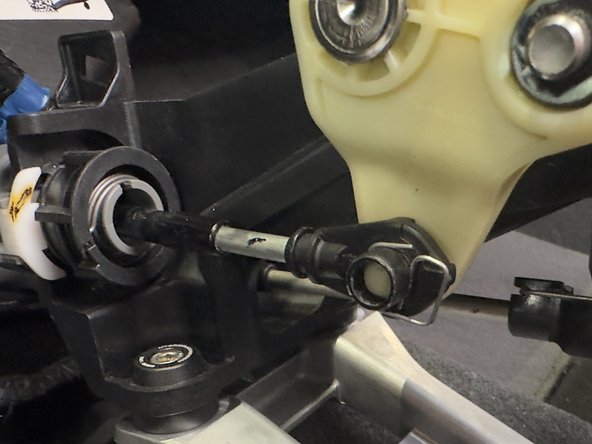
Now you will need to remove the shifter cables from the shifter. This is a three-part process.
-
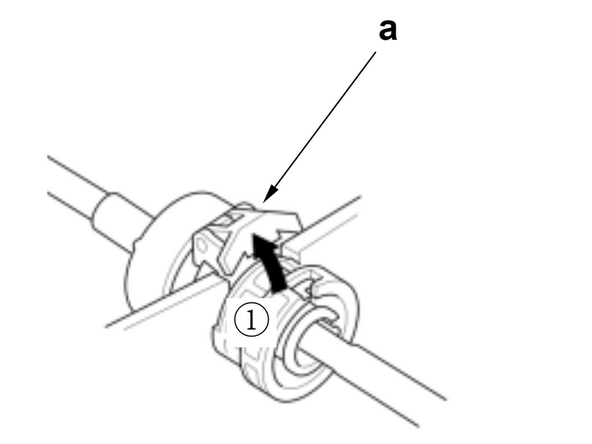
1: unlock the shifter cable by pushing the tab upwards.
-
2: After the cable is unlocked, spin the cable lock to relieve the tension on the cable.
-
3: Push the lock back down to hold it in place.
-
4: Push the cable back
-
5: Pull upward on the cable and it should slide out of the groove in the shifter.
-
Repeat this process on the other shifter cable.
-
-
-
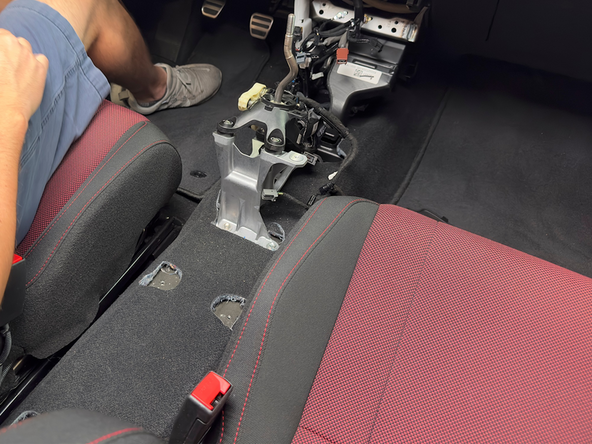
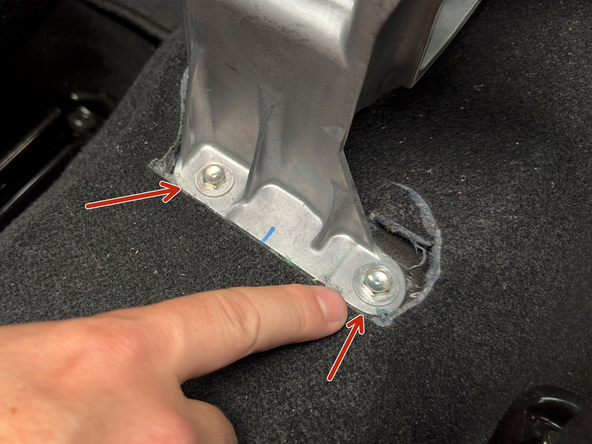
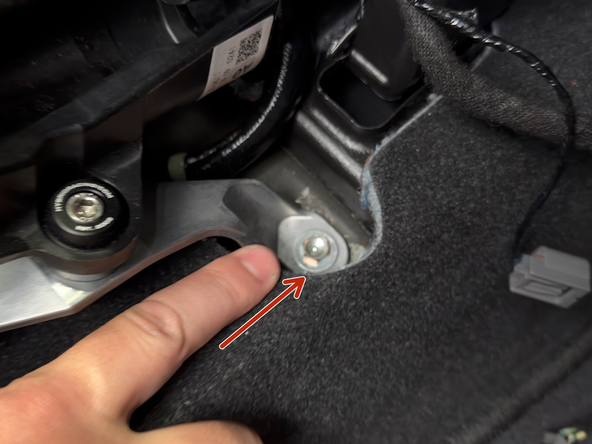
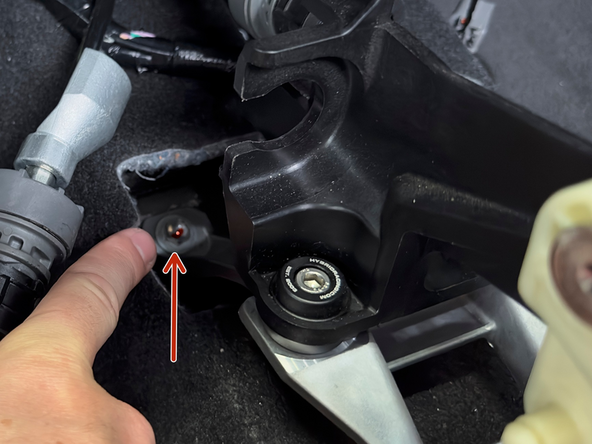
There are four 10mm bolts that hold the aluminum shifter base to the chassis.
-
Remove all four bolts.
-
-
-
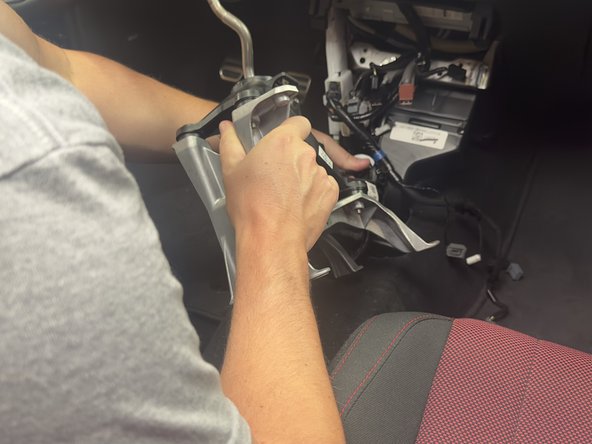
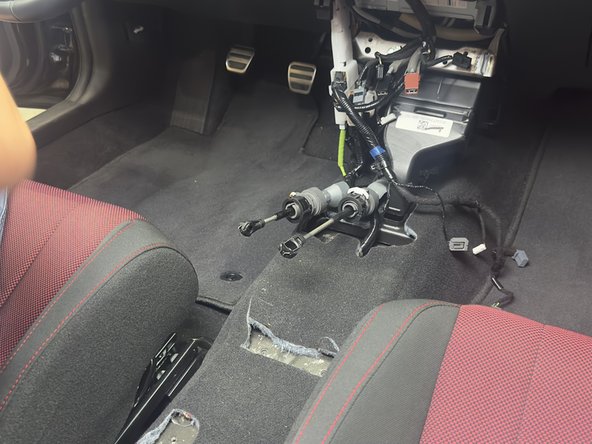
Remove the factory shifter assembly and shifter base from the chassis. You will not reuse this.
-
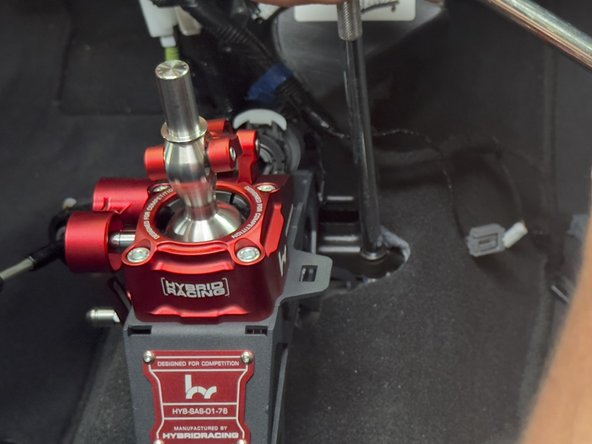
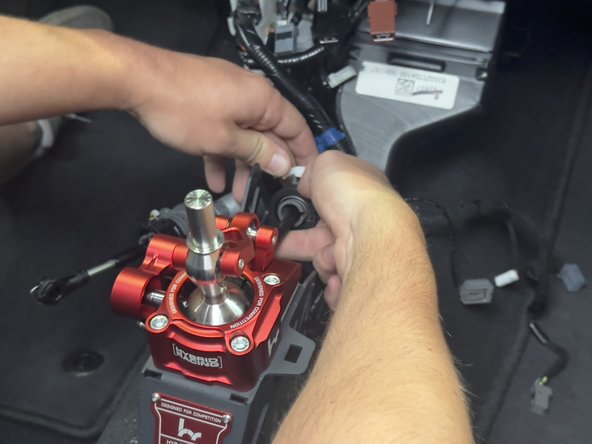
Install the Hybrid Racing shifter using the OEM hardware.
-
-
-
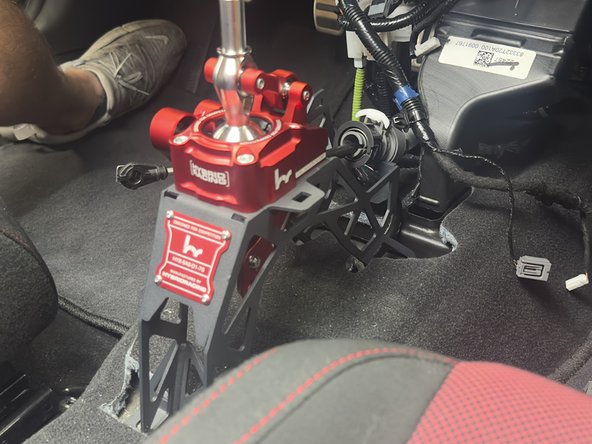
Use the supplied 10mm bolts and install the Hybrid Racing shifter directly to the chassis.
-
Our shifters do not need or require base bushings.
-
-
-
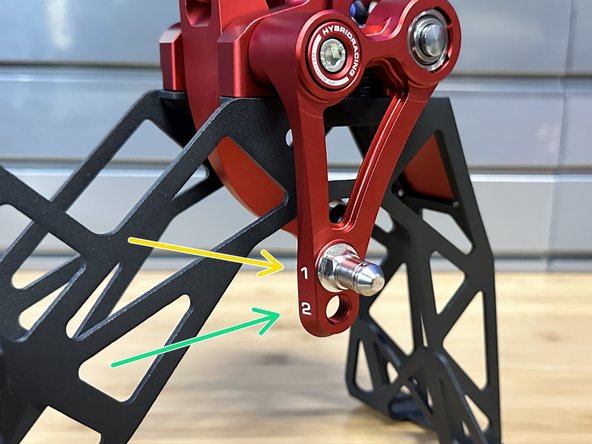
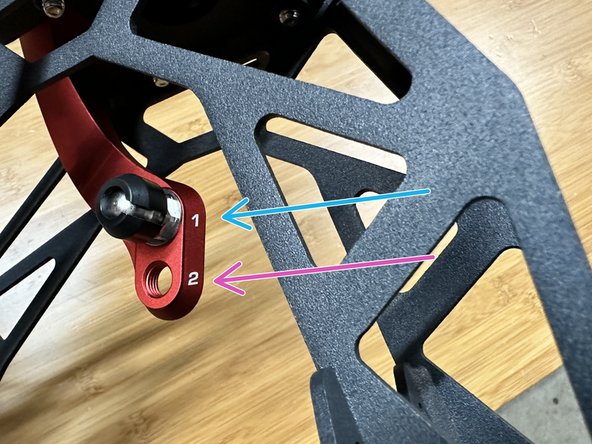
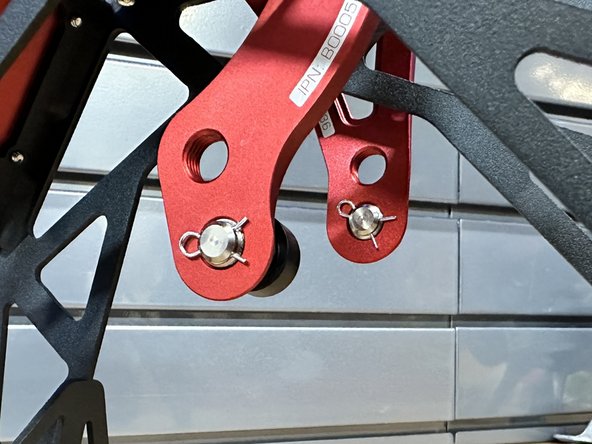
Our shifter has two settings for F/B and L/R movements. They are independently adjustable, meaning you can do whatever combination you prefer.
-
This is the L/R movement. Adjust this pin to shorten or lengthen the left/right motion of the shifter.
-
Position 1 is the default setting. This is the LONGEST setting possible. Approximately 15% shorter than OEM.
-
Position 2 is the SHORTEST setting possible. This is 30% shorter than OEM.
-
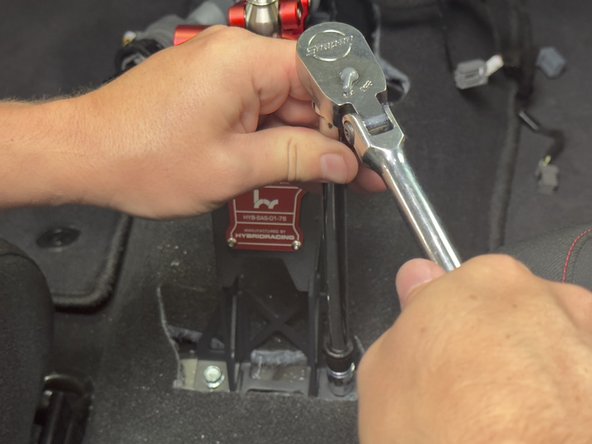
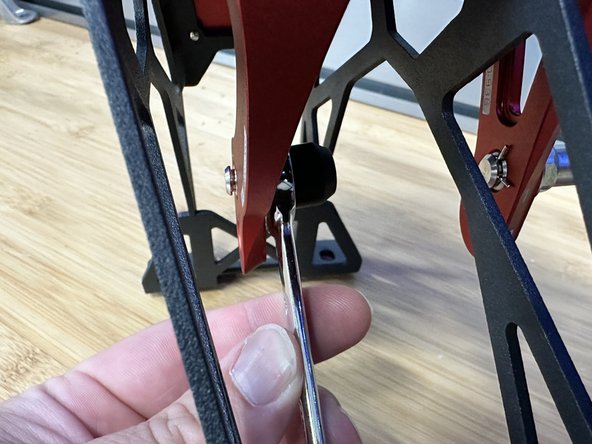
To adjust the throw, simply push the retaining clip off the backside and loosen the pin with a 12mm wrench. Unscrew the pin, place it in the desired location and retighten. Then install the clip.
-
-
-
Our shifter has two settings for F/B and L/R movements. They are independently adjustable, meaning you can do whatever combination you prefer.
-
This is the throw adjustment. Adjust this pin to shorten or lengthen the front/back motion of the shifter.
-
Position 1 is the default setting. This is the LONGEST setting possible. Approximately 25% shorter than OEM.
-
Position 2 is the SHORTEST setting possible. This is 50% shorter than OEM.
-
To adjust the throw, simply push the retaining clip off the backside and loosen the pin with a 12mm wrench. Unscrew the pin, place it in the desired location and retighten. Then install the clip.
-
-
-
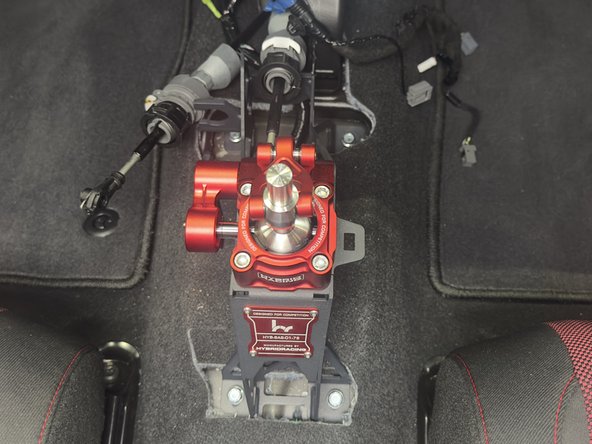
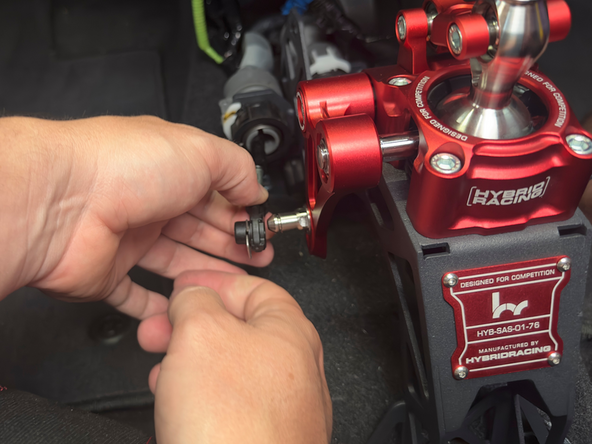
Once you have chosen your starting positions, you can reinstall the shifter cables. Follow step 12, then 11, then 10 again.
-
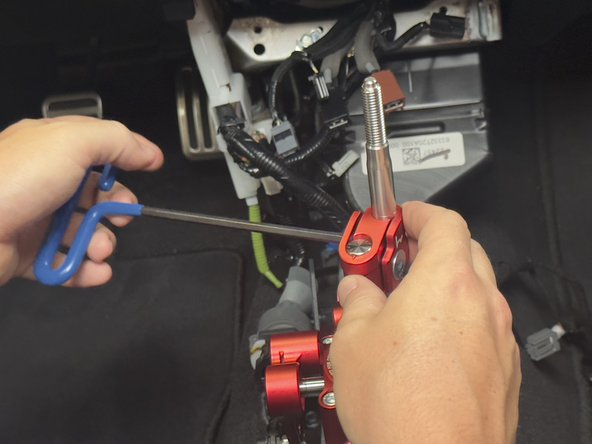
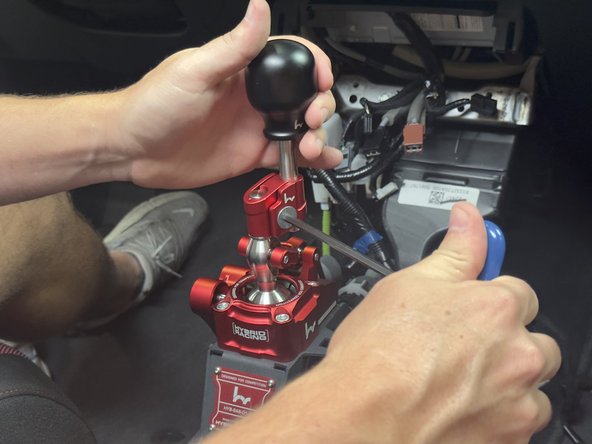
Install the supplied shifter offset and rod.
-
-
-
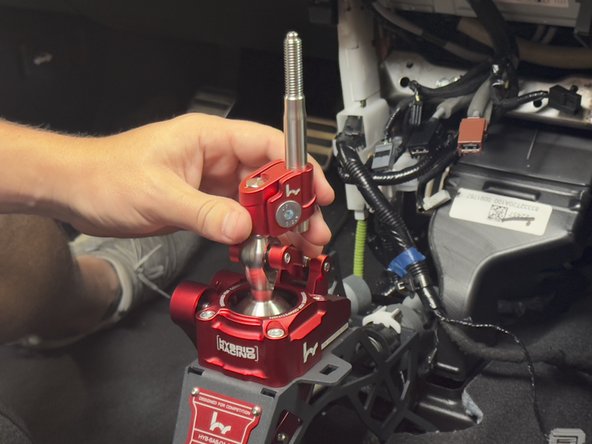
Depending on your car and shifting preference you can adjust the shift knob height and overall position.
-
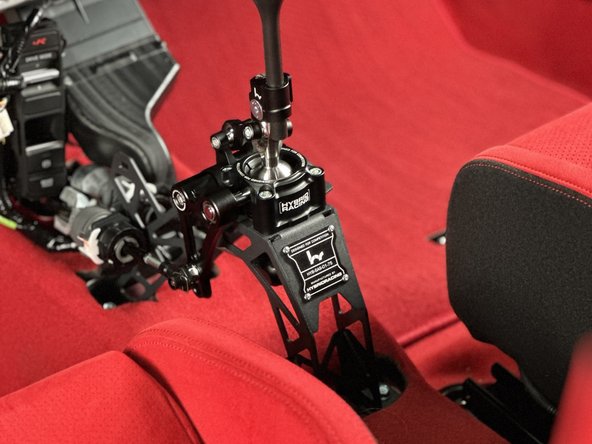
The offset must either be in the forward position (10 to 2 on a clock) or the rearward position (8 to 4 on a clock). The offset or rod will contact your console if you have it mounted to the side.
-
These shifters DO NOT work in RHD cars. The offset WILL contact the console. If you use this in a RHD you will NOT be able to use the console cover. Please understand you will have to modify your center console if you have a RHD car. We do not recommend that.
-
-
-
Row through the gears and make sure you are comfortable with the throw settings. The shifter will wear in as you drive so it will become smoother over time.
-
If you have any questions or issues please contact our support team ASAP. Support@hybrid-racing.com
-
Reinstall your console and go rip!
-