
Difficulty
Moderate
Steps
11
Time Required

In Progress
This guide is currently being written. Reload periodically to see the latest changes.
Introduction
*AC Kit may not be legal for highway use. Hybrid Racing is not responsible for any direct or indirect, actual or incidental expense attributed to the use of any performance parts sold by Hybrid Racing LLC. Purchasers agree to all of the terms of this agreement upon the purchase of parts. More information can be found at www.hybrid-racing.com.
-
-
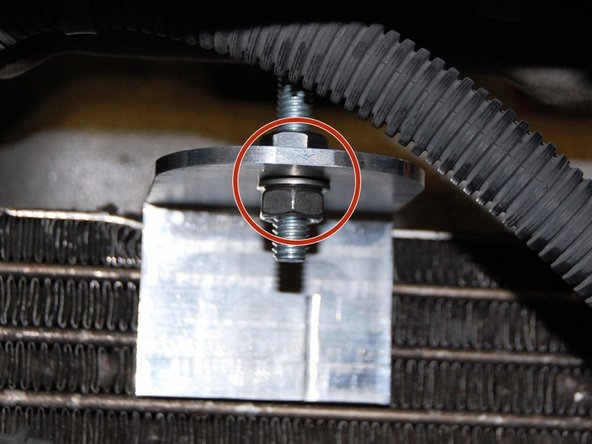
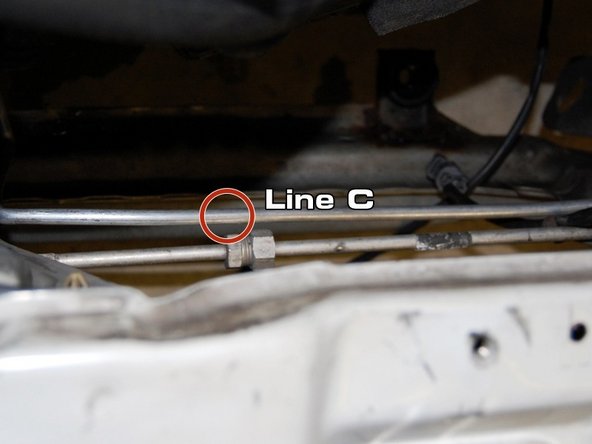
Begin by removing all of the lines highlighted in RED as outlined by the image below .
-
-
-
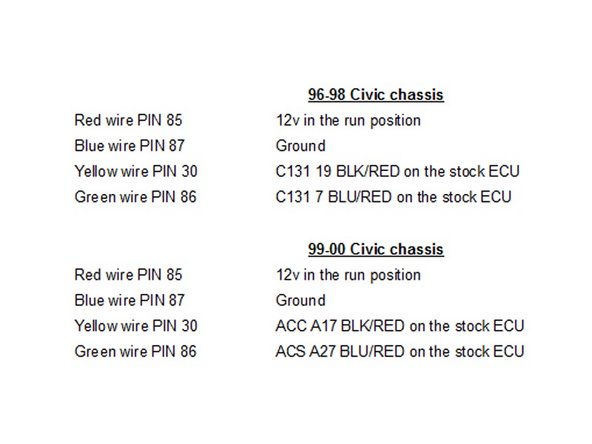
Take the relay that was included with your AC lines and connect the wires as follows:
-
96-98 Civic Chassis: Relay PIN 85 to 12v in the run position. Relay PIN 87 to Ground. Relay PIN 30 to connector C131 pin 19 a BLK/RED wire. Relay PIN 86 to connector C131 pin 7 a BLU/RED wire.
-
99-00 Civic chassis Red wire PIN 85 12v in the run position Blue wire PIN 87 Ground Yellow wire PIN 30 ACC A17 BLK/RED on the stock ECU Green wire PIN 86 ACS A27 BLU/RED on the stock ECU
-
-
-
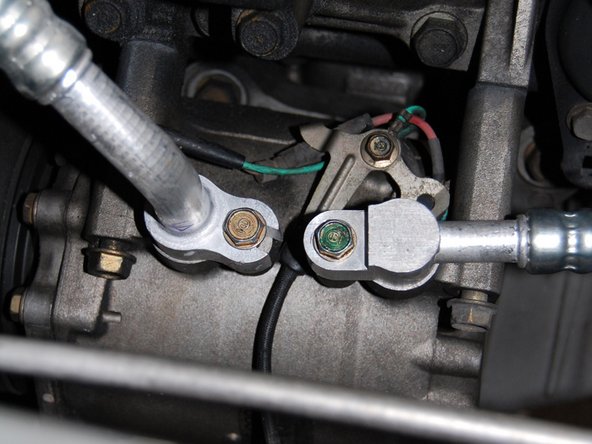
Next, make sure that you connect the wire from your old AC compressor to your new AC compressor. This should be a connector with one pin located on your driver side. You will need to extend it to your new compressor. It is also recommended that you take the connector from your stock AC compressor so that everything mates up nicely.
-


You have successfully completed your AC Line Install! If you have any questions or comments please email Info@hybrid-racing.com
You have successfully completed your AC Line Install! If you have any questions or comments please email Info@hybrid-racing.com

4 Comments
K-Swap AC Line Install Guide for 96-00 Honda Civic. The lines that are highlighted in Green stay in the car. Install line labeled A, starting at the firewall end. Install the line labeled B. You can now install the EK condenser.
Install the line labeled B. It connects to Line A. Make sure you have an O-ring on the end of line A. The other end will connect to the compressor.
K-Swap AC Line Install Guide for 96-00 Honda Civic. The lines that are highlighted in Green stay in the car. Install line labeled A, starting at the firewall end. Install the line labeled B. You can now install the EK condenser